Elevate your snacking game with a collection of dietitian-approved snack ideas that promote a balanced and healthy way of eating. Explore a variety of nutritious and satisfying snacks to inspire your journey toward a healthier lifestyle.

Introduction: The Dietitian’s Seal of Approval

  1. Meet the Dietitian: Get to know the dietitian whose expertise guides these snack recommendations, ensuring they align with a healthier way of life.

Snack Ideas for a Healthier Lifestyle

  1. Greek Yogurt with Berries: Dive into a bowl of Greek yogurt paired with fresh, antioxidant-rich berries for a protein-packed and satisfying snack.
  2. Hummus and Veggie Sticks: Explore the fiber-filled and low-calorie delight of hummus with a colorful array of fresh vegetable sticks.
  3. Mixed Nuts: Enjoy the satiating power of mixed nuts, rich in healthy fats and protein, providing a balanced and nutritious snack.
  4. Cottage Cheese with Pineapple: Embrace the protein-packed goodness of cottage cheese alongside the natural sweetness of pineapple for a satisfying option.
  5. Hard-Boiled Eggs: Savor the convenience of hard-boiled eggs, a protein-rich snack that keeps hunger at bay.

    Image by: https://www.prevention.com/food-nutrition/a20513051/4-types-of-people-who-should-be-on-a-high-protein-diet/
  6. Nut Butter and Apple Slices: Relish the harmonious pairing of nut butter’s healthy fats and the fiber-packed crispness of apple slices.
  7. Air-Popped Popcorn: Delight in guilt-free snacking with air-popped popcorn, customized with your preferred seasonings.
  8. Dark Chocolate and Almonds: Indulge in the rich flavors of dark chocolate and the satisfying crunch of almonds for a nutritious treat.
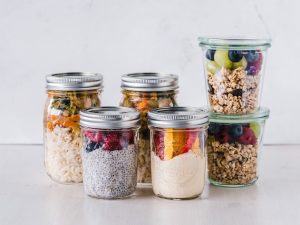
  9. Yogurt Parfait with Granola: Customize your yogurt parfait with a sprinkle of granola and your favorite toppings for a balanced and fulfilling snack.

The Health Benefits of Balanced Snacking

  1. Satiety and Weight Management: Discover how these dietitian-approved snacks can help control your appetite and support your weight management goals.
  2. Nutrient Intake: Learn how these snacks contribute to better overall nutrition by providing essential nutrients your body needs.

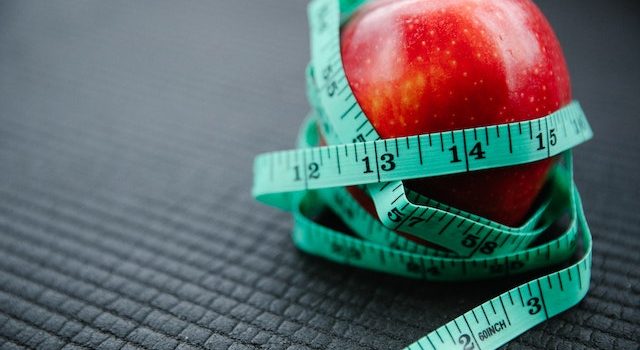
    Photo by Annushka Ahuja: https://www.pexels.com/photo/measuring-tape-wrapped-around-red-apple-7991936/

Conclusion: A Healthier Lifestyle through Mindful Snacking

With these dietitian-approved snack ideas, you can embrace a healthier way of life through mindful snacking. These options offer both nutrition and satisfaction, guiding you on the path to improved well-being and a more balanced lifestyle.

Whitehead Warfare: Tactics for a Blemish-Free Complexion

By Rosemary Gladstar, Skin Care Specialist

Are you tired of waging a never-ending battle against whiteheads and longing for a complexion that radiates health and beauty? Look no further. In this article, I, Rosemary Gladstar, a seasoned Skin Care Specialist, am here to guide you through the art of achieving a blemish-free lifestyle. With years of experience in the field, I understand the struggles you face and am excited to share my expert strategies with you.

Understanding the Whitehead Dilemma

Before we embark on our journey to a clearer complexion, let’s understand the enemy. Whiteheads, those pesky, small, raised bumps, can wreak havoc on your skin and confidence. They occur when oil, dead skin cells, and bacteria clog your pores. So, it’s crucial to get to the root of the problem.

skincare
Image By stockgiu

The Core Aspects of Whitehead Prevention

Let’s delve into the core aspects of our mission: preventing whiteheads and achieving a blemish-free complexion. Here are the key strategies:

1. Gentle Cleansing and Exfoliation

  • Cleanse: Using a gentle, sulfate-free cleanser to remove dirt and impurities is the first step.
  • Exfoliate: Regular, mild exfoliation can prevent dead skin cell build-up.

2. Hydration is Key

  • Moisturize: A hydrating, non-comedogenic moisturizer keeps your skin balanced and healthy.
  • Drink Water: Staying hydrated from within is equally important.

3. Targeted Treatments

  • Salicylic Acid: A proven ingredient for whitehead treatment and prevention.
  • Spot Treatments: Apply a spot treatment containing benzoyl peroxide or tea tree oil.

4. Healthy Diet

  • Limit Dairy and Sugar: These can exacerbate whitehead formation.
  • Incorporate Antioxidants: Fruits and veggies promote healthy skin.

5. Hands Off!

  • Avoid Picking: Touching whiteheads can lead to infection and scarring.

Rosemary’s Blemish-Free Lifestyle Plan

Here’s a step-by-step plan to implement these strategies effectively:

Step Details
Morning Routine Cleanse, moisturize, and apply sunscreen.
Evening Routine Double cleanse, exfoliate (2-3 times a week), moisturize, and apply treatment.
Weekly Deep cleanse, apply a face mask, and avoid makeup.
Monthly Treat yourself to a professional facial.

A Comparison of Whitehead Prevention Products

Before you embark on your blemish-free journey, let’s compare some essential products you can incorporate into your skincare routine:

Product Key Features Benefits
Salicylic Acid Serum Exfoliates and unclogs pores, reducing whiteheads. Clears blemishes and prevents future breakouts.
Non-comedogenic Moisturizer Hydrates without clogging pores. Keeps your skin balanced and moisturized.
Spot Treatment Contains benzoyl peroxide or tea tree oil to target whiteheads. Speeds up healing and reduces inflammation.

By selecting products that suit your skin type and concerns, you can tailor your routine for the best results.

In Conclusion

Your journey to a blemish-free complexion begins with understanding the enemy, adopting essential prevention strategies, and following a personalized skincare routine. With dedication and patience, you can conquer whiteheads and reveal your skin’s natural radiance. Remember, consistency is key on this path to a healthier, happier you.

As a lifestyle enthusiast, I encourage you to embrace these tactics and make them a part of your daily life. Your complexion will thank you, and you’ll step into a world of renewed self-confidence.

Next Steps to Retirement: What to Do in the Coming Years

Retirement is drawing near, and it’s time to focus on key actions to ensure a seamless transition into this new phase of life. In this comprehensive guide, we’ll explore the crucial steps to take in the years leading up to retirement. These steps encompass financial planning, healthcare considerations, legal preparations, and lifestyle adjustments.

Financial Planning

Assess Your Retirement Savings: Review your retirement savings to ensure they align with your financial goals. Consider making catch-up contributions to retirement accounts if eligible.

Evaluate Your Investment Portfolio: Examine your investment portfolio and adjust it to align with your risk tolerance and retirement objectives.

Create a Detailed Budget: Develop a comprehensive retirement budget that covers projected income, expenses, and debts. Account for factors like healthcare costs and potential lifestyle changes.

Healthcare Considerations

Understand Medicare: Familiarize yourself with Medicare, including eligibility and the various plans available. Make informed decisions about your healthcare coverage during retirement.

Prioritize Wellness: Invest in your health by maintaining a healthy lifestyle. Regular exercise, a balanced diet, and preventative healthcare measures can reduce future medical expenses and enhance your quality of life in retirement.

Legal Preparations

Review and Update Legal Documents: Ensure that your legal documents, such as your will, power of attorney, and healthcare directives, are current and accurately reflect your wishes.

Estate Planning: Collaborate with professionals to create a comprehensive estate plan. This plan should outline how your assets will be distributed, safeguarded, and account for potential estate taxes and inheritance considerations.

Legal Preparations
Image by: https://barandogan.av.tr/

Lifestyle Adjustments

Housing Decisions: Evaluate your housing situation and decide on your future living arrangements. Consider whether to remain in your current home, downsize, relocate, or explore other housing options. Plan for any necessary home modifications.

Debt Management: Work toward clearing any outstanding debts, including mortgages and credit card balances. Reducing financial obligations before retirement can reduce stress and free up more of your retirement income.

Income Sources

Social Security Strategy: Understand the intricacies of Social Security benefits and decide on the optimal timing for claiming them. Delaying Social Security can result in higher monthly payments.

Pension and Retirement Plans: If you have an employer-sponsored pension or retirement plan, ensure that you are well-informed about the terms and how to access your benefits. Decide on the timing for drawing from these accounts.

Post-Retirement Lifestyle

Explore New Interests: Plan for how you will spend your time in retirement. Explore new hobbies, interests, and activities that bring you joy and fulfillment.

Maintain Social Connections: Cultivate and strengthen your social connections with family and friends. Consider joining clubs, volunteer organizations, or social groups to maintain a sense of community and support during retirement.

Ongoing Monitoring and Adjustments

Regular Financial Check-Ups: Continuously monitor your financial situation and make adjustments as necessary. Stay updated on changes in tax laws, healthcare regulations, and investment opportunities.

Reevaluate Retirement Goals: As retirement draws near, reevaluate your goals and expectations. Consider any lifestyle changes or aspirations you’d like to pursue during your retirement years.

Seek Professional Guidance

Consult with Experts: Throughout the retirement planning process, seek guidance from financial advisors, estate planning attorneys, and healthcare professionals. These experts can provide valuable insights and ensure that your retirement plans are well-prepared.

Conclusion

As retirement approaches, taking these actions in the coming years will ensure a smooth and fulfilling transition into this exciting phase of life. By focusing on financial planning, healthcare considerations, legal preparations, and lifestyle adjustments, you can set the stage for a secure and enjoyable retirement. Remember that early and thorough preparation is the key to enjoying the retirement you’ve envisioned.

Introduction:

Greetings, skincare aficionados! I am David Winston, a seasoned Registered Herbalist with a passion for holistic living and skincare. Today, I’m excited to share a Japanese beauty secret – the Japanese Rice Mask. This DIY mask can do wonders for your skin, leaving it refreshed, revitalized, and with a radiant glow. Join me on this journey as we unravel the mysteries of this potent face mask and unlock the door to a luminous complexion.

Discovering the Beauty Secrets of Japanese Skincare:

Japan is renowned for its centuries-old skincare rituals, often attributed to their clear, youthful complexion. Let’s explore the principles behind Japanese skincare and understand why it’s highly sought after.

Japanese skincare embraces simplicity and a deep-rooted connection to nature. It emphasizes a gentle approach, focusing on prevention rather than correction. Central to this approach is maintaining a well-hydrated, balanced skin barrier. Traditional practices like double cleansing, ample hydration, and protection from sun damage are key components of the Japanese skincare routine. The essence of Japanese skincare lies in respecting the skin’s natural balance and harnessing the benefits of natural ingredients.

Photo by ROMAN ODINTSOV: https://www.pexels.com/photo/woman-looking-in-mirror-applying-face-mask-5912194/

Unveiling the Benefits of Japanese Rice for Your Skin:

Rice, a staple in Japanese cuisine, isn’t just a dietary delight. It’s a powerhouse for your skin too. Let’s unveil the benefits of Japanese rice and how it can promote a radiant complexion.

1. Brightens the Skin:

  • Rice flour helps to brighten the skin and reduce dark spots, giving you a more even complexion.

2. Smoothens and Exfoliates:

  • The gentle texture of rice flour acts as a natural exfoliator, sloughing off dead skin cells and leaving your skin smoother.

3. Anti-Aging Properties:

  • Rice is rich in antioxidants, which help combat free radicals and slow down the aging process, keeping your skin youthful.

4. Hydration and Moisturization:

  • Rice flour has moisturizing properties that keep your skin hydrated and soft.

Essential Ingredients and Their Skin-Enhancing Properties:

Before we dive into the recipe, let’s acquaint ourselves with the core ingredients and how they contribute to the efficacy of the Japanese Rice Mask. Each element has unique properties that synergize to deliver beautiful, glowing skin.

1. Rice Flour:

  • Benefits: Brightens, smoothens, and evens out the skin tone.
  • Usage: Acts as a gentle exfoliator, revealing fresh skin.

2. Honey:

  • Benefits: Moisturizes, reduces inflammation, and promotes healing.
  • Usage: Provides hydration and soothes the skin.

Crafting Your Japanese Rice Mask: A Recipe for Radiance:

Embark on a journey to create your Japanese Rice Mask, a simple yet effective concoction that harnesses the power of natural ingredients. Let’s explore the steps and create a skin-revitalizing mask.

Ingredients:

  • 2 tablespoons Rice Flour
  • 1 tablespoon Honey

Steps:

  1. Mixing the Ingredients:
    • In a bowl, mix 2 tablespoons of rice flour with 1 tablespoon of honey to create a paste.
    • Stir well until a smooth consistency is achieved.
  2. Applying the Mask:
    • Cleanse your face and pat dry.
    • Apply the mask evenly, avoiding the eye area.
  3. Leave it On:
    • Let the mask sit for about 20 minutes until it dries.
  4. Rinse and Cleanse:
    • Gently rinse off the mask using warm water.
    • Pat your face dry and follow up with your regular moisturizer.

Application and Incorporation into Your Skincare Routine:

Knowing how to apply and incorporate the Japanese Rice Mask into your skincare routine is crucial for achieving the best results. We’ll discuss the proper application techniques and offer tips on how to maximize the benefits of this revitalizing mask.

Usage Frequency: Apply this mask once a week to maintain a radiant complexion.

Additional Tip: Use a toner after rinsing off the mask to close your pores and complete your skincare routine.

Comparative Table: DIY Masks for Glowing Skin:

Mask Name Key Ingredients Application Method Benefits
Japanese Rice Mask Rice flour, Honey Weekly application Brightens, smoothens, and rejuvenates the complexion
Honey and Oatmeal Mask Honey, Oatmeal Weekly application Moisturizes, exfoliates, and promotes a healthy glow

Visual Table: Key Ingredients and Their Benefits:

Key Ingredients Benefits
Rice Flour Brightens, smoothens, and evens out the skin tone
Honey Moisturizes, reduces inflammation, and promotes healing
Oatmeal Exfoliates, soothes, and provides a natural glow to the skin

In the upcoming sections, we will delve into the details of each aspect, providing comprehensive information, step-by-step guides, and tips for crafting and using the Japanese Rice Mask. Prepare to elevate your skincare routine and unveil a radiant complexion that speaks of the beauty in simplicity.

Turmeric Tactics: A Guide to Avoid Face-Care Missteps

By David Winston, Registered Herbalist (AHG)

Turmeric, a golden-hued spice and ancient healing herb, has gained immense popularity in the world of skincare. However, while this natural marvel has a plethora of benefits, it’s crucial to navigate the realm of turmeric with care and knowledge. Join me, David Winston, a Registered Herbalist with the American Herbalists Guild (AHG), as we explore the art of using turmeric for a radiant complexion and how to sidestep common face-care missteps.

The Turmeric Treasure Trove: Nature’s Golden Gift

Turmeric, scientifically known as Curcuma longa, is hailed for its anti-inflammatory, antioxidant, and antimicrobial properties. This multifaceted herb can work wonders for the skin when used appropriately.

Benefits
Image by: https://pressmaverick.com/

Turmeric’s Skin Benefits

Benefit Description
Anti-Inflammatory Reduces redness and skin inflammation
Brightening Evens out skin tone and imparts a natural glow
Antimicrobial Fights acne-causing bacteria and promotes clarity

Dos and Don’ts of Turmeric in Skincare

To reap the benefits of turmeric without facing common skincare pitfalls, follow these guidelines:

Dos

  1. Patch Test First: Always perform a patch test to ensure you don’t have an allergic reaction or sensitivity to turmeric.
  2. Use Moderately: Turmeric is potent; a little goes a long way. Start with a small amount and adjust as needed.
  3. Pair with Other Ingredients: Combine turmeric with gentle ingredients like honey, yogurt, or aloe vera to enhance its effects and mitigate any potential irritation.

Don’ts

  1. Excessive Application: Avoid using too much turmeric, as it may stain the skin and cause a yellow tint.
  2. Leave on for Prolonged Periods: Don’t leave turmeric masks on for extended periods to prevent potential skin staining.
  3. Not Suitable for All Skin Types: Turmeric may be too strong for sensitive or dry skin. Exercise caution and consult a skincare professional if in doubt.

Turmeric-Infused Skincare Routine

Incorporate turmeric into your skincare routine with these simple yet effective steps:

  1. Turmeric Face Mask: Mix turmeric with honey and yogurt for a rejuvenating face mask to brighten and soothe the skin.
  2. Turmeric Scrub: Create a gentle exfoliating scrub using turmeric, rice flour, and milk to reveal a radiant complexion.
  3. Turmeric Infused Oil: Blend turmeric with a carrier oil like coconut oil to make a nourishing oil for massages or moisturizing.

Navigate Turmeric Wisely for a Radiant Complexion

Turmeric can be a game-changer for your skincare routine when used correctly. By understanding the do’s and don’ts and incorporating it into your face-care regimen, you can harness the power of this golden spice to achieve a glowing and even complexion.

For personalized skincare advice and turmeric-based recipes, consult with a registered herbalist or skincare expert. Embrace turmeric’s benefits, avoid common missteps, and let your radiant skin reflect the beauty of this natural wonder.

Introduction:

As a seasoned chef and culinary enthusiast, I invite you to embark on a flavorful journey to revitalize your spice cabinet this spring.  who already have a basic understanding of spices and are eager to elevate your culinary game. We’ll delve into the art of spring cleaning for your spice cabinet, unlocking the secrets to a well-organized, fragrant, and inspiring kitchen’s guide you on this flavorful journey, we’ve enlisted the expertise of a seasoned culinary expert, Nina Simonds. With a rich background in culinary arts and an extensive repertoire of cookbooks, Nina brings a wealth of knowledge to the table. Her culinary journey has taken her across diverse cuisines and flavors, and now she’s here to share her insights on the art of spring cleaning for your spice cabinet. But let’s not forget the human element. After all, it’s you, the enthusiast, who will breathe life into your spice cabinet. You’re someone who already possesses a basic understanding of spices and cooking but seeks more advanced techniques, a deeper understanding of flavors, and a more organized kitchen.

SPICE
Photo by ire rosa: https://www.pexels.com/photo/jars-with-pasta-and-oats-7476685/

 Spice Cabinet

Your spice cabinet is more than just a storage space; it’s the heart and soul of your kitchen. It’s where you craft your signature dishes, experiment with new flavors, and infuse your culinary creations with personality. To kickstart this journey, let’s understand the core aspects of a spice cabinet transformation. Before you can transform your spice cabinet, it’s essential to take stock of what you have. Start by creating a spice inventory. Here’s a simple table to help you get organized: Now, go through your spices and fill in the table. Pay close attention to the expiration dates. Any spices that are past their prime should be discarded. This initial step is crucial as it sets the stage for a well-organized spice cabinet.

SPICE
Photo by Markus Spiske: https://www.pexels.com/photo/food-in-jars-3905826/

Organize Alphabetically

Sorting Your Spices: Begin by arranging your spices in alphabetical order. This can be done on a dedicated shelf or in a designated section of your spice cabinet.

Label and Store: Ensure that each spice container is clearly labeled with its name. Using uniform containers for your spices not only keeps your cabinet looking neat but also makes it easier to find what you need.

Access and Visibility: Alphabetically arranged spices make it effortless to locate the right spice quickly. When you’re in the midst of cooking, this method simplifies the process, saving you valuable time.

Organize by Cuisine

Categorize by Cuisine: Group your spices according to the cuisine they are commonly associated with. For example, create sections for Indian, Italian, Mexican, and more. Label and Store: Similar to the alphabetical method, make sure each spice container is clearly labeled, and consider using uniform containers for a cohesive look. Enhanced Cooking Experience: This organization method enhances your cooking experience. When preparing a dish from a specific cuisine, you’ll know exactly where to find the required spices, streamlining your cooking process.

Color-Coded Organization

For those who appreciate aesthetics and want a visually pleasing spice cabinet, color-coded organization can be a great choice. This approach not only looks stylish but also provides a quick visual cue for the type of spice. Here’s how to do it: Assign Colors: Associate specific colors with different spice categories. For example, use red for hot spices, green for herbs, and yellow for mild spices. Label and Store: Along with the color-coding, make sure to label your spice containers. Transparent containers work well to showcase the colors effectively. Aesthetically Pleasing: Color-coded organization not only streamlines your spice cabinet but also adds a beautiful and harmonious aspect to your kitchen decor.

SPICE
Photo by Ruslan Kamenetsky: https://www.pexels.com/photo/close-up-photo-of-glass-jars-with-preserved-food-covered-with-grain-sack-fabric-13447632/

Frequency of Use

Organizing spices based on their frequency of use ensures that the spices you reach for most often are readily accessible. Here’s how to implement this method: Categorize Spices: Divide your spices into three categories – daily use, occasional use, and rarely used. Storage Placement: Store the spices you use daily at eye level or in the most accessible area. Occasional use spices can be placed slightly higher or lower, and rarely used spices can be stored in less accessible locations, like higher shelves or the back of the cabinet. Efficient Cooking: By placing frequently used spices within easy reach, you’ll streamline your cooking process. No more rummaging through your cabinet for the basics; they’re right at your fingertips.

Combination Approach

The combination approach allows you to harness the strengths of different organization techniques, resulting in a highly personalized and efficient spice cabinet organization system. Let’s explore some practical combinations:

1. Alphabetical within Cuisine

This combination approach is perfect for those who enjoy diverse cuisines and want a quick, logical way to find spices while staying true to specific flavor profiles.

  • Categorize by Cuisine: Group your spices into categories by the cuisine they are commonly associated with. For instance, you could have sections for Indian, Italian, Mexican, and so on.
  • Alphabetical Order: Within each cuisine category, arrange the spices alphabetically. Make sure each container is labeled with the spice’s name and cuisine category.
  • Uniform Containers: Using uniform containers maintains a neat and consistent look, even when spices are divided by cuisine.
SPICE
Photo by Ella Olsson: https://www.pexels.com/photo/six-fruit-cereals-in-clear-glass-mason-jars-on-white-surface-1640768/

 Color-Coded Frequency

Combining color-coding with the frequency of use creates an attractive spice cabinet that’s also highly functional. It’s great for those who appreciate aesthetics and want quick access to their most-used spices.

  • Assign Colors: Associate specific colors with different spice categories. For example, you could use red for hot spices, green for herbs, and yellow for mild spices.
  • Frequency of Use: Categorize your spices into daily use, occasional use, and rarely used. Apply the color-coding to all categories.
  • Storage Placement: Arrange daily use spices at eye level for immediate access, place occasional use spices slightly higher or lower, and keep rarely used spices in less accessible locations.
  • Clear Labels: Ensure that each spice container is clearly labeled with both the spice’s name and the corresponding color code.

 Seasonal Rotation

  • Alphabetical Order: Organize your spices alphabetically for easy access.
  • Label and Date: Each spice container should be clearly labeled with the spice name and the purchase date or expiration date. Using uniform containers can enhance the overall organization.
  • Spice Rotation Schedule: Develop a schedule for reviewing and rotating your spices regularly. Ground spices might need replacement every six months, while whole spices can last up to a year. Regularly check and refresh your spices according to this schedule.

Custom Hybrid

You can always create a custom hybrid approach tailored specifically to your preferences. Mix and match any combination of the methods mentioned above or come up with your own unique system. The primary aim is to design an organization method that simplifies your cooking process, maintains spice freshness, and adds a pleasing touch to your kitchen decor. The combination approach allows for the ultimate customization of your spice cabinet organization. Regardless of the method or combination you choose, a well-organized spice cabinet is the key to creating delicious, well-seasoned dishes and elevating your culinary journey.

SPICE
Photo by cotton Bro studio: https://www.pexels.com/photo/clear-glass-jars-filled-with-cereals-3737639/

 Spice Cabinet Organization

Approach Benefits Ideal for
Alphabetical within Cuisine Quick access to spices while adhering to specific flavor profiles. Enthusiasts who enjoy diverse cuisines and want logical organization.
Color-Coded Frequency A visually attractive and functional cabinet. Quick access to most-used spices. Those who appreciate aesthetics and seek quick access to frequently used spices.
Alphabetical and Seasonal Rotation Balance between quick access and spice freshness. Individuals who want frequently used spices within reach without compromising on quality.
Custom Hybrid Ultimate customization. Mix and match methods to create a system tailored to individual preferences. Anyone who wants a unique organization system that perfectly suits their needs.

 Conclusion:

The combination approach, which allows you to blend multiple organization methods, offers a highly customizable solution. Whether you opt for alphabetically within cuisine, color-coded frequency, alphabetical and seasonal rotation, or create a custom hybrid, the key is to design a system that simplifies your cooking process, maintains the freshness of your spices, and complements your personal style. A well-organized spice cabinet not only saves time but also ensures that you have easy access to the spices you need, resulting in flavorful and well-seasoned dishes. Additionally, an organized spice cabinet adds a touch of elegance and harmony to your kitchen’s decor. Remember that the best organization method is the one that works for you, aligning with your cooking habits, aesthetics, and personal preferences. the benefits of efficiently organizing your spice cabinet extend far beyond mere tidiness. It’s about elevating your culinary experience, saving time, ensuring spice freshness, personalizing your kitchen, and enhancing your cooking journey. The combination approach, which blends various organization methods, offers the flexibility to create a system that aligns perfectly with your cooking habits and preferences.

Introduction:

Hello, hair care enthusiasts! I am David Winston, a seasoned Registered Herbalist with a profound love for holistic living. Today, I’m delighted to share a natural solution to a common concern – hair fall and lackluster locks. Let’s delve into creating a DIY Hair Elixir that not only helps prevent hair fall but also brings out the natural shine in your beautiful tresses. Join me on this journey to nourish your locks and embrace a mane that reflects your vibrant, healthy lifestyle.

Understanding Hair Health: The Foundations of a Gorgeous Mane:

Before we explore the creation of a hair elixir, let’s understand what makes our hair beautiful and healthy. Hair health is influenced by various factors, including diet, hydration, and the products we use. By nourishing our hair from within, we can achieve lasting results and maintain luscious locks.

Your hair’s health is a reflection of your overall well-being. A balanced diet rich in vitamins, minerals, and proteins is essential. Proper hydration, regular exercise, and minimizing stress play vital roles in maintaining a vibrant mane. Additionally, the products we use on our hair can significantly impact its health. Opting for natural, nourishing ingredients is a step toward a healthier, more beautiful mane.

Hair Brushing
Image by: https://www.glam.com/1079144/brush-fine-hair-without-leaving-it-flat/

Key Ingredients for the Hair Elixir and Their Benefits:

Let’s acquaint ourselves with the essential ingredients that make up this hair elixir. Each ingredient brings unique benefits to the table, synergizing to provide a holistic solution to hair fall and dullness.

  1. Aloe Vera:
    • Benefits: Hydrates the scalp, reduces dandruff, and promotes hair growth.
    • Usage: Strengthens hair, adds natural shine, and helps prevent hair fall.
  2. Coconut Oil:
    • Benefits: Conditions, strengthens, and adds a natural shine to the hair.
    • Usage: Provides moisture, reduces hair breakage, and improves hair texture.

Crafting Your Hair Elixir: A Recipe for Vibrant Hair:

Embark on the journey of creating your hair elixir using natural, easy-to-find ingredients. This elixir is a blend of carefully selected elements that work together to strengthen your hair, reduce hair fall, and add a natural shine.

Ingredients:

  • 2 tablespoons Aloe Vera Gel
  • 1 tablespoon Coconut Oil

Steps:

  1. Mixing the Ingredients:
    • In a bowl, combine the Aloe Vera Gel and Coconut Oil.
    • Mix thoroughly until you achieve a smooth, consistent blend.
  2. Applying the Elixir:
    • Section your hair and apply the elixir from the roots to the tips.
    • Massage gently into the scalp for better absorption.
  3. Leave it On:
    • Leave the elixir on for at least 30 minutes to an hour for maximum benefits.
  4. Rinse and Cleanse:
    • Wash your hair with a gentle shampoo to remove the elixir.
    • Let your hair air dry or use a towel to pat dry.

Incorporating the Elixir into Your Routine:

Consistency is key in achieving the desired results. We’ll discuss how to seamlessly incorporate the hair elixir into your daily hair care routine to maximize its benefits and promote a healthier mane.

Usage Frequency: Apply this elixir once or twice a week, depending on your hair’s needs. Regular application will yield optimal results.

Additional Tip: Consider using a wide-tooth comb to evenly distribute the elixir through your hair for better absorption.

Additional Tips for Healthy, Lustrous Hair:

Nourishing your hair goes beyond elixirs. We’ll provide additional tips on maintaining hair health, including a balanced diet, proper hydration, and stress management. Holistic care translates to a vibrant, gorgeous mane.

  1. Balanced Diet:
    • Ensure your diet is rich in vitamins, minerals, and proteins essential for hair health.
    • Include leafy greens, nuts, fish, and eggs for a well-rounded nutritional boost.
  2. Hydration:
    • Drink plenty of water to keep your scalp and hair well-hydrated.
    • Hydration is vital for healthy hair growth and overall well-being.
  3. Stress Management:

Comparative Table: DIY Hair Elixirs for Healthy Hair:

Elixir Name Key Ingredients Application Method Benefits
Nourish & Shine Elixir Aloe vera, Coconut oil Weekly application Strengthens, adds shine, and reduces hair fall
Revitalize & Grow Elixir Castor oil, Rosemary EO Daily massage Promotes growth, nourishes, and prevents breakage

Visual Table: Key Ingredients and Their Benefits:

Key Ingredients Benefits
Aloe Vera Hydrates the scalp, reduces dandruff, and promotes hair growth
Coconut Oil Conditions, strengthens, and adds a natural shine to the hair
Castor Oil Nourishes hair follicles, stimulates growth, and prevents breakage
Rosemary Essential Oil Improves circulation, encourages hair growth, and reduces dandruff

In the upcoming sections, we will delve into the details of each aspect, providing comprehensive information, step-by-step guides, and tips for crafting and using the DIY Hair Elixir. Get ready to embrace a radiant, healthy mane that truly represents the beauty of a holistic lifestyle.

Savor the delicious flavors of heart-healthy, cholesterol-friendly recipes that do wonders for your heart and your taste buds. This article presents a delectable collection of dishes designed to support better cholesterol numbers and elevate your overall heart health.

Recipe 1: Oatmeal with Mixed Berries

Ingredients:

  • 1/2 cup of rolled oats
  • 1 cup of unsweetened almond milk
  • 1/4 cup of fresh mixed berries (strawberries, blueberries, raspberries)
  • 1 tablespoon of honey or maple syrup (optional)
  • Chopped nuts for garnish (e.g., almonds or walnuts)

Instructions:

  1. In a saucepan, combine rolled oats and almond milk.
  2. Cook over medium heat, stirring occasionally, until the oats are tender and the mixture thickens (about 5-7 minutes).
  3. Remove from heat and transfer to a serving bowl.
  4. Top with fresh mixed berries and drizzle with honey or maple syrup if desired.
  5. Garnish with chopped nuts.
  6. Enjoy a cholesterol-friendly breakfast that’s rich in fiber and antioxidants.

    Photo by RDNE Stock project: https://www.pexels.com/photo/person-holding-a-disposable-cup-filled-with-oatmeal-6529655/

Recipe 2: Grilled Salmon with Avocado Salsa

Ingredients:

  • 2 salmon fillets
  • 1 ripe avocado, diced
  • 1/4 cup of red onion, finely chopped
  • 1/4 cup of fresh cilantro, chopped
  • Juice of 1 lime
  • Salt and pepper to taste

Instructions:

  1. Preheat the grill to medium-high heat.
  2. Season the salmon fillets with salt and pepper.
  3. Grill the salmon for about 4-5 minutes per side, or until it flakes easily with a fork.
  4. In a bowl, combine diced avocado, chopped red onion, cilantro, lime juice, salt, and pepper.
  5. Serve the grilled salmon topped with the avocado salsa.
  6. Delight in a heart-healthy and omega-3-rich dinner option.

Recipe 3: Berry Spinach Salad with Balsamic Vinaigrette

Ingredients:

  • 3 cups of fresh baby spinach
  • 1/2 cup of fresh mixed berries (strawberries, blueberries, raspberries)
  • 1/4 cup of crumbled feta cheese
  • 1/4 cup of chopped pecans
  • Balsamic vinaigrette dressing

Instructions:

  1. In a large salad bowl, combine fresh baby spinach, mixed berries, crumbled feta cheese, and chopped pecans.
  2. Drizzle with your favorite balsamic vinaigrette dressing.
  3. Toss the salad to coat all ingredients evenly.
  4. Enjoy a vibrant and antioxidant-rich salad that’s kind to your heart and your taste buds.

Recipe 4: Mixed Berry Smoothie

Ingredients:

  • 1/2 cup of fresh mixed berries (strawberries, blueberries, raspberries)
  • 1/2 cup of plain Greek yogurt
  • 1/2 cup of unsweetened almond milk
  • 1 tablespoon of honey or maple syrup (optional)
  • Ice cubes

Instructions:

  1. In a blender, combine mixed berries, plain Greek yogurt, almond milk, and honey or maple syrup if desired.
  2. Add ice cubes and blend until smooth.
  3. Pour the smoothie into a glass and relish a cholesterol-friendly and antioxidant-packed beverage.

    https://www.mz-store.com/blog/wp-content/uploads_en/2019/11/shutterstock_1126093256-1.jpg

Conclusion: A Journey to Heart-Healthy Eating

These delicious recipes aren’t just a treat for your taste buds; they’re also a gift to your heart. By incorporating these heart-healthy dishes into your diet, you can promote better cholesterol levels and enjoy a culinary journey to heart-healthy eating.

Subscribers’ Game Night: Netflix’s Trial Expansion

Netflix, the streaming titan, is broadening its trial with gaming, potentially creating a game night experience for subscribers. In this article, we’ll delve into this thrilling development and explore what it signifies for users and the continually evolving landscape of digital entertainment.

Introduction to Netflix’s Gaming Trial Expansion

For years, Netflix has been a trailblazer in the streaming industry, transforming how we consume movies and TV shows. Now, they’re venturing further into the world of gaming, offering subscribers an exciting new dimension of entertainment.

Netflix’s expansion of the gaming trial is more than just a new feature; it’s a bold step into diversifying the entertainment options available to subscribers, ensuring that they remain engaged and entertained.

The Netflix Gaming Experience

Seamlessly Integrated Entertainment

Netflix envisions a gaming experience that seamlessly integrates with its existing platform. Subscribers will have the convenience of effortlessly transitioning from watching their favorite series to playing interactive games without leaving the platform.

A Diverse Gaming Selection

The streaming giant is actively curating a gaming library that caters to a broad spectrum of interests. Whether you’re a fan of casual mobile games or seeking more immersive and complex titles, Netflix is committed to offering something for everyone.

Cross-Platform Flexibility

Netflix’s gaming ambitions transcend the boundaries of a single device. Subscribers will have the flexibility to enjoy games on various platforms, including smartphones, tablets, and smart TVs.

Netflix's Video Game
Image by: https://about.netflix.com/

The Trial Phase

At the time of writing, Netflix is in the early stages of expanding its gaming trial, introducing it to more subscribers. This phase is an opportunity for fine-tuning the gaming experience and collecting valuable feedback.

During the trial period, subscribers will have access to a curated selection of games, with the expectation that the gaming library will expand over time.

What to Expect

As Netflix’s gaming trial expansion progresses, subscribers can anticipate several key developments:

A Growing Game Library

The initial assortment of games will rapidly expand to offer a diverse range of gaming experiences. Subscribers can look forward to a broader selection, including exclusive titles developed in-house.

Seamless Integration

Netflix aims to make gaming an integral part of its platform. Subscribers can expect a user-friendly interface that allows them to switch effortlessly between watching content and playing games.

Exclusive Gaming Content

Netflix is likely to produce exclusive gaming content, potentially tied to popular series and movies available on the platform. This exclusive content will set Netflix apart in the gaming industry.

The Potential Impact

Netflix’s expansion of gaming has the potential to reshape the entertainment landscape in several ways:

A Complete Entertainment Hub

Netflix is positioning itself as an all-encompassing entertainment hub, offering a wide spectrum of content under one roof. With movies, TV shows, and gaming accessible through the platform, subscribers can enjoy a diverse range of entertainment without leaving the platform.

Attracting New Subscribers

The inclusion of gaming can serve as a compelling draw, enticing new subscribers who may not have considered subscribing before. The prospect of accessing their favorite shows and games in one place can be a compelling proposition.

A Unique Gaming Experience

Netflix’s gaming approach, including cross-platform play and exclusive content, offers a distinct gaming experience. It is poised to carve out a niche within the gaming industry, catering to a specific set of subscribers.

The Future of Netflix Gaming

Gaming on Netflix is not just an expansion; it’s a glimpse into the future of entertainment. As the platform refines its gaming offering, subscribers can anticipate more features, a broader game library, and innovative content crossovers.

Netflix’s move into the gaming industry is poised to captivate subscribers and reshape how we perceive entertainment in the digital age.

Conclusion

Netflix’s decision to expand its gaming trial represents a pivotal moment in the world of entertainment. Subscribers are on the brink of experiencing a new form of entertainment that seamlessly blends movies, TV shows, and interactive gaming, potentially leading to a subscribers’ game night. As Netflix’s gaming library expands and diversifies, we can expect that this expansion will signify an evolution in entertainment, offering subscribers a more integrated and dynamic entertainment landscape. Gaming on Netflix is not just a feature; it’s a bold step towards a future where subscribers come together for a night of digital entertainment.

Aloe Alchemy: DIY Organic Aloe Vera Elixir in Your Kitchen

By David Winston, Registered Herbalist (AHG)

Uncover the secrets of aloe vera, the succulent with extraordinary healing properties. Are you ready to transform your kitchen into an alchemist’s workshop and concoct a revitalizing aloe vera elixir? Join me, David Winston, a Registered Herbalist with the American Herbalists Guild (AHG), as we delve into the world of aloe alchemy and create a DIY organic aloe vera elixir for a natural lifestyle boost.

The Aloe Vera Miracle: Nature’s Healing Gel

Aloe vera, also known as the “plant of immortality,” has been revered for centuries for its remarkable healing properties. From soothing skin irritations to aiding digestion, aloe vera is a versatile plant that offers a myriad of benefits.

Kitchen Remedies
Image by: https://m.indiamart.com/proddetail/natural-aloe-vera-gel-20485482173.html

Aloe Vera Benefits at a Glance

Benefit Description
Skin Healing Calms and rejuvenates the skin
Digestive Aid Supports a healthy digestive system
Anti-Inflammatory Reduces inflammation and soothes discomfort

Crafting Your Aloe Vera Elixir

Creating an organic aloe vera elixir is simpler than you think. Follow these steps to harness the power of aloe vera in the comfort of your kitchen:

  1. Harvest Fresh Aloe Vera: Obtain a healthy aloe vera leaf and carefully extract the gel from within.
  2. Prepare the Gel: Blend the aloe vera gel with a splash of water to achieve a smooth, consistent texture.
  3. Enhance the Elixir: Customize your elixir by adding natural ingredients like lemon, honey, or a hint of mint for flavor and added benefits.

Integrating Aloe Vera into Your Lifestyle

Incorporate this rejuvenating aloe vera elixir into your daily routine and witness its transformative effects:

Morning Boost

Kickstart your day with a shot of aloe vera elixir to promote digestion and boost your energy levels naturally.

Skin Nourishment

Apply a thin layer of aloe vera gel to your face and body for hydrated, radiant skin. Aloe vera can also soothe minor burns and skin irritations.

Internal Healing

Incorporate aloe vera elixir into your wellness routine to support a healthy digestive system and reduce inflammation.

Begin Your Aloe Alchemy Journey

Embrace the wonders of aloe vera and let its magic infuse into your daily life. With a few simple steps and the guidance provided here, you can concoct your very own organic aloe vera elixir, elevating your natural lifestyle.

For personalized advice and more aloe vera recipes, consult with a registered herbalist or wellness expert. The power of aloe vera is within your reach—start your aloe alchemy journey today, and witness the transformative effects of this remarkable plant.