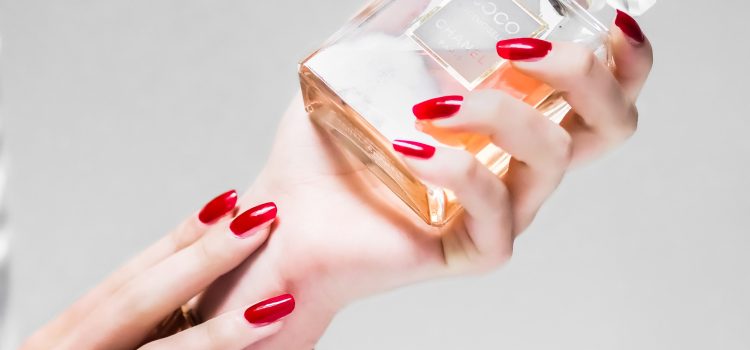
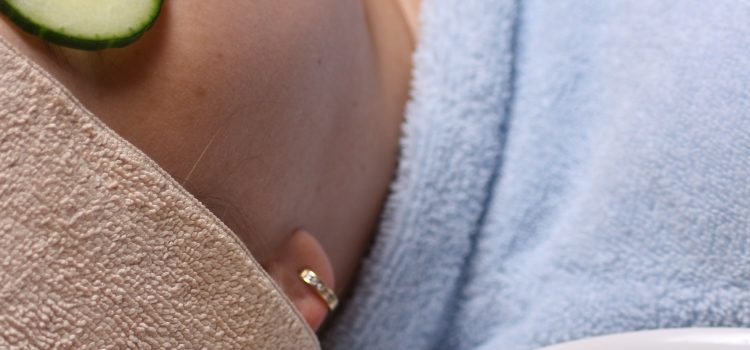
Are you tired of spending money on expensive skincare products, only to see little to no improvement in your skin? Investing in regular facials might just be the solution you’ve been searching for. Not only do they provide a relaxing and rejuvenating experience, but they also offer numerous benefits for your skin’s health and appearance. So why not treat yourself (and your skin) to some much-needed TLC? In this blog post, we’ll explore the reasons why regular facials are worth both the time and money investment. Get ready to glow from within!

The Importance of Skin Care

Your skin is your largest organ, and it’s constantly exposed to environmental stressors like UV rays, pollution, and free radicals. That’s why it’s so important to invest in a good skincare routine that includes regular facials.

Facials can help to remove dead skin cells, unclog pores, and hydrate the skin. They can also stimulate collagen production and help to reduce the appearance of fine lines and wrinkles. In short, facials are an excellent way to keep your skin looking its best.

If you’re not sure where to start, consider booking a consultation with a dermatologist or esthetician. They can help you create a personalized skincare routine that includes regular facials as well as at-home treatments.

The Benefits of Facials

Facials are a great way to keep your skin looking its best. Not only do they exfoliate and cleanse your skin, but they also help to boost circulation and promote cell turnover. This can result in brighter, smoother skin. In addition, facials can help to unclog pores and reduce the appearance of fine lines and wrinkles.

Regular facials can be an investment that pays off in the long run. By taking care of your skin now, you can help to prevent premature aging and other problems down the road. Plus, who doesn’t love a little pampering? If you’re looking for ways to improve your skin health, consider adding facials to your beauty routine.

How to Choose a Facial

When it comes to skincare, we all have different needs and concerns. And while there are a lot of at-home options available, sometimes it’s worth it to invest in a professional facial. But with so many different types of facials out there, how do you know which one is right for you? Here are a few things to keep in mind when choosing a facial:

1. Consider your skin type.

If you have sensitive skin, you’ll want to avoid facials that use harsh chemicals or exfoliants. Instead, opt for a gentler option like an oxygen facial or LED light therapy. If you have acne-prone skin, look for facials that include ingredients like salicylic acid or benzoyl peroxide to help fight breakouts.

2. Think about your goals.

Do you want to improve the appearance of fine lines and wrinkles? Are you hoping to get a more even skin tone? Or do you simply want to relax and pamper yourself? Knowing what you want to get out of your facial will help you choose the right treatment.

3. Ask for recommendations.

If you’re not sure which facial is right for you, ask a friend or family member who has great skin for their recommendation. You can also talk to a skincare professional at your local beauty store or salon. They can assess your skin type and needs and recommend the best facial

The Cost of Facials

When it comes to taking care of your skin, there is no such thing as too much pampering. While some people might think that facials are a luxury, the truth is that they can actually save you money in the long run. Here’s a breakdown of the cost of facials and why they’re worth the investment:

The average facial costs between $50 and $100. While this might seem like a lot of money upfront, keep in mind that a good facial can last anywhere from 4 to 6 weeks. That means that you’re only paying around $8-$17 per week for healthy, glowing skin – which is a pretty good deal!

In addition to saving you money in the long run, facials also have a number of other benefits. For one, they can help to improve the overall appearance of your skin by reducing wrinkles, fine lines, and dark spots. They can also help to unclog pores and clear up acne breakouts.

If you’re looking for an investment that will pay off both in the short- and long-term, regular facials are definitely worth considering!

How Often to Get a Facial

When it comes to how often to get a facial, there is no one-size-fits-all answer. The frequency with which you should schedule facials depends on several factors, including your skin type, the current condition of your skin, and your budget.

If you have dry or sensitive skin, you may benefit from getting a facial every 4 to 6 weeks. If you have normal or combination skin, you may only need a facial every 6 to 8 weeks. And if you have oily skin, you may only need a facial every 8 to 12 weeks.

Of course, the condition of your skin can also affect how often you should get a facial. If you are dealing with breakouts or other concerns, you may need to get more frequent facials until your skin clears up. Once your skin is back in balance, you can return to your regular facial schedule.

Finally, keep in mind that facials can be expensive. If money is tight, you may need to space out your appointments a bit more than recommended in order to make them affordable.

Conclusion

Regular facials are an excellent way to invest in your skin and achieve healthy, glowing skin. They can help reduce the signs of aging, hydrate and nourish your skin, boost circulation, remove dirt and debris from pores, decrease breakouts, and improve overall complexion. With regular facials, you can enjoy all these benefits while also taking time to relax and unwind. So why not take some time for yourself today – invest in a facial that will leave you looking radiant!

Are you tired of struggling with an uneven makeup application? Do you want to achieve a flawless, smooth canvas that makes your features pop? Look no further! In this blog post, we have compiled five easy and effective steps to help you achieve the perfect makeup base. From prepping your skin to choosing the right foundation formula, these tips will elevate your makeup routine and leave you looking like a total pro. Get ready for some serious glow-up moments!

Cleansing

A perfectly smooth makeup canvas starts with a good cleansing routine. The first step is to remove all traces of makeup, dirt and oil from the skin. This can be done using a gentle cleanser and a cotton pad. Next, exfoliate the skin to get rid of dead skin cells and reveal a brighter complexion. This can be done using a physical or chemical exfoliator. Finally, cleanse the skin again to remove any leftover product from the previous steps.

Exfoliating

Exfoliating is key to achieving a perfectly smooth makeup canvas. There are two main types of exfoliation: physical and chemical. Physical exfoliation involves using a physical object, such as a brush or scrub, to slough away dead skin cells. Chemical exfoliation uses acids or other chemicals to break down the bonds between dead skin cells, making them easier to remove.

The best way to exfoliate depends on your skin type. If you have sensitive skin, you may want to stick to physical exfoliation. If you have tough, thick skin, you may be able to handle more aggressive chemical exfoliation. No matter what type of exfoliation you choose, be sure to do it gently so you don’t irritate your skin.

There are many different products on the market that can help you achieve a perfectly smooth makeup canvas. Be sure to do your research and find one that is right for your skin type and needs.

Applying a Primer

Before you can start perfecting your makeup look, you need to create a perfectly smooth canvas. This means applying a primer. Primer creates an even surface for your foundation and concealer, and it helps your makeup last longer.

There are a few different types of primer, so you can choose the one that works best for your skin type. If you have oily skin, look for a mattifying primer. If you have dry skin, opt for a hydrating primer. And if you have sensitive skin, be sure to choose a hypoallergenic option.

Once you’ve found the right primer for your skin, it’s time to apply it. Start by dotting the primer onto your forehead, cheeks, nose, and chin. Then, use your fingers or a makeup brush to blend it into your skin. Be sure to cover all of your problem areas so that your foundation will go on smoothly.

Using Foundation

Foundation is the key to any good makeup look. It’s important to find a foundation that matches your skin tone, as this will create a smooth and even base for your other makeup. Once you’ve found your perfect foundation, it’s time to start applying it!

Here are some tips for using foundation:

-Start with a clean face. Make sure to remove any dirt, oil, or makeup from your face before starting. This will help your foundation go on smoothly and last longer.

-Apply a primer. This will help create an even canvas for your foundation and make it last longer.

-Choose a foundation brush or sponge. Using a brush or sponge will help you blend the foundation evenly into your skin.

-Start in the middle of your face and work outwards. Apply the foundation to your forehead, cheeks, nose, and chin. Then blend outward towards your hairline and jawline.

-Be sure to blend well! You don’t want any lines or streaks of foundation on your face. Use circular motions to blend until everything is even.

Concealing imperfections

Concealing imperfections is the first step to achieving a perfectly smooth makeup canvas. To do this, you will need a good concealer and a brush or sponge.

Start by applying the concealer to any problem areas, such as dark circles under your eyes, blemishes, or redness. Then, use the brush or sponge to blend the concealer into your skin until it is completely smooth.

If you have any other facial imperfections that you would like to cover up, such as fine lines or wrinkles, you can apply a foundation primer before your foundation. This will help to fill in any lines and create an even surface for your makeup.

Setting your makeup

Setting your makeup is the most important step in achieving a perfectly smooth makeup canvas. If you don’t set your makeup, it will eventually fade and become patchy. Here are the best ways to set your makeup:

1. Use a setting powder. Setting powder helps to prolong the wear of your foundation and concealer by absorbing excess oil and sebum. It also helps to Mattifies the skin and gives it a smoother appearance.

2. Use a setting spray. Setting spray helps to keep your makeup in place all day long. It also gives you a more polished and professional look.

3. Use blotting papers throughout the day. Blotting papers help to absorb excess oil and sebum that can cause your makeup to fade or become patchy.

4. Touch up your makeup throughout the day as needed. If you start to notice that your makeup is fading or becoming patchy, touch it up with a little more foundation or concealer.

Are you tired of using the same old beauty tools and techniques with little to no results? It’s time to shake things up and add a jade roller to your collection! This ancient Chinese beauty tool has been used for centuries to promote circulation, reduce inflammation, and improve overall skin health. Not only is it easy to use, but it also provides immediate benefits that will leave you feeling refreshed and rejuvenated. Keep reading to find out why every beauty enthusiast needs a jade roller in their routine!

What is a jade roller?

A jade roller is a type of facial massager that is said to improve the appearance of the skin. The roller is typically made of jade stone, which is thought to have healing properties. Jade rollers are said to increase blood circulation, help to reduce puffiness and wrinkles, and give the skin a more youthful appearance.

How to use a jade roller

There are a few ways to use a jade roller, depending on your desired effect. To help reduce puffiness and promote drainage, roll the jade roller from the center of your face outward. For a lymphatic massage, which can help improve circulation and skin tone, start at your neck and roll upward. To help with fine lines and wrinkles, roll the jade roller from the bottom of your face upward. You can also use the jade roller on your décolletage and body for an all-over glow.

The benefits of using a jade roller

Jade rollers have been around for centuries, and for good reason! These simple beauty tools offer a multitude of benefits for the skin. Here are just a few of the many reasons why you should add a jade roller to your beauty routine:

1. Improves circulation: Massaging the skin with a jade roller helps to increase blood flow and improve circulation. This can in turn help to reduce puffiness and give the skin a healthy glow.

2. Reduces wrinkles and fine lines: The gentle massage action of using a jade roller can help to smooth out wrinkles and fine lines over time.

3. Promotes lymphatic drainage: Lymphatic drainage is an important part of detoxifying the body. Jade rollers can help to stimulate lymphatic flow, which can reduce swelling and promote a healthy complexion.

4. Increases product absorption: When used before applying serums or moisturizers, jade rollers can help to increase product absorption so that your skincare products can work more effectively.

5. Soothes inflammation: Jade rollers can also help to calm inflamed skin, whether it’s due to acne, sun exposure, or other irritations.

Where to buy a jade roller

Jade rollers have been around for centuries, and they are believed to have many benefits for the skin. If you’re looking to add a jade roller to your beauty collection, here are some tips on where to buy one:

1. Look for a reputable source. When it comes to buying a jade roller, you’ll want to make sure you’re getting it from a reputable source. There are many counterfeit products on the market, so it’s important to do your research before making a purchase.

2. Consider your budget. Jade rollers can range in price from around $10 to $100 or more. Decide how much you’re willing to spend on a jade roller before beginning your search.

3. Compare features. Once you’ve narrowed down your options based on price and reputation, take some time to compare the features of each jade roller. Things like size, material, and handle design can vary significantly between products. Choose the jade roller that has the features that are most important to you.

4. Read reviews. Before making your final purchase decision, be sure to read reviews of the jade rollers you’re considering. Customer feedback can be very helpful in determining which product is right for you

Jade roller alternatives

There are a few different types of jade rollers on the market, each with its own set of benefits. If you’re looking for an alternative to the traditional jade roller, there are a few options available.

One type of jade roller is the electric jade roller. This type of roller uses vibrations to help stimulate circulation and reduce puffiness. Electric jade rollers are typically more expensive than traditional jade rollers, but they may be worth the investment if you’re looking for a more powerful tool.

Another alternative to the traditional jade roller is the rose quartz roller. Rose quartz is thought to have similar benefits to jade, but it’s also said to be beneficial for the heart and emotions. If you’re looking for a more gentle option, rose quartz may be a good choice.

Finally, there are also wooden rollers available on the market. Wooden rollers are less common than other types of rollers, but they can still provide some benefits. Wooden rollers are said to be helpful for stimulating circulation and improving skin tone.

No matter what type of roller you choose, make sure to clean it regularly to keep it free from dirt and bacteria.

Conclusion

There are countless reasons why every beauty enthusiast should add a jade roller to their collection. Not only is the jade stone itself said to bring balance, harmony, and luck in life but it also helps diminish wrinkles, reduce puffiness and dark circles under eyes, improve circulation of the face for glowing skin, and boost collagen production in skin cells. Add a jade roller to your daily skincare routine today to reap all these amazing benefits!

Looking for the secret to achieving perfectly sculpted brows? Look no further! Whether you’re a brow newbie or a seasoned pro, our expert tips will help you create the best brows of your life. From shaping to filling in, we’ve got everything you need to know to master this essential beauty skill. So grab your tweezers and get ready to learn how to shape and define your brows like a pro!

The Right Tools

When it comes to sculpting your brows, the right tools are key. A good quality brow pencil or powder will help you create the perfect shape, while a fine-tipped brush will allow you to fill in any sparse areas for a natural look.

If you’re new to brow shaping, start by finding a pencil or powder that matches your hair color. Then, use the pencil or powder to fill in your brows, following their natural shape. Use light, feathery strokes for a natural look. Once you’ve filled in your brows, use a fine-tipped brush to blend the color and soften any harsh lines.

If you’re looking for a more dramatic look, you can go bolder with your brow pencil or powder. For a really defined shape, use a clear Brow Gel to hold your handiwork in place all day long.

The Perfect Shape

When it comes to brows, there is no such thing as the perfect shape. The key is to find a style that works with your natural features and complements your face.

There are a few things to keep in mind when shaping your brows:

1. Start with clean, well-groomed brows. This will make it easier to see your natural shape and make any necessary adjustments.

2. Use a pencil or powder to fill in your brows and create a more defined look. Be sure to use light, feathery strokes for a natural effect.

3. Use a highlighter just under the arch of your brow to create lift and definition.

4. Experiment with different shapes and styles until you find one that you love!

The Right Color

The right color can make all the difference when it comes to sculpting your best brows ever. Here are a few expert tips to help you choose the perfect shade:

1. If you have fair skin, go for a lighter brow color. A blonde or taupe shade will look natural and complement your complexion.

2. If you have medium skin, opt for a medium-brown shade. This will give you a defined look without being too harsh.

3. If you have dark skin, go for a dark-brown or black shade. This will give you the most definition and make your brows really stand out.

4. No matter what your skin tone is, always test out the color before you commit to it. Use a cotton swab to apply the shadow to your brow bone and then blend it out to see how it looks against your skin.

Filling Them In

When it comes to brows, the old saying goes that less is more. But if you’ve been blessed with sparse arches, you know that a little extra help in the filling department can go a long way. The good news is, there are plenty of products on the market that can help you achieve fuller-looking brows in just a few swipes.

Powders are ideal for filling in brows because they can be built up gradually to create the desired effect. Use a powder that’s one shade lighter than your natural brow color to avoid looking too harsh. An angled brush will help you apply the product evenly and with precision.

Pencils are another great option for filling in brows, and they can be used to create both fine and bold strokes depending on how much pressure you apply. Again, choose a pencil that’s one shade lighter than your natural brow color. Start by drawing small, hair-like strokes along the base of your brows and then fill in any sparse areas. Use a spoolie brush to blend everything together for a natural look.

If you want something with more staying power, try using a pomade or wax. These products can be used to create both thin and thick lines, so they’re perfect for those with sparse or full brows alike. Just keep in mind that a little goes a long way with these products, so start with less than you think you need and build up from there

Highlighting Your Brows

If you’re looking to up your brow game, then highlighting your brows is a must. Here are some tips to help you get the perfect sculpted brows:

1. Use a highlighter that’s one or two shades lighter than your skin tone. This will help create a natural and subtle brow highlight.

2. Apply the highlighter just under the arch of your brow and blend it outwards.

3. Use a small, pointed brush to apply the highlighter so you can be precise with placement.

4. Set the highlight with a translucent powder to help it stay in place all day long.

Grooming Them

When it comes to brows, there are a few key things to keep in mind. First, make sure you have the right tools. A good set of tweezers, a brow brush, and a high-quality brow pencil or powder will help you achieve any look you’re going for. Second, take your time. Don’t be afraid to step back and assess your work every few minutes to make sure you’re happy with the shape. Finally, don’t overdo it! It’s easy to get carried away when plucking or filling in your brows, but remember that less is often more.

Now that you have the basics down, let’s get into some specific tips for grooming your brows.

First, if you’re starting with a clean slate, take a close look at your natural brow shape. Use a white pencil or liner to trace the outline of your brows so you can see where they start and stop. Then, use a fine-tipped tweezer to pluck any stray hairs outside of that outline. Tweeze in the direction of hair growth to avoid irritation.

Next, it’s time to fill in your brows. If you’re using a pencil or powder, start by making light strokes in the direction of hair growth. Fill in sparse areas until you’re happy with the coverage, then use a sp

Are you tired of clumpy, flaky mascaras that leave your lashes looking anything but long and luscious? Look no further! We’ve tried countless mascaras to bring you the top 5 options for achieving the perfect fluttery lash look. Say goodbye to smudges and hello to a gorgeous gaze with these game-changing formulas. Get ready to bat those beauties all day with our must-have mascara picks.

L’Oreal Paris Voluminous Lash Paradise Mascara

If you’re looking for a mascara that will give you long and luscious lashes, then look no further than the L’Oreal Paris Voluminous Lash Paradise Mascara. This mascara is formulated with a volumizing and lengthening formula that will leave your lashes looking fuller and longer. The Lash Paradise Mascara also features a curved brush that helps to coat each lash evenly from root to tip.

Maybelline New York Great Lash Mascara

Few things in life are as gratifying as taking a makeup brush to your lashes and transforming your entire look. Mascara is the one product that can take your eyes from looking tired and lackluster to wide awake and gorgeous with just a few swipes. If you’re on the hunt for a new mascara that will give you long, luscious lashes, we’ve got you covered. Here are the top mascaras to achieve long and luscious lashes, according to our expert makeup artists.

1. Maybelline New York Great Lash Mascara

This drugstore staple has been around for decades for good reason—it works! The Great Lash mascara features a small brush that helps to coat even the tiniest of lashes for dramatic results. We love that this formula is buildable, so you can keep layering on coats until you achieve your desired look.

Covergirl Clump Crusher Extensions LashBlast Mascara

Covergirl Clump Crusher Extensions LashBlast Mascara is an amazing mascara that can give you long and luscious lashes in just a few strokes. This mascara comes with a specially designed brush that can help to separate your lashes and coat them evenly with the mascara. The result is beautiful, long, and voluminous lashes that will make your eyes pop.

Dior Diorshow Iconic Overcurl Mascara

When it comes to achieving long and luscious lashes, there is no better mascara than the Dior Diorshow Iconic Overcurl Mascara. This mascara has a unique formula that helps to curl and lengthen your lashes, while also adding volume and definition. The results are truly dramatic, and your lashes will look longer, fuller, and more defined than ever before. The best part about this mascara is that it is easy to use and can be removed easily with warm water.

Lancome Monsieur Big Mascara

If you’re looking for a high-quality mascara that will give you long, luscious lashes, Lancome Monsieur Big Mascara is a great option. This mascara has a large brush that makes it easy to apply, and it’s formulated to volumize and lengthen your lashes. It’s also long-wearing, so you don’t have to worry about it smudging or flaking throughout the day.

How to Apply Mascara for Best Results

When it comes to mascara, there are a few things you can do to ensure you get the best results. First, start with clean, dry lashes. Then, apply a thin layer of mascara to your upper lashes, wiggling the brush back and forth as you go. Be sure to coat the entire lash from base to tip. Repeat on your lower lashes. For extra volume and curl, you can apply a second coat of mascara. Just be sure to let the first coat dry completely before applying the second.

Conclusion

Long and luscious lashes are achievable with the right mascara. We’ve gone over a list of 5 amazing mascaras that can help you get the look you want. Whether it’s volume, length, or intensity that you seek, there is a suitable option for any type of lash need from this selection. With these top-rated mascaras at your disposal, achieving those gorgeous eye looks has never been easier!

Are you tired of the same old hair routine? Want to switch up your style but don’t know where to start? Look no further! We’ve rounded up the top 10 must-have styling tools for achieving a flawless mane, whether you want sleek and straight locks or bouncy curls. From flat irons to curling wands, we’ve got you covered with all the essentials you need to elevate your hair game. Get ready for some serious #hairgoals!

The Top 10 Hair Styling Tools

1. A high-quality hairbrush: This is one of the most important tools you need for a flawless mane. A good brush will help keep your hair free of tangles and knots, and will also help distribute your natural oils evenly throughout your hair.

2. A fine-toothed comb: A fine-toothed comb is essential for detangling your hair and for creating sleek, smooth styles.

3. Hair clips: Hair clips are great for keeping your hair out of your face while you style it. They can also be used to create fun updos and other styles.

4. Bobby pins: Bobby pins are another must-have styling tool. They can be used to secure loose strands of hair, or to create intricate updos and hairstyles.

5. A hairdryer: A hairdryer is a necessary tool for achieving many different hairstyles. It can be used to straighten or curl your hair, as well as to add volume and body to your locks.

6. Hot rollers: Hot rollers are a great way to add curls or waves to your hair without using any heat styling tools. Simply roll them in and let them sit in your hair for a few minutes before taking them out for beautiful, long-lasting results.

7. Curling iron: A curling iron is another versatile styling tool that can be used to create a variety of looks, from

How to Use Them

Assuming you’re starting with straight hair, the first step is to gather your tools. You’ll need a curling iron, some hair clips, and a heat protectant spray. If you want to add some extra shine or hold to your curls, you can also use a light-hold hairspray.

Now that you have everything you need, it’s time to start curling! Begin by spraying your hair with the heat protectant spray and then divide it into sections. Take one small section of hair at a time and wrap it around the barrel of the curling iron. Hold for 10-15 seconds before releasing. Repeat all over until all of your hair is curled.

Once you’re done curling, let your hair cool for a few minutes before adding any hairspray. This will help ensure that your curls stay in place all day long!

The Different Types of Hair

There are a variety of hair types, from straight to curly, and each type responds differently to styling. The best way to find out what works for your hair is to experiment with different stylers until you find the perfect combination. Here are some of the most popular types of hair and the best styling tools to use for each:

Straight Hair: If you have straight hair, you can use just about any styling tool. However, straighteners will give you the sleekest results. Curling irons can also be used to add a little bit of wave or curl to your hair.

Wavy Hair: Wavy hair looks best when it’s styled with a curling iron or wand. You can also use a flat iron to smooth out your waves and create a more polished look.

Curly Hair: Curly hair tends to be more delicate than other types, so it’s important to choose a styler that won’t damage your locks. A good option is a diffuser, which helps distribute heat evenly and prevents frizz. You can also try using a curling iron or wand to create loose, beachy waves.

Pros and Cons of Each Tool

When it comes to hair styling, there are a lot of different tools you can use to achieve the look you want. From straightening irons to curling wands, each tool has its own set of pros and cons. In this section, we’ll take a closer look at the pros and cons of each hair styling tool so you can decide which one is right for you.

Straightening Irons:

Pros:
– Can help achieve a sleek and polished look
– Ideal for straightening out frizzy or flyaway hairs
– Can be used to create beachy waves or touch up existing styles

Cons:
– Can cause damage to your hair if used incorrectly or too often
– Not ideal for creating tight curls or ringlets

Conclusion

If you want to get the perfect look for your hair, it’s important to have the right styling tools. With these 10 must-haves in your arsenal, there is no limit to what style of mane you can rock with confidence. From straightening irons and curling wands to diffusers and texturizing sprays, having a complete hair toolbox will make it easy for you to achieve any look without damaging your beautiful locks. So go on, choose the best styling tools that fit both your needs and budget – after all, who doesn’t love a flawless mane?

Are you in search of the fountain of youth? While it may be a myth, there are plenty of anti-aging skincare products that can help revitalize your skin and make you look years younger! From serums to creams, it’s important to choose the right products for your specific needs. In this blog post, we’ll share some top recommendations that will help turn back time on your skin. So sit back and get ready to feel confident in your glowing complexion once again!

Intro

As we age, our skin goes through changes. It becomes thinner, drier, and less elastic. The fatty tissues below the skin decrease, and wrinkles begin to form. There are many anti-aging skincare products on the market that can help to revitalize your skin and reduce the signs of aging.

In this article, we will recommend some of the best anti-aging skincare products that are available today. These products can help to hydrate your skin, reduce wrinkles, and give you a more youthful appearance.

The importance of anti-aging skincare

As we age, our skin changes. We lose collagen, which leads to wrinkles, and our skin becomes drier and less elastic. To combat these effects of aging, it’s important to use anti-aging skincare products.

There are a lot of different anti-aging skincare products on the market, so it can be overwhelming to try to figure out which ones to use. But don’t worry! We’ve got you covered with our recommendations for the best anti-aging skincare products.

Our top pick for an anti-aging serum is the L’Oreal Paris Revitalift Derm Intensives 10% Vitamin C Serum. This serum contains 10% pure vitamin C, which helps to brighten the skin and reduce the appearance of wrinkles.

For an anti-aging moisturizer, we recommend the Olay Regenerist Micro-Sculpting Cream. This cream contains hyaluronic acid, which helps to hydrate the skin and plump up fine lines and wrinkles.

If you’re looking for an all-in-one anti-aging skincare product, we recommend the Neutrogena Rapid Wrinkle Repair Night Moisturizer. This night cream not only hydrates the skin, but also helps to reduce the appearance of fine lines and wrinkles with its retinol formula.

No matter what age you are, it’s never too late to start using anti-aging

The best time to start using anti-aging skincare products

As we age, our skin changes. We lose collagen, which causes our skin to become thinner and less elastic. We also produce less oil, which can make our skin dry and wrinkled.

To combat these changes, many people turn to anti-aging skincare products. But when is the best time to start using them?

The answer depends on your individual skin type and concerns. If you have wrinkles or other signs of aging, you may want to start using anti-aging products sooner rather than later.

If you’re in your 20s or 30s and just starting to see some fine lines, you can wait a bit longer before using anti-aging products. However, it’s never too early to start taking care of your skin! Use sunscreen every day, eat healthy foods, and drink plenty of water to keep your skin looking its best.

Recommended anti-aging skincare products

If you’re looking to reduce the appearance of wrinkles and fine lines, then these anti-aging skincare products are for you. We’ve rounded up our top picks that help to diminish the signs of aging and give your skin a more youthful appearance.

1. retinol serum: A powerful antioxidant, retinol is known to boost collagen production and reduce the appearance of wrinkles. We recommend using a retinol serum at night before bedtime.

2. hyaluronic acid: Hyaluronic acid helps to keep skin hydrated and plump by trapping moisture in the skin. It also helps to smooth out the appearance of fine lines and wrinkles.

3. sunscreen: Wearing sunscreen every day is crucial in protecting your skin from damage caused by UV rays. Choose a broad-spectrum sunscreen with an SPF of 30 or higher for best results.

4. vitamin C serum: Vitamin C is another powerful antioxidant that can help brighten your complexion and reduce the appearance of wrinkles over time. Use a vitamin C serum in the morning before applying your sunscreen for best results.

How to use anti-aging skincare products

It’s never too late to start using anti-aging skincare products! Whether you’re in your 20s or 50s, these products can help improve the appearance of fine lines and wrinkles, as well as promote collagen production to keep your skin looking plump and youthful. Not sure where to start? Here are some recommendations:

1. Cleanser: A good cleanser is essential for all skin types, but it’s especially important for those with mature skin. Look for a gentle, non-drying cleanser that will remove makeup and impurities without stripping away moisture.
2. Exfoliator: An exfoliating scrub or mask can help slough away dead skin cells and reveal brighter, more radiant skin. Exfoliate once or twice a week, depending on your skin’s tolerance.
3. Serum: A powerful serum can help target specific concerns like dark spots, dullness, or wrinkles. Apply a few drops after cleansing and before moisturizing.
4. Moisturizer: A nourishing moisturizer is key for keeping mature skin hydrated and supple. Look for one that contains hyaluronic acid or glycerin to help lock in moisture.
5. Sunscreen: Don’t forget to apply sunscreen every day, even if you’re staying indoors! UV rays from computers and other electronics can cause damage to the skin,

Conclusion

These anti-aging skincare product recommendations can help you take steps to restore your skin’s youthful glow and reduce the appearance of wrinkles, fine lines, and dark spots. With a combination of specially formulated products and regular exfoliation, you can dramatically improve your skin’s health without expensive treatments or harsh chemicals. Investing in quality skincare products will have you feeling confident about showing off your complexion for years to come.

Introduction

Ladies, get ready to indulge in the ultimate luxury experience! We have curated a list of the most expensive fragrances for women that will elevate your style and leave you feeling like royalty. From rare ingredients to stunning packaging, these scents are worth every penny. So sit back, relax, and let us take you on a journey through the luxurious world of fragrance.

Top 3 Most Expensive Fragrances for Women

1. Chanel No. 5: This fragrance is truly worthy of its legendary status. The luxurious blend of jasmine, rose, and ylang-ylang is both timeless and irresistible. A single drop of this elixir is enough to transport you to a world of luxury and refinement.

2. Guerlain Shalimar: Another classic fragrance with a rich history, Shalimar is a sensual and exotic blend of vanilla, amber, and patchouli. Its Oriental notes are both intoxicating and alluring, making it the perfect scent for a night out on the town.

3. Creed Royal Princess Oud: This opulent fragrance is fit for royalty with its regal blend of oud wood, rose, and sandalwood. The luxurious bottle and gold-plated cap make it a true work of art.

How to Choose the Right Fragrance for You

When it comes to choosing a fragrance, it is important to consider what type of scent you are looking for. Are you looking for a light, refreshing scent or a more powerful, sensual scent? There are many different types of fragrances on the market, so it is important to do your research before making a purchase.

There are a few things to keep in mind when choosing a fragrance. First, consider what type of mood you want to set with your fragrance. If you want to feel confident and sexy, then you will want to choose a heavier scent. If you are looking for something that is light and fresh, then a lighter scent would be best. Second, think about the occasion you will be wearing the fragrance. If you are going to be attending a formal event, then you will want to choose a more sophisticated fragrance. However, if you are just going out for the night with friends, then you can choose something fun and flirty. Third, keep in mind the season. In the winter months, you may want to choose a warmer scent that will remind you of cozy fireside chats. In the summertime, however, lighter scents such as citrus or floral fragrances would be more appropriate.

No matter what type of fragrance you choose, make sure it is one that makes YOU feel confident and beautiful. After all, that is what luxury is all about!

Conclusion

Luxury fragrances for women don’t always have to come with an exorbitant price tag. There are plenty of options that are more affordable, but if you want to go the extra mile and splurge on a luxurious scent in 2023, then these top picks should be your first stop. Not only do they smell divine, but they also make a statement of exquisite taste and sophistication. Investing in one or two of them is sure to draw admiring glances from those around you!

Are you tired of putting in hours at the gym without seeing any tangible results? Are you struggling to stay motivated and track your progress towards your fitness goals? Look no further than a trusty fitness tracker! In this post, we’ll discuss why incorporating a fitness tracker into your workout routine is essential for staying on top of your health and wellness game. So grab some water, lace up those sneakers, and get ready to discover why you need a fitness tracker ASAP.

What is a fitness tracker?

A fitness tracker is a device that helps you track your physical activity and fitness level. It can be worn on your wrist, ankle, or belt, and usually looks like a watch or pedometer. Fitness trackers typically have sensors that detect your movement and calculate how many steps you take and how much calories you burn. Some fitness trackers also include heart rate monitors, GPS, and other advanced features.

Fitness trackers are an important tool for anyone trying to improve their physical fitness. They can help you set and reach goals, monitor your progress, and track your activity level. Fitness trackers can also motivate you to be more active by giving you feedback on your progress and letting you compare your activity level to others.

How does a fitness tracker help you with your workout routine?

There are a number of ways that a fitness tracker can help you with your workout routine. First, it can help you to set and track your fitness goals. This can be especially helpful if you are trying to lose weight or improve your overall fitness level. Second, a fitness tracker can help you to monitor your heart rate and other health metrics during your workout. This information can be used to adjust your workout routine accordingly. Third, a fitness tracker can provide motivation to keep you going when you feel like quitting. Finally, a fitness tracker can help you to track your progress over time and see the results of your hard work.

What are the benefits of using a fitness tracker?

There are many benefits to using a fitness tracker, including:

1. Increased motivation to stay active and reach your fitness goals.

2. The ability to track your progress and see how far you’ve come.

3. Improved accountability – it’s harder to skip workouts when you know you’re being tracked!

4. A sense of community and support from other users who can offer encouragement and advice.

5. Customizable features that allow you to tailor your tracker to your own needs and preferences.

How to choose the right fitness tracker for you

There are a lot of fitness trackers on the market these days, and it can be tough to decide which one is right for you. Here are a few things to consider when choosing a fitness tracker:

-Your budget. Fitness trackers can range in price from around $50 to $200 or more. Decide how much you’re willing to spend on a tracker before you start shopping.

-The features you need. Some fitness trackers just track your steps and heart rate, while others have more advanced features like GPS tracking, sleep tracking, and more. Think about which features are most important to you and look for a tracker that has them.

-Compatibility with your phone. Not all fitness trackers work with all phones, so make sure the tracker you’re considering is compatible with yours.

-Ease of use. You want a tracker that’s easy to set up and use so that you’ll actually use it on a regular basis.

5 of the best fitness trackers on the market

There are a ton of fitness trackers on the market, but which one is right for you? Here are 5 of the best fitness trackers that will help you reach your fitness goals:

1. Fitbit Flex 2: This tracker is great for people who want to track their steps, distance, calories burned, and active minutes. It’s also water resistant, so you can wear it while swimming.

2. Garmin Vivoactive 3: This tracker is perfect for people who are into running, biking, or swimming. It tracks your heart rate, steps, distance, calories burned, and more. Plus, it has GPS so you can map out your routes.

3. Jawbone UP2: This tracker is ideal for people who want to track their sleep, steps, distance traveled, and calories burned. It also vibrates when you’ve been inactive for too long, which is a great way to stay motivated.

4. Apple Watch Series 2: This tracker is great for people who want to track their activity levels, heart rate, and calorie burn. Plus, it has GPS and water resistance so you can take it on all your adventures.

5. Samsung Gear S3: This tracker is perfect for people who want to monitor their fitness progress and receive notifications from their smartphone. It tracks steps taken, distance traveled, heart rate, and more

Conclusion

A fitness tracker is a valuable tool that can help you reach your health and fitness goals faster than ever before. In addition to tracking your progress, it can also motivate you by providing objective feedback on how you are progressing. Whether it’s to lose weight or build muscle, having a good tracker like Fitbit can make all the difference in terms of achieving success with your workout routine. So what are you waiting for? Invest in a good quality fitness tracker and start making real progress towards reaching your goals!

Do you ever feel stiff after a long day at work or intense workout? If so, stretching should become your best friend. But did you know that there are different types of stretching that can benefit your body in unique ways? Whether you’re an athlete looking to improve performance, recovering from injury, or simply seeking some relief from muscle soreness and tension – this post will walk you through the benefits of static, dynamic, ballistic, and PNF stretching techniques. So get ready to limber up and discover how different stretches can help keep your body healthy and strong!

What is stretching?

There are many different types of stretching, and each has its own benefits. Static stretching is the most common type of stretching, and it involves holding a stretch for 20-30 seconds. This type of stretching is great for improving flexibility and range of motion. Dynamic stretching is another common type, and it involves moving in and out of a stretch several times. This type of stretching is beneficial for warming up the muscles before exercise and helping to prevent injuries. Active stretching is a less common type of stretching, but it can be very effective. Active stretches are usually done without any support, and they require you to use your muscles to move your body into the stretch. These types of stretches are great for increasing strength and power.

The different types of stretching

There are four main types of stretching: ballistic, dynamic, passive, and PNF.

Ballistic stretching is a type of stretching that uses momentum to force a limb into a position. It is often used by athletes to increase their range of motion. However, this type of stretching can be dangerous if not done properly, as it can lead to injuries.

Dynamic stretching is a type of stretching that involves moving your body through a full range of motion. It is often used by athletes as part of their warm-up routine. This type of stretching helps reduce the risk of injuries and improve performance.

Passive stretching is a type of stretching where you use an external force (such as your body weight or gravity) to stretch your muscles. This type of stretching is often used by people who are rehabilitating from an injury. It is also used by people who are looking to increase their flexibility.

PNF (proprioceptive neuromuscular facilitation) stretches are a type of stretch that uses both the contraction and relaxation of muscles to stretch the muscle tissue. PNF stretches are often used by physical therapists to help patients regain range of motion after an injury.

The benefits of stretching

Stretching is an important part of any workout routine. It helps improve flexibility, range of motion, and can also help prevent injuries.Static stretching, which is holding a stretch for a period of time, is the most common type of stretching. It’s important to do static stretches after your muscles are warm, such as after a workout.Dynamic stretching, which involves moving your body through a range of motion, is another type of stretching that can be beneficial. Dynamic stretches are often used as part of a warm-up before exercise.Proprioceptive neuromuscular facilitation (PNF) stretching is a type of stretching that involves both static and dynamic stretches. PNF stretching is often used by physical therapists to help rehabilitate patients after an injury.

There are many benefits to stretching, regardless of the type you choose. Stretching can help improve flexibility and range of motion, both of which are important for overall fitness and performance. Stretching can also help prevent injuries by keeping muscles and joints loose and limber. Whether you’re looking to improve your workout routine or simply want to reduce your risk of injury, including some stretches in your daily routine is a good idea.

How to stretch properly

If you’re like most people, you probably don’t think much about stretching beyond the occasional pre-workout warmup or post-workout cool-down. However, stretching is an important part of overall fitness and should be incorporated into your workout routine.

There are many different types of stretching, each with its own benefits. Here’s a look at some of the most common types of stretches and how they can improve your health:

1. Static Stretching

This is the most common type of stretch and is what most people think of when they think of “stretching.” Static stretches involve slowly extending your muscles to their maximum range of motion and holding the stretch for 20 to 30 seconds. These types of stretches are best done after a workout when your muscles are already warmed up. They can help improve your flexibility and range of motion over time.

2. Dynamic Stretching

Dynamic stretches are more active than static stretches and involve moving your body through a full range of motion. These types of stretches are best done as part of a warmup before a workout, as they can help increase blood flow to your muscles and reduce your risk of injury during exercise.

Conclusion

Stretching is an important part of any exercise routine, and with the variety of stretching exercises available, you can easily find one that suits your needs. Whether you’re looking for flexibility or muscle strength, dynamic or static stretching will provide benefits to your body. Taking a few minutes each day to stretch can help improve posture, reduce stress levels and increase overall wellbeing. Remember to always listen to your body when performing stretches as this will ensure optimum results and prevent injury.