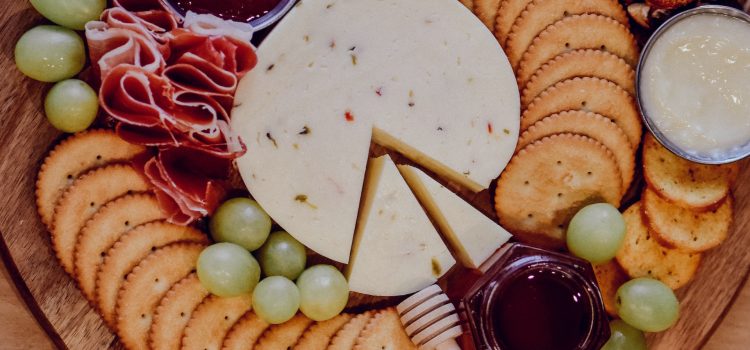
Charcuterie boards have become a popular trend in the culinary world, and for good reason. These boards are not only visually stunning, but they also offer a delicious array of cured, cheeses, fruits, nuts, and other gourmet foods. The art of charcuterie is all about creating a beautiful board that is both aesthetically pleasing and delicious.

The word “charcuterie” comes from the French word “chair cuite,” which means “cooked meat.” Charcuterie has been around for centuries, and it was originally a way to preserve meat before refrigeration. Today, charcuterie has evolved into an art form, with chefs and home cooks alike creating beautiful boards that are perfect for entertaining or as a special treat for yourself.

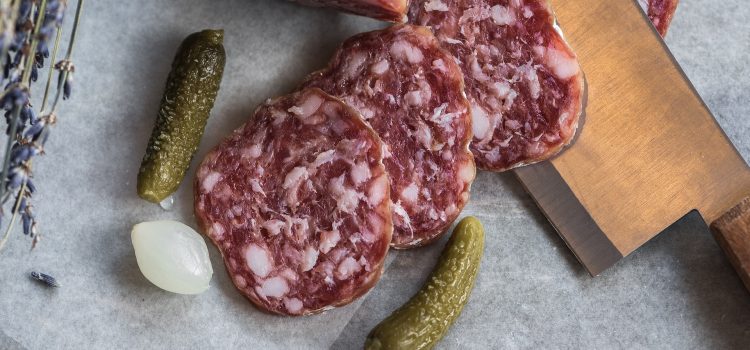
Creating a charcuterie board is all about balance. You want to have a variety of flavors, textures, and colors on your board. Start by selecting a variety of cured meats, such as prosciutto, salami, and chorizo. These meats should be thinly sliced and arranged in a visually appealing way on the board.

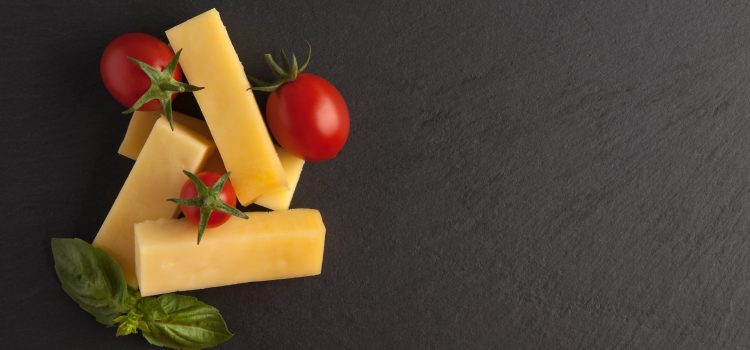
Next, add a variety of cheeses. Soft cheeses like brie and goat cheese pair well with cured meats, while harder cheeses like cheddar and gouda offer a nice contrast in texture. Be sure to include a variety of flavors, such as sharp, mild, and creamy.

Fruits and nuts are also an important component of a charcuterie board. Fresh fruits like grapes, berries, and figs add a pop of color and sweetness to the board. Nuts like almonds, walnuts, and pistachios offer a nice crunch and complement the flavors of the meats and cheeses.

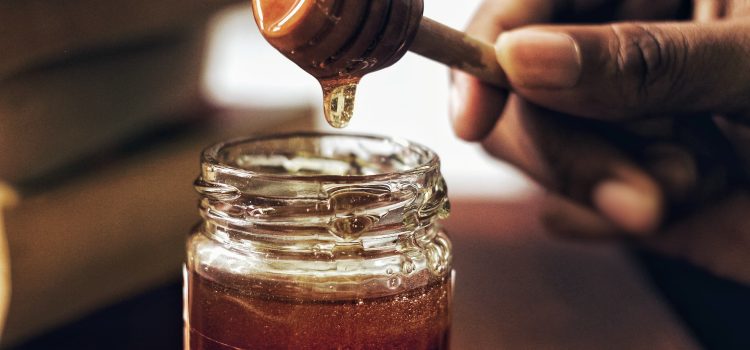
To add some variety to your board, consider adding some gourmet foods like olives, pickles, and spreads. These items can be used to add some extra flavor to the meats and cheeses or to be enjoyed on their own.

When arranging your board, start with the larger items like the meats and cheeses and then fill in the gaps with the smaller items like fruits and nuts. Be sure to leave some space between each item so that they can be easily picked up and enjoyed.

The art of charcuterie is not just about the food, but also about the presentation. Use a wooden board or platter as the base for your charcuterie board. This will add a rustic and natural feel to the presentation. You can also add some greenery like herbs or edible flowers to add some color and texture to the board.

In conclusion, the art of charcuterie is all about creating a beautiful board that is both visually stunning and delicious. By selecting a variety of cured meats, cheeses, fruits, nuts, and gourmet foods, you can create a board that is sure to impress your guests or be a special treat for yourself. Remember to balance the flavors, textures, and colors on your board and to have fun with the presentation. With a little bit of creativity and some delicious ingredients, you can create a charcuterie board that is truly a work of art.

There’s nothing quite like a picnic on a beautiful day. Whether you’re heading to the park, the beach, or the countryside, a picnic is a great way to enjoy the outdoors and spend time with friends and family. And of course, no picnic is complete without delicious food! But packing for a picnic can be a challenge – you want to bring foods that are easy to transport, won’t spoil in the heat, and are delicious and satisfying. Here are a few tips for packing scrumptious foods for a fun outdoor meal:

1. Choose foods that are easy to transport. When packing for a picnic, it’s important to choose foods that are easy to transport and won’t make a mess. Finger foods like sandwiches, wraps, and skewers are a great option, as are salads and fruits that can be packed in containers. Avoid foods that are messy or require utensils, as these can be difficult to eat outdoors.

2. Pack foods that won’t spoil in the heat. When packing for a picnic, it’s important to choose foods that won’t spoil in the heat. Avoid foods that are highly perishable, such as dairy products and meats, and opt for foods that can be stored at room temperature, such as fruits, vegetables, and crackers. If you do bring perishable foods, be sure to pack them in a cooler with ice packs to keep them fresh.

3. Bring a variety of flavors and textures. A successful picnic is all about variety – you want to bring a range of flavors and textures to keep everyone satisfied. Try packing a mix of sweet and savory foods, as well as crunchy and soft textures. This will ensure that there’s something for everyone to enjoy.

4. Don’t forget the drinks. A picnic isn’t complete without refreshing drinks to quench your thirst. Pack plenty of water, as well as other beverages like lemonade, iced tea, or sparkling water. If you’re bringing alcoholic beverages, be sure to check the park or beach regulations to make sure they’re allowed.

5. Pack utensils and napkins. Don’t forget to pack utensils and napkins for your picnic. Bring disposable plates, cups, and utensils, as well as napkins and paper towels for easy cleanup. If you’re feeling eco-friendly, consider bringing reusable utensils and plates to reduce waste.

Here are a few ideas for scrumptious picnic foods:

1. Sandwiches and wraps. These are a classic picnic food for a reason – they’re easy to transport, customizable, and delicious. Try packing a variety of fillings, such as turkey and avocado, hummus and veggies, or grilled chicken and pesto.

2. Salads. Salads are a great option for a refreshing and healthy picnic food. Try packing a mix of greens, veggies, and proteins, such as a Greek salad with feta cheese and olives, or a quinoa salad with roasted vegetables.

3. Fruit. Fresh fruit is a perfect picnic food – it’s easy to transport, refreshing, and delicious. Try packing a mix of fruits, such as berries, grapes, and sliced melon.

4. Cheese and crackers. Cheese and crackers are a classic picnic food that’s always a crowd-pleaser. Try packing a variety of cheeses, such as cheddar, brie, and goat cheese, along with crackers and sliced baguette.

5. Desserts. No picnic is complete without a sweet treat. Try packing cookies, brownies, or fruit bars for a satisfying and portable dessert.

In conclusion, packing for a picnic can be a fun and rewarding experience. By choosing foods that are easy to transport, won’t spoil in the heat, and are delicious and satisfying, you can create a memorable outdoor meal that everyone will enjoy. So, grab your picnic basket, head to your favorite outdoor spot, and enjoy a scrumptious picnic with friends and family!

The bone-in, skin-on chicken breast has long been a staple in kitchens around the world, cherished for its succulence, flavor, and versatility. However, recent shifts in consumer preferences and industrial practices have led to a decline in the availability of this cherished cut. As food enthusiasts navigate the absence of bone-in, skin-on chicken breasts, they encounter challenges and seek alternatives. Join us as we delve into this culinary landscape, exploring the reasons behind the decline and discovering creative solutions to fill the void.

The Changing Tides of Convenience: In an era marked by convenience and speed, the demand for boneless, skinless chicken breasts has skyrocketed. Consumers gravitate towards the ease of preparation and reduced cooking time offered by boneless cuts. As a result, commercial poultry producers and supermarkets have prioritized efficiency and profitability, leading to a decrease in the availability of bone-in, skin-on chicken breasts on store shelves.

Nostalgia and Flavor Rediscovered: The absence of bone-in, skin-on chicken breasts has sparked a wave of nostalgia among food enthusiasts. Memories of family gatherings and comforting meals prepared with this traditional cut are reignited. The complex flavors and succulent texture that come from cooking with the bone and skin create a depth of taste that is sorely missed. As a result, cooks are seeking alternative sources and exploring different techniques to replicate the flavors of this beloved cut.

Embracing Specialty Butchers and Local Farms: One avenue for finding bone-in, skin-on chicken breasts is through specialty butchers and local farms. These establishments often prioritize quality and offer a more personalized experience. By developing relationships with these vendors, food enthusiasts can inquire about special orders or be notified when limited quantities of bone-in, skin-on chicken breasts become available. Engaging with the local community strengthens the connection to food sources and fosters a sense of support for sustainable farming practices.

Heritage Breeds and Culinary Revival: Another intriguing solution lies in embracing heritage poultry breeds. These breeds, such as the Barred Plymouth Rock or the Rhode Island Red, have a longer growth period, resulting in more robust flavors and firmer textures. Supporting heritage breed farms not only helps preserve genetic diversity but also opens up opportunities for culinary exploration. Food enthusiasts can experience the unique characteristics of these breeds, adapting cooking techniques to highlight the distinctive qualities of the meat.

Exploring Ethnic Cuisines and Traditional Recipes: In the realm of ethnic cuisines, bone-in, skin-on chicken breasts continue to hold a prominent place. Traditional recipes from various cultures celebrate the use of this cut, delivering exceptional flavors and textures. Exploring diverse culinary traditions, such as Indian, Chinese, or Middle Eastern, provides opportunities to enjoy the bone-in, skin-on experience in different contexts. Ethnic restaurants, cookbooks, and online resources offer a wealth of inspiration for recreating these cherished dishes at home.

Home Cooks Innovate: As the absence of bone-in, skin-on chicken breasts persists, home cooks are rising to the challenge by developing innovative techniques and recipes. They explore alternative cuts, such as bone-in, skin-on chicken thighs or whole chickens, to replicate the flavors and textures they crave. By experimenting with different cooking methods, brining, or utilizing marinades, home cooks can create dishes that capture the essence of bone-in, skin-on chicken breasts even without the exact cut.

Conclusion: While the decline in availability of bone-in, skin-on chicken breasts may evoke a sense of loss, it also serves as a catalyst for culinary exploration and innovation. Food enthusiasts are seeking out alternative sources, embracing heritage breeds, and exploring ethnic cuisines to satisfy their cravings for the flavors and textures of this cherished cut. Whether through specialty butchers, local farms, or the ingenuity of home cooks, the absence of bone-in, skin-on chicken breasts is met with adaptability and a determination to preserve the essence of tradition in our evolving culinary landscape.

Ground meat is a kitchen staple that often finds its way into classic dishes like meatballs and burgers. However, the potential of ground meat extends far beyond these familiar favorites. In this article, we invite you to embark on a culinary adventure and explore the versatility of ground meat with five exciting and delicious recipes. From flavorful stuffed peppers to aromatic Middle Eastern kofta, get ready to discover new dimensions of taste and texture that will revolutionize your cooking game.

  1. Italian Stuffed Zucchini Boats: Transform humble zucchini into a show-stopping dish with Italian Stuffed Zucchini Boats. Hollow out zucchini halves and fill them with a mixture of ground beef or turkey, cooked rice, onions, garlic, and Italian herbs like basil and oregano. Top the stuffed zucchini boats with marinara sauce and a generous sprinkle of mozzarella cheese. Bake until the zucchini is tender and the cheese is golden and bubbly. These zucchini boats offer a flavorful and satisfying alternative to traditional ground meat recipes.
  2. Asian Lettuce Wraps: Experience the vibrant flavors of Asia with delectable Asian Lettuce Wraps. Sauté ground pork or chicken with a combination of ginger, garlic, soy sauce, hoisin sauce, and a touch of sweetness from brown sugar or honey. Add diced water chestnuts and scallions for added crunch and flavor. Serve the flavorful mixture in crisp lettuce leaves and garnish with chopped peanuts, cilantro, and a squeeze of lime. These wraps offer a refreshing and light option for enjoying ground meat.
  3. Middle Eastern Kofta Kebabs: Transport your taste buds to the Middle East with flavorful Kofta Kebabs. Mix ground lamb or beef with minced onions, garlic, fresh herbs like parsley and mint, and a blend of warm spices including cumin, coriander, and paprika. Shape the mixture into elongated kebabs and grill them to perfection. Serve the juicy kofta kebabs with warm pita bread, tangy tzatziki sauce, and a side of refreshing tabbouleh. These kebabs showcase the rich flavors and aromatic spices of Middle Eastern cuisine.
  4. Mexican Taco Stuffed Peppers: Add a Mexican twist to your dinner table with Taco Stuffed Peppers. Cook ground beef or turkey with diced onions, garlic, and a blend of Mexican spices such as chili powder, cumin, and paprika. Fill hollowed-out bell peppers with the flavorful meat mixture and top with shredded cheese. Bake until the peppers are tender and the cheese is melted and bubbly. Serve these stuffed peppers with your favorite taco toppings like salsa, guacamole, and sour cream for a delightful and satisfying meal.
  5. Moroccan Spiced Meat Pies: Delight your senses with aromatic Moroccan Spiced Meat Pies. Prepare a spiced ground meat filling by cooking ground lamb or beef with onions, garlic, and a fragrant blend of Moroccan spices like cumin, coriander, cinnamon, and ginger. Encase the filling in a flaky pastry dough and bake until golden brown. These handheld pies are perfect for a flavorful snack or a portable meal on the go. Serve them with a side of tangy yogurt sauce or a refreshing cucumber and tomato salad.

Conclusion:

Ground meat is a versatile ingredient that opens up a world of culinary possibilities beyond the traditional meatball and burger. By exploring new recipes and flavors, you can discover the true versatility of ground meat. From Italian stuffed zucchini boats to Middle Eastern kofta kebabs, these five exciting recipes showcase the endless possibilities and allow you to unleash your creativity in the kitchen

Introduction:

When it comes to burgers, nothing beats sinking your teeth into a juicy and flavorful patty. Achieving the perfect level of juiciness requires a combination of expert tips, techniques, and attention to detail. In this article, we delve into the secrets of elevating your burger game to new heights, ensuring every bite is a succulent and savory delight. From selecting the right meat to cooking temperatures and resting periods, get ready to unlock the key to juicy burger perfection.

  1. The Meat Matters: Choosing the Right Blend: The foundation of a juicy burger lies in selecting the right blend of meat. Look for ground beef with a good balance of fat and lean meat, around 80% lean and 20% fat. This ratio ensures flavor and moisture without excessive greasiness. Experiment with different cuts, such as chuck, sirloin, or a blend of multiple cuts, to discover your preferred taste and texture.
  2. Optimal Thickness for Juiciness: Burger thickness plays a crucial role in achieving juiciness. Aim for a patty that is about ¾ to 1 inch thick. This thickness allows the burger to cook evenly, retaining its moisture and preventing it from drying out. Remember that the patty will shrink slightly during cooking, so shaping it slightly larger than the bun is recommended.
  3. Seasoning for Flavor Infusion: To enhance the juiciness and flavor of your burger, season it well. Sprinkle both sides of the patty with salt and freshly ground black pepper just before cooking. For an extra flavor boost, experiment with additional seasonings like garlic powder, onion powder, or smoked paprika. Remember, it’s best to keep the seasoning simple to let the natural flavors of the meat shine.
  4. The Art of the Sear: High Heat and Maillard Reaction: Achieving a juicy burger begins with a hot grill or skillet. Preheat your cooking surface to medium-high heat, around 375-400°F (190-205°C). This high heat helps to create a flavorful sear, locking in the juices and creating a caramelized crust. Place the patties on the grill or skillet and resist the temptation to press them down with a spatula, as this can cause moisture loss.
  5. Cooking Time and Doneness Levels: Cooking time and doneness levels play a significant role in burger juiciness. The cooking time will vary depending on the thickness of the patty and personal preference. For a medium-rare burger, grill the patty for about 4-5 minutes on each side. Adjust the cooking time accordingly for different levels of doneness. To ensure accuracy, use a meat thermometer to check the internal temperature. For medium-rare, aim for 130-135°F (55-57°C), medium at 140-145°F (60-63°C), and medium-well at 150-155°F (65-68°C).
  6. Resting Period: Sealing in Juices: Allowing your burger to rest before serving is a crucial step in achieving optimal juiciness. After removing the patties from the heat, let them rest for about 5 minutes. This resting period allows the juices to redistribute and reabsorb into the meat, resulting in a juicier burger. Resting also helps to retain moisture when you take that first satisfying bite.
  7. Cheese, Toppings, and Bun Harmony: To elevate the flavor and juiciness of your burger, consider adding a slice of your favorite cheese during the last minute of cooking. Let the residual heat melt the cheese onto the patty, creating a luscious layer of creaminess. When assembling your burger, choose fresh, high-quality toppings that complement the flavors of the patty. From crisp lettuce and ripe tomatoes to caramelized onions and tangy pickles, the right combination of toppings can enhance the overall juiciness and flavor profile of your burger.

Conclusion:

Elevating your burger game to achieve ultimate juiciness requires careful consideration of every step, from selecting the right meat blend to mastering the cooking process and toppings. With these expert tips, you’ll be well-equipped to create mouthwatering burgers that leave you and your guests yearning for more. So, fire up the grill or heat up the skillet, and get ready to savor the sizzle and savory perfection of a juicy burger that will elevate your culinary experience.

In a world where social connections often revolve around food, the concept of shared dining experiences has taken center stage. It’s a celebration of togetherness, where friends and family gather around a bountiful platter, indulging in a myriad of flavors and textures. Embracing this communal spirit, we present six customizable platter recipes that not only tantalize the taste buds but also foster a sense of unity and joy.

  1. Mediterranean Mezze Platter: Transport your taste buds to the sun-kissed shores of the Mediterranean with a vibrant Mezze platter. This customizable delight is an amalgamation of flavors, textures, and colors. Arrange an assortment of hummus, tabbouleh, falafel, dolmas, olives, and pita bread. Encourage your guests to experiment with various combinations, creating personalized bites that suit their preferences. The mezze platter embodies the spirit of sharing, where each guest can explore their unique culinary journey while enjoying the company of others.
  2. Sushi Savoring Platter: Experience the art of sushi with a customizable platter that combines traditional flavors with modern twists. Arrange a variety of sushi rolls, nigiri, and sashimi on a beautifully adorned platter. Provide an array of condiments like soy sauce, wasabi, and pickled ginger for guests to create their own flavor profiles. This platter encourages conversation and collaboration as guests exchange their favorite sushi combinations, creating a delightful harmony of tastes and textures.
  3. Taco Fiesta Platter: Unleash your creativity with a Taco Fiesta platter that brings the joy of DIY assembly to the table. Present an assortment of soft and crispy taco shells along with a plethora of fillings such as seasoned meats, grilled vegetables, salsas, cheeses, and fresh garnishes. Let your guests build their own tacos, mixing and matching ingredients to suit their palates. This platter fosters a lively atmosphere as people share their culinary creations, turning the dining experience into a fiesta of flavors.
  4. Bountiful Bruschetta Board: Savor the simplicity and elegance of Italian cuisine with a bountiful bruschetta board. Arrange an array of crusty bread slices accompanied by various toppings like diced tomatoes, fresh basil, mozzarella, olive tapenade, and balsamic glaze. Encourage guests to experiment with different combinations, creating unique bruschetta bites bursting with Mediterranean flavors. This platter promotes interaction and conversation, as guests exchange their favorite bruschetta pairings, celebrating the art of customization.
  5. Charcuterie and Cheese Extravaganza: Indulge in the ultimate customizable delight with a charcuterie and cheese extravaganza. Curate a lavish platter featuring an assortment of cured meats, artisanal cheeses, crackers, bread, fruits, and condiments. Allow guests to create their own unique flavor combinations by pairing different meats and cheeses, experimenting with sweet and savory pairings. This platter becomes a catalyst for lively discussions about personal preferences and tastes, fostering a sense of camaraderie.
  6. Build-Your-Own Pizza Party: Transform your dining experience into a lively pizza party with a customizable platter of pizza ingredients. Provide a selection of dough, sauces, cheeses, and toppings such as vegetables, meats, and herbs. Encourage guests to craft their own pizzas and experiment with flavor combinations. This platter ignites a playful atmosphere as guests share their pizza creations, engaging in friendly debates about the perfect pizza topping ratios.

Conclusion:

Customizable platters offer a unique way to celebrate shared dining experiences. They create an interactive and engaging atmosphere, where individuals can express their creativity and personal preferences while connecting with others. Whether it’s the Mediterranean Mezze, Sushi Savoring, Taco Fiesta, Bountiful Bruschetta, Charcuterie and Cheese Extravaganza, or Build-Your-Own Pizza Party, these platters embrace the beauty of customization, making every dining experience a memorable and joyful celebration of togetherness. So gather your loved ones, lay out a platter, and embark on a culinary adventure that unites hearts and palates.

Rice, a versatile and beloved staple, holds a special place in the hearts and kitchens of people around the world. However, achieving perfectly cooked rice on the stove can be a challenge. In this article, we embark on a culinary journey, unraveling the secrets to cooking rice with precision. By following this step-by-step guide, you will master the art of stove-top rice cooking, creating fluffy, tender grains that will elevate your meals to new heights.

Step 1: Selecting the Right Rice

The journey to cooking rice with precision begins with selecting the right type of rice. Whether it’s long-grain, short-grain, basmati, or jasmine, each variety offers a unique texture and flavor profile. Consider the dish you are preparing and choose a rice variety that best complements it. Understanding the characteristics of different rice types will help you achieve the desired results.

Step 2: Measuring the Ingredients

Accurate measurement is crucial when it comes to cooking rice. Use a measuring cup to determine the amount of rice and water needed. As a general rule of thumb, use a 1:2 ratio of rice to water for long-grain rice. Adjust the ratio according to the specific type of rice and the desired texture. Remember, precision in measurement is key to achieving consistent results.

Step 3: Rinsing the Rice

Before cooking, it is important to rinse the rice thoroughly. Place the desired amount of rice in a fine-mesh sieve and rinse it under cold water. Rinsing removes excess starch, resulting in fluffier grains and preventing them from sticking together. Continue rinsing until the water runs clear. This step is essential for achieving perfectly cooked rice.

Step 4: Cooking on the Stove

Now it’s time to cook the rice on the stove. In a medium-sized pot, combine the rinsed rice and the appropriate amount of water. Bring the water to a boil over medium-high heat. Once boiling, reduce the heat to low and cover the pot with a tight-fitting lid. This allows the rice to cook gently and evenly.

Step 5: Timing and Simmering

Timing is crucial in cooking rice with precision. The cooking time will vary depending on the type of rice. Refer to the package instructions as a starting point. Generally, long-grain rice takes about 15-20 minutes, while shorter-grain varieties may take slightly longer. It’s important to maintain a gentle simmer during the cooking process. Avoid lifting the lid or stirring the rice, as this can disrupt the cooking and affect the final texture.

Step 6: Resting and Fluffing

Once the rice is cooked, remove the pot from the heat and let it rest, covered, for about 5-10 minutes. This resting period allows the steam to distribute evenly, resulting in fluffy and tender grains. After resting, use a fork or a rice paddle to gently fluff the rice, separating the grains. This step helps release any excess moisture and ensures an even distribution of flavors.

Step 7: Serve and Enjoy

Your perfectly cooked rice is now ready to be enjoyed. Serve it as a side dish, use it as a base for stir-fries, or incorporate it into your favorite rice-based recipes. The precision and care you put into cooking the rice will be evident in its taste and texture, elevating your meals to a new level of deliciousness.

Conclusion:

Cooking rice with precision on the stove is an art that can be mastered with practice and attention to detail. By following this step-by-step guide, you will unlock the secrets to achieving fluffy, tender, and perfectly cooked rice. From selecting the right rice to measuring ingredients, rinsing, simmering, and fluffing, each step plays a vital role in the final result. Embrace the stove-top chronicles and let your culinary creations shine with precision-cooked rice.

Soup, with its comforting warmth and array of flavors, has long been a beloved culinary staple. However, what many fail to realize is that soup can serve as a keyhole into a world of mouthwatering meal extensions. By harnessing the versatility and flavors of soup, you can unlock the potential to create three extraordinary dishes that go beyond a simple bowl. In this article, we will explore how soup can be transformed into flavorful meal extensions that will tantalize your taste buds and elevate your dining experience.

  1. Transform Soup into a Savory Sauce:

A delicious soup can be the foundation for a mouthwatering sauce that adds depth and complexity to a variety of dishes. Select a soup with bold flavors, such as a tomato-based or mushroom soup. Transfer the soup to a saucepan and simmer it over low heat to reduce and concentrate the flavors. If desired, blend the soup until smooth for a silky texture. Adjust the consistency by adding broth or cream, if needed. This versatile sauce can be drizzled over grilled meats, poured over pasta, or used as a base for flavorful casseroles. The result is a rich and savory sauce that takes your dishes to a whole new level.

  1. Turn Soup into a Hearty Filling:

Hearty soups, such as chili or lentil soup, can be transformed into a delicious filling for various dishes. Begin by cooking the soup until it thickens and the ingredients meld together. If needed, adjust the seasoning to ensure a robust flavor profile. The thickened soup can then be used as a filling for tacos, burritos, or savory hand pies. Alternatively, it can be layered between sheets of phyllo dough to create a savory strudel. The possibilities are endless, and the result is a satisfying and flavorful meal that showcases the heartiness of the original soup.

  1. Elevate Soup to a Gourmet Bisque:

Cream-based soups, such as butternut squash or lobster bisque, can be elevated into gourmet delights fit for special occasions. Start by simmering the soup to concentrate the flavors and allow it to thicken slightly. For added richness, stir in heavy cream or a touch of butter. Enhance the flavors with a hint of herbs, spices, or a splash of wine. Finish the bisque with a garnish of fresh herbs, a drizzle of truffle oil, or a dollop of crème fraiche. Serve the gourmet bisque as an appetizer or a sophisticated main course. The velvety texture and complex flavors will impress even the most discerning palates.

Unlocking the Culinary Keyhole:

Soup serves as a culinary keyhole, allowing you to peek into a world of tantalizing flavors and endless possibilities. By exploring its potential as a savory sauce, a hearty filling, or a gourmet bisque, you can unlock a realm of mouthwatering meal extensions.

When selecting soups for transformation, opt for those with robust flavors, diverse ingredients, and a well-balanced base. This will provide a solid foundation for creating the meal extensions with depth and complexity.

Conclusion:

Soup, often enjoyed as a comforting bowl of warmth, holds the key to a world of mouthwatering meal extensions. By harnessing its versatility and flavors, you can transform soup into savory sauces, hearty fillings, and gourmet bisques. The key lies in selecting the right soup and exploring the potential to create extraordinary dishes. Embrace the culinary keyhole that soup provides, and let your creativity soar as you unlock a world of delicious meal extensions that will delight your taste buds and impress your guests.

Cheese, with its myriad flavors and textures, is a versatile ingredient loved by many. Whether you’re dealing with an excess of cheese or simply want to stock up on your favorite varieties, freezing can be a practical solution. However, freezing cheese requires careful consideration to ensure that its taste, texture, and overall quality are preserved. In this article, we will navigate the ins and outs of freezing cheese properly, helping you make informed decisions and enjoy your cheese even after it’s been frozen.

  1. Choosing the Right Cheese:

Not all cheeses are well-suited for freezing. Generally, hard and semi-hard cheeses like Cheddar, Gouda, and Parmesan freeze better than soft and fresh cheeses like Brie or mozzarella. Hard cheeses have lower moisture content, which helps them maintain their structure and flavor during freezing and thawing. So, before freezing, consider the type of cheese and its moisture level to ensure the best possible results.

  1. Preparing the Cheese:

Preparing the cheese properly before freezing is essential to maintain its quality. Cut the cheese into smaller portions or grate it, depending on your intended use. Smaller portions freeze and thaw more evenly, ensuring consistent texture and flavor. If you’re planning to use grated cheese, consider freezing it in individual portions to make it more convenient for future use.

  1. Packaging for Protection:

Proper packaging is crucial to prevent freezer burn and maintain the quality of the cheese. Wrap each portion of cheese tightly in plastic wrap or aluminum foil, ensuring there are no exposed surfaces. Then, place the wrapped portions in resealable plastic bags or airtight containers to provide an additional layer of protection against air and moisture. This double-layered packaging will help maintain the cheese’s flavor and texture.

  1. Labeling and Dating:

To avoid confusion and ensure you use the cheese within a reasonable timeframe, it’s important to label and date each package. Clearly indicate the type of cheese and the date it was frozen. Most cheeses can be safely frozen for up to three months, but the quality may start to deteriorate after that period. Proper labeling helps you keep track of the cheese in your freezer and ensures you use it before it loses its optimal quality.

  1. Thawing Techniques:

Proper thawing is crucial to preserve the texture and flavor of the cheese. The recommended method is to thaw the cheese gradually in the refrigerator. Transfer the cheese from the freezer to the fridge and allow it to thaw slowly overnight or for a few hours. Avoid thawing cheese at room temperature or using the microwave, as rapid thawing can affect the cheese’s texture and compromise its flavor.

  1. Utilizing Thawed Cheese:

Once the cheese is thawed, it can be used in various dishes and recipes. Hard cheeses can be grated or used in cooked dishes without significant changes in texture. Soft cheeses may undergo slight textural changes after freezing, but they can still be enjoyed in cooked dishes or melted for sandwiches and sauces. Incorporating the thawed cheese into cooked recipes will help mask any minor differences in texture.

  1. Quality Control:

While freezing cheese can help extend its shelf life, it’s important to assess the quality of the cheese before and after freezing. If the cheese appears moldy, has an off smell, or shows signs of spoilage, it’s best to discard it rather than freezing it. Freezing will not improve the quality of cheese that is already compromised.

Conclusion:

Freezing cheese can be a practical solution to preserve its flavor and texture while reducing waste. By selecting the right cheeses, preparing them properly, and employing appropriate packaging and thawing techniques, you can navigate the frozen dairy dilemma with confidence. Remember to label and date your packages, and be mindful of the cheese’s quality before freezing. With these guidelines, you can enjoy the versatility of cheese, even after it has been frozen, and ensure that every cheesy creation you make is a delight.

Honey, a sweet and golden elixir produced by bees, has been revered throughout history for its delightful taste and numerous health benefits. Beyond its natural sweetness, honey harbors hidden health treasures that have captivated humankind for centuries. Packed with essential nutrients, enzymes, antioxidants, and antibacterial properties, honey is a true natural wonder. In this article, we will unlock the hidden health treasures of honey and delve into its remarkable benefits for our well-being.

  1. Nutrient-Rich Powerhouse:

Honey is not just a sweetener; it is a nutrient-dense food. While the exact composition of honey may vary depending on the floral source, it typically contains an array of vitamins, minerals, and beneficial enzymes. These include B vitamins, vitamin C, calcium, potassium, magnesium, and various antioxidants.

By incorporating honey into your diet, you can enjoy the nutritional benefits it offers. The vitamins and minerals found in honey contribute to overall health and well-being, supporting various bodily functions and promoting vitality.

  1. Antioxidant Superstar:

Antioxidants play a crucial role in protecting our bodies from oxidative stress and damage caused by harmful free radicals. Honey is a rich source of antioxidants, including phenolic compounds and flavonoids. These powerful antioxidants help neutralize free radicals, reducing the risk of chronic diseases, such as heart disease, cancer, and neurodegenerative disorders.

The antioxidant content of honey varies depending on its floral source, with darker varieties often having higher levels of antioxidants. Embracing honey as part of a balanced diet can provide a natural and delicious way to boost your antioxidant intake and enhance your overall health.

  1. Natural Antibacterial Properties:

Honey possesses natural antibacterial properties that have been recognized for centuries. These properties are attributed to its low water content, high sugar concentration, and the enzyme glucose oxidase, which produces hydrogen peroxide. These factors create an inhospitable environment for bacteria and other microorganisms.

Studies have shown that honey can inhibit the growth of various bacteria, including antibiotic-resistant strains. Honey has been used as a natural remedy for wound healing, as it can prevent infection, reduce inflammation, and promote tissue regeneration. Applying honey topically to minor cuts, burns, or wounds can accelerate healing and provide a protective barrier.

  1. Soothing and Calming Effects:

Honey’s soothing properties extend beyond its taste. It has been traditionally used to calm coughs, soothe sore throats, and alleviate discomfort associated with respiratory infections. Its thick consistency forms a protective coating in the throat, providing relief from irritation and reducing coughing.

Moreover, honey’s natural sugars can stimulate the release of serotonin, a neurotransmitter that promotes relaxation and a sense of well-being. Adding a spoonful of honey to a warm cup of herbal tea before bed can create a calming effect, helping you unwind and improve sleep quality.

  1. Digestive Aid and Gut Health:

Honey has been valued for its digestive benefits for centuries. It contains enzymes that aid in the digestion of carbohydrates, promoting better nutrient absorption. Honey also acts as a prebiotic, nourishing beneficial gut bacteria and supporting a healthy gut microbiome.

Consuming honey in moderation can help soothe digestive discomfort, alleviate constipation, and support overall digestive health. However, it is important to note that honey should not be given to infants under the age of one year due to the risk of botulism.

Conclusion:

Honey, a natural wonder with hidden health treasures, offers more than just sweetness. Its nutrient-rich composition, antioxidant properties, antibacterial effects, soothing capabilities, and digestive benefits make it a valuable addition to a healthy lifestyle.

When selecting honey, opt for raw, unprocessed varieties to ensure maximum retention of its beneficial compounds. Whether enjoyed as a natural sweetener, incorporated into recipes, or used as a healing remedy, honey unlocks a world of health treasures that can enhance your well-being.

Embrace the hidden powers of honey and indulge in its remarkable benefits, all while savoring the rich history and natural wonders of this extraordinary gift from nature.