Introduction:

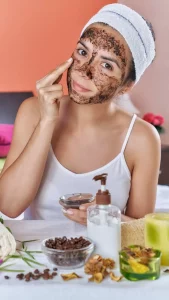
Hello, beauty enthusiasts! Are you ready to unlock the secrets of a radiant complexion using ingredients straight from your kitchen? I’m Suk Chai, a dedicated lifestyle enthusiast, and today we’re diving into the world of DIY brown sugar scrubs. These scrubs not only exfoliate but also nourish, leaving your skin with a healthy glow. Let’s embark on this delightful journey from your kitchen to a personal home spa.

The Sweet Magic of Brown Sugar: Nature’s Exfoliator

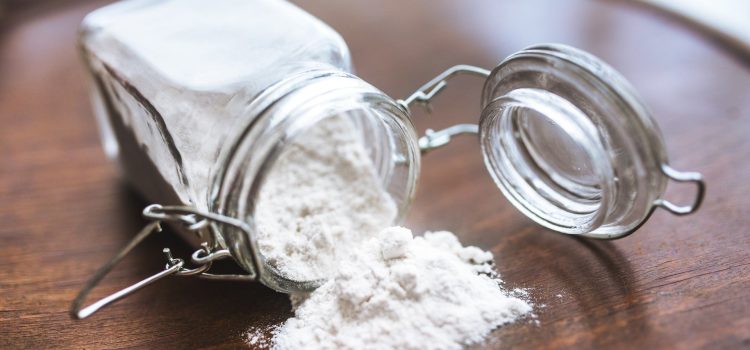
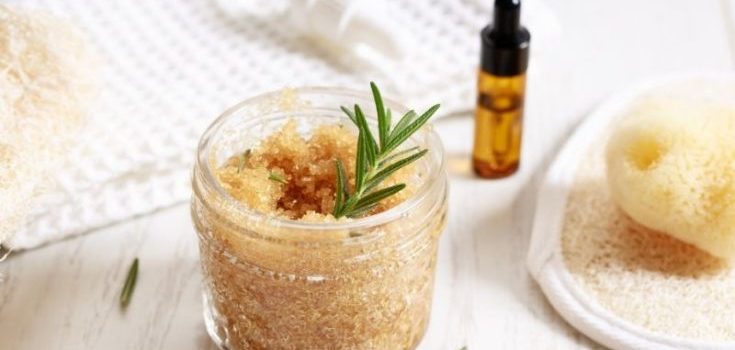
Brown sugar, a kitchen staple, is more than just a sweetener. Its fine particles make it a gentle exfoliator for the skin. Brown sugar granules, being smaller than that of regular sugar, make it ideal for sensitive skin. When used in skincare, it helps remove dead skin cells, dirt, and impurities from the skin’s surface. This unclogs pores, allowing your skin to breathe and absorb subsequent products better.

Not only does brown sugar exfoliate, but it also has natural humectant properties, keeping your skin moisturized by drawing moisture from the environment into your skin. This dual-action of exfoliation and hydration makes brown sugar a fantastic base for DIY scrubs.

Face Masks
Image by: https://www.idiva.com/ampstories/beauty/skincare/best-homemade-diy-coffee-face-packs-to-get-bright-skin-this-summer/18057814

Lemon and Brown Sugar Scrub: Citrus Fresh Glow

Lemon, a natural brightening agent, is packed with Vitamin C and citric acid. These properties can help lighten dark spots, even out skin tone, and rejuvenate dull skin. When combined with brown sugar, it forms a powerful scrub that exfoliates and brightens simultaneously.

Recipe:

  • Ingredients:
    • 2 tablespoons brown sugar
    • Juice of half a lemon
  • Method:
    1. Mix the brown sugar and lemon juice in a bowl to create a paste.
    2. Gently apply the mixture to your face in a circular motion, avoiding the eye area.
    3. Let it sit for 10-15 minutes to allow the lemon’s citric acid to work its magic.
    4. Rinse off with lukewarm water and pat dry.

Honey and Brown Sugar Scrub: The Hydrating Duo

Honey is a natural humectant and emollient, making it an excellent ingredient to retain moisture in the skin. It’s also rich in antioxidants, providing your skin with a healthy glow and slowing down the aging process. Combining honey with brown sugar creates a hydrating scrub that revitalizes dry skin.

Recipe:

  • Ingredients:
    • 2 tablespoons brown sugar
    • 1 tablespoon honey
  • Method:
    1. Mix the brown sugar and honey in a bowl to form a thick paste.
    2. Apply the mixture to your face and neck, gently massaging in a circular motion for about 3-5 minutes.
    3. Leave the scrub on for another 5 minutes to let your skin absorb the goodness of honey.
    4. Rinse off with warm water and pat dry.
Brown Sugar Scrubs
Image by: https://sarahblooms.com/basic-diy-sugar-scrubs/

Coconut Oil and Brown Sugar Scrub: Tropical Treat for Your Skin

Coconut oil is a versatile natural moisturizer. Its medium-chain fatty acids help retain the skin’s moisture content and provide a natural glow. When combined with brown sugar, it creates a tropical delight that exfoliates and moisturizes, leaving your skin supple and glowing.

Recipe:

  • Ingredients:
    • 2 tablespoons brown sugar
    • 1 tablespoon coconut oil
  • Method:
    1. Mix the brown sugar and coconut oil in a bowl to form a grainy paste.
    2. Apply the mixture to your face and body, gently massaging in circular motions for 3-5 minutes.
    3. Let it sit for an additional 5 minutes to allow your skin to absorb the coconut oil.
    4. Rinse off with lukewarm water and pat dry.

Green Tea and Brown Sugar Scrub: Antioxidant Bliss

Green tea is a powerhouse of antioxidants, known for its anti-aging properties. It also helps reduce inflammation and soothe the skin. Combining green tea with brown sugar creates a scrub that not only exfoliates but also provides your skin with a dose of antioxidant goodness.

Recipe:

  • Ingredients:
    • 2 tablespoons brown sugar
    • 1 tablespoon brewed green tea (cooled)
  • Method:
    1. Mix the brown sugar and brewed green tea in a bowl to create a paste.
    2. Apply the mixture to your face, gently scrubbing in circular motions for about 3-5 minutes.
    3. Let it sit for an additional 5 minutes to allow your skin to absorb the antioxidants.
    4. Rinse off with cold water to close your pores and pat dry.

Suk Chai’s Favorite DIY Brown Sugar Scrubs: Your Path to Radiance

To enhance your skincare journey, I’ve handpicked my favorite DIY brown sugar scrub recipes. These scrubs not only leave your skin glowing but also offer a therapeutic and rejuvenating experience. Let’s dive into these delightful concoctions.

  1. Minty Brown Sugar Scrub:
    • Ingredients:
      • 2 tablespoons brown sugar
      • 1 tablespoon olive oil
      • A few fresh mint leaves (finely chopped)
    • Method:
      1. Mix the brown sugar, olive oil, and chopped mint leaves in a bowl to form a grainy paste.
      2. Apply the mixture to your face and body, gently massaging in circular motions for 3-5 minutes.
      3. Rinse off with cold water and pat dry.
  2. Cinnamon Spice Brown Sugar Scrub:
    • Ingredients:
      • 2 tablespoons brown sugar
      • 1 tablespoon almond oil
      • 1/2 teaspoon ground cinnamon
    • Method:
      1. Mix the brown sugar, almond oil, and ground cinnamon in a bowl to create a paste.
      2. Apply the mixture to your face, gently scrubbing in circular motions for about 3-5 minutes.
      3. Rinse off with lukewarm water and pat dry.

DIY Brown Sugar Scrubs: A Comparative Guide

Here’s a handy comparison of the DIY brown sugar scrubs we’ve explored, showcasing their unique features and benefits.

Brown Sugar Scrub Key Ingredients Key Benefits
Lemon Scrub Brown sugar, lemon Brightens, exfoliates, and provides a fresh glow
Honey Scrub Brown sugar, honey Hydrates, rejuvenates, and moisturizes the skin
Coconut Oil Scrub Brown sugar, coconut oil Moisturizes, nourishes, and leaves skin glowing
Green Tea Scrub Brown sugar, green tea Antioxidant-rich, exfoliates, and provides a youthful glow

Elevate your skincare routine with these delightful DIY brown sugar scrubs, transforming your home into a personal spa experience.

Introduction:

Greetings, beauty enthusiasts! Tired of pesky facial hair and looking for a gentle solution to whisk it away? You’re in the right place. I’m Suk Chai, a dedicated lifestyle enthusiast, and I’m here to guide you through a journey of natural ingredients that can help in reducing facial hair. Let’s explore these nature-derived solutions that not only bring you closer to smooth skin but do it gently and effectively.

1. Turmeric: The Golden Elixir for Facial Hair Woes

Turmeric, often termed the “Golden Spice,” has a wide array of benefits. Discover how this magical spice can inhibit facial hair growth and provide a natural, glowing complexion. Uncover simple methods to incorporate turmeric into your beauty routine.

Radiant Skin
Image by: https://www.herzindagi.com/beauty/must-have-beauty-products-for-women-under-40-for-glowing-youthful-skin-article-152370

2. Papaya: Nature’s Gentle Exfoliator

Papaya, a tropical fruit rich in enzymes, can be your ally in facial hair reduction. Delve into the enzymatic powers of papaya that help weaken hair follicles, making them finer over time. Learn to prepare DIY masks that harness the goodness of this fruit.

3. Spearmint Tea: Sipping Away Unwanted Hair

Would you believe that a cup of spearmint tea can aid in reducing unwanted facial hair? Explore how this refreshing tea can regulate hormones that contribute to excess hair growth. Embrace this natural remedy as a part of your daily routine.

4. Gram Flour: The Time-Tested Secret

Gram flour, also known as besan, is a staple in many skincare routines. Delve into how gram flour, when combined with other natural ingredients, can act as an effective exfoliator and facial hair reducer. Learn to create your personalized gram flour masks.

Hair Reduction
Image by: https://www.scarymommy.com/i-sprouted-a-she-beard

5. Sugar: The Sweet Route to Smooth Skin

Discover the age-old method of sugaring, a natural alternative to traditional waxing. Learn how this simple concoction of sugar, water, and lemon juice can help remove facial hair with minimal discomfort and leave your skin smooth and hair-free.

6. Suk Chai’s Top Picks: Your Natural Hair Reduction Allies

To simplify your journey to smoother skin, I’ve carefully selected my top natural products and ingredients for facial hair reduction. These picks are not only effective but also gentle on your skin, ensuring a smooth and comfortable experience.

Natural Hair Reduction: A Comparative Guide

Here’s a helpful comparison of the natural ingredients we’ve explored, showcasing their unique features and benefits.

Natural Ingredient Key Features Benefits
Turmeric Inhibits hair growth Provides a natural glow to the skin
Papaya Weakens hair follicles Gentle exfoliation for a smooth complexion
Spearmint Tea Regulates hormone levels Slows down unwanted hair growth
Gram Flour Acts as an exfoliator Helps reduce facial hair growth
Sugar Natural waxing alternative Removes hair with minimal discomfort

Unveil the power of nature and embrace smooth skin with these effective and gentle natural ingredients for facial hair reduction.

Introduction:

Hello, gentlemen! As the winter chill sets in, it’s essential to adapt your skincare routine to ensure your complexion remains smooth and suave. I’m Britta Plug, a dedicated beauty enthusiast and expert, here to guide you through five winter skincare tips tailored to the modern gentleman. Embrace the winter season with confidence, knowing your skin is well taken care of.

1. Master the Gentle Cleanse: A Gentleman’s First Step

The foundation of a great skincare routine begins with a gentle cleanse. Learn the art of effective yet mild cleansing, ensuring your face is free from impurities without stripping it of essential moisture. A proper cleanse lays the groundwork for a flawless complexion.

Healthy Skin
Image by: https://manofmany.com/lifestyle/grooming/complete-guide-to-the-best-mens-skincare-routine

2. Hydrate, Hydrate, Hydrate: The Elixir of Winter Skincare

Hydration is key, especially during the colder months. Discover how to choose the right moisturizer that caters to your skin type, providing the much-needed hydration to combat dryness and maintain a smooth, supple complexion. Keep your skin moisturized and protected against the winter elements.

3. Sunscreen: Not Just a Summer Essential

Even in winter, the sun’s rays can cause damage. Understand the importance of incorporating sunscreen into your skincare routine. Learn about non-greasy, SPF-infused moisturizers that shield your skin from harmful UV rays while keeping it nourished and smooth.

4. Lip Care: Winter’s Unsung Hero

Don’t overlook your lips, a crucial yet often forgotten part of skincare. Delve into the world of lip balms and discover how they can protect your lips from the harsh winter winds, ensuring they stay smooth and chap-free throughout the season.

5. Exfoliation: Refining Your Complexion

Gentlemen, exfoliation is the secret to a polished look. Learn how to incorporate gentle exfoliation into your routine to remove dead skin cells and reveal a fresh, rejuvenated complexion. Refine your skin’s texture for a smooth, youthful finish.

6. Britta Plug’s Top Product Picks: Your Winter Skincare Arsenal

To simplify your winter skincare regimen, our expert, Britta Plug, has curated a selection of top skincare products tailored for gentlemen. These products have been chosen for their quality and effectiveness, ensuring your journey to a smooth complexion is hassle-free and enjoyable.

Winter Skincare Tips: A Comparative Guide

Here’s a handy comparison of the winter skincare tips we’ve explored, showcasing their unique features and benefits.

Skincare Tip Key Features Benefits
Gentle Cleanse Mild yet effective cleansing Removes impurities without drying the skin
Hydration Moisturizes and keeps skin supple Prevents dryness and maintains a healthy glow
Sunscreen Provides SPF protection Guards against sun damage, even in winter
Lip Care Prevents chapping and dryness Keeps lips smooth and comfortable
Exfoliation Removes dead skin cells and unclogs pores Promotes a refined and rejuvenated complexion

Elevate your winter skincare routine and maintain a suave, smooth complexion all season long with these essential tips tailored for the modern gentleman.

Introduction:

Greetings, fellow skincare enthusiasts! Today, we embark on a natural beauty expedition exploring the age-old secrets nature holds for maintaining a youthful complexion. I’m Britta Plug, a dedicated beauty enthusiast and expert, here to unveil the time-defying properties of herbs. Join me as we uncover the incredible potential these natural wonders possess to help you achieve a radiant and youthful glow.

Herbs: Nature’s Treasure Trove of Youth

Herbs have been revered throughout history for their various healing and beautifying properties. Their potential to slow down the aging process and rejuvenate the skin makes them an indispensable component of natural skincare. Let’s begin our journey by understanding why these age-old herbs are the ultimate time-defiers.

2. The Power of Antioxidants: Nature’s Shield Against Aging

Antioxidants are crucial in the fight against premature aging. Discover how herbs are abundant in antioxidants that combat free radicals, protecting your skin from oxidative stress and promoting a youthful complexion.

Magic of Herbs
Image by: https://explore.globalhealing.com/top-5-herbs-anti-aging-benefits/

3. Collagen Boosters: Herbs for Firm and Supple Skin

Collagen, the building block of youthful skin, tends to deplete with age. Dive into the world of herbs that stimulate collagen production, helping your skin maintain its elasticity and firmness as you age.

4. Hydration Heroes: Herbs for Moisture-Rich Skin

Proper hydration is fundamental for youthful skin. Explore the herbs that are excellent hydrators, locking in moisture and preventing dryness, leaving your skin plump, smooth, and glowing.

5. Anti-Inflammatory Wonders: Calming the Aging Storm

Inflammation can accelerate the aging process. Learn about herbs with potent anti-inflammatory properties that calm the skin, reducing redness, irritation, and signs of aging.

6. DIY Herbal Infusions: Crafting Your Youth Elixir

Delve into the world of DIY herbal infusions and concoct your own skincare potions. Discover easy recipes and techniques to harness the age-defying potential of herbs for a personalized skincare routine.

7. Britta Plug’s Top Herbal Picks: Your Youth-Preserving Allies

To kickstart your journey into the realm of herbal skincare, our expert, Britta Plug, recommends her top herbal products. These have been thoughtfully selected for their quality and effectiveness, ensuring you commence your path to a youthful complexion with the best in hand.

Herbal Time-Defiers: A Comparative Guide

Here’s a handy comparison of the various herbs we’ve explored, showcasing their unique anti-aging properties and benefits.

Herb Key Features Benefits
Rosemary Rich in antioxidants Promotes youthful, glowing skin
Ginseng Stimulates collagen production Improves skin elasticity and firmness
Aloe Vera Excellent hydrator Nourishes and moisturizes the skin
Chamomile Anti-inflammatory properties Calms skin and reduces redness

Unleash the anti-aging magic of herbs and embrace a youthful, radiant complexion with these natural time-defiers.

Introduction:

Hello, beauty enthusiasts! Today, we’re unraveling the beauty magic concealed within a common kitchen ingredient: baking soda. I’m Britta Plug, a dedicated beauty enthusiast and expert, here to guide you through the marvelous world of baking soda and its transformative effects on your skin. Let’s explore how this humble yet potent elixir can elevate your skincare routine to a whole new level.

1. The Versatile Charm of Baking Soda: An Overview

Let’s commence our baking soda journey by understanding its versatility. Baking soda, or sodium bicarbonate, is a household staple known for its myriad uses, including baking and cleaning. However, its benefits extend beyond the kitchen. We’ll explore how this affordable and accessible ingredient can work wonders for your skin.

Radiant Skin
Image by: https://www.herzindagi.com/beauty/must-have-beauty-products-for-women-under-40-for-glowing-youthful-skin-article-152370

2. A Gentle Exfoliant: Baking Soda’s Role in Skin Renewal

Exfoliation is a crucial step in any skincare routine, and baking soda excels in this domain. Discover how baking soda’s fine particles provide a gentle exfoliation, sloughing off dead skin cells and promoting a rejuvenated, glowing complexion.

3. Balancing Act: Baking Soda for pH Harmony

Maintaining the skin’s pH balance is essential for healthy skin. Baking soda, with its neutral pH, can help regulate your skin’s acidic levels, promoting balance and reducing issues like acne and excessive oiliness.

4. Acne Annihilator: Baking Soda’s Fight Against Pimples

Bid farewell to those pesky pimples! Baking soda possesses anti-inflammatory and antiseptic properties that can combat acne and breakouts. Dive into strategies on how to effectively use baking soda to manage acne.

5. Baking Soda Masks: Recipes for a Radiant Glow

Get hands-on with baking soda by crafting DIY masks. Learn easy, at-home recipes that harness the benefits of baking soda, catering to various skin concerns. From oily skin to dullness, we’ve got a mask for everyone.

6. Bid Odor Adieu: Baking Soda’s Deodorizing Effect

Beyond skincare, baking soda works as a natural deodorant. Explore how it neutralizes odors effectively, making it an excellent and safe alternative to commercial deodorants.

7. Britta Plug’s Top Baking Soda Picks: Your Skincare Essentials

To kickstart your baking soda beauty journey, our expert Britta Plug recommends her top baking soda-based skincare products. These products have been handpicked for their quality and effectiveness, ensuring a seamless introduction to the wonders of baking soda.

Baking Soda Beauty Hacks: A Comparative Guide

Here’s a handy comparison of the various baking soda beauty hacks we’ve explored, showcasing their unique features and benefits.

Baking Soda Hack Key Features Benefits
Exfoliating Scrub Gentle exfoliation Removes dead skin cells, revealing fresh skin
pH Balancer Regulates skin’s pH levels Maintains a healthy skin pH for a clear complexion
Acne Treatment Anti-inflammatory and antiseptic properties Fights acne and reduces inflammation
DIY Face Masks Customizable with natural ingredients Addresses diverse skin concerns
Natural Deodorizer Neutralizes odors Acts as an alternative to commercial deodorants

Embrace the magic of baking soda and revolutionize your skincare routine with these versatile and powerful beauty hacks.

Introduction:

Greetings skincare enthusiasts! Are you ready to elevate your skincare game and achieve a radiant complexion? Join Britta Plug, a passionate beauty enthusiast and expert, as we delve into the world of clay masks. Clay masks are versatile, powerful tools that can enhance your skincare routine in many ways. Let’s explore the benefits and various types of clay masks to help you make the most of your skincare regimen.

1. Unveiling the Power of Clay Masks: What Sets Them Apart?

Clay masks have been cherished in the realm of skincare for centuries, owing to their remarkable benefits. They stand out due to their ability to detoxify, cleanse, and nourish the skin simultaneously. The magic lies in the diverse types of clay, each offering unique properties that cater to various skin concerns.

Clays like Bentonite are renowned for their deep cleansing and detoxifying abilities, making them ideal for oily or acne-prone skin. On the other hand, Kaolin clay, being gentle and mild, suits sensitive and dry skin, purifying without causing irritation. Rhassoul clay is mineral-rich and moisturizing, enhancing skin clarity and elasticity. French Green clay specializes in absorbing excess oil and tightening pores, leaving the skin revitalized.

Photo by Shiny Diamond: https://www.pexels.com/photo/woman-with-clay-mask-on-face-3762642/

2. Tailoring Clay Masks to Your Skin Type: A Personalized Approach

One of the beauties of clay masks is their versatility and ability to cater to different skin types. Understanding your skin type is the cornerstone of selecting the perfect clay mask for your skin’s unique needs. If you have oily or acne-prone skin, opt for Bentonite or French Green clay. Those with sensitive skin should embrace the gentle touch of Kaolin clay. For a mineral-rich indulgence, Rhassoul clay is the go-to, suitable for a range of skin types.

3. Detoxifying and Purifying: The Core Benefits of Clay Masks

Clay masks are celebrated for their detoxifying properties. They work like magnets, attracting impurities and excess oils from the skin, leaving it clean and refreshed. The natural minerals in clay penetrate the skin, stimulating blood circulation and promoting a healthy, youthful glow. These masks are particularly effective in unclogging pores and preventing acne, making them a must-have in any skincare arsenal.

4. Nourishment and Hydration: Clay Masks Beyond Detox

Contrary to the misconception that clay masks only strip the skin of impurities, they can also nourish and hydrate. Many clay masks contain additional ingredients like botanical extracts and essential oils that replenish the skin with vital nutrients. As the clay cleanses, these components penetrate, providing hydration and leaving the skin supple and rejuvenated. It’s a complete skincare package in one little jar.

5. Multimasking: Tailoring Your Mask for Targeted Results

One of the innovative trends in skincare involving clay masks is multimasking. This technique involves applying different types of clay masks to specific areas of your face based on your skin’s needs. For instance, you might use Bentonite clay on your T-zone to combat excess oil, while applying Kaolin clay on your cheeks for a gentle cleanse. Multimasking ensures that each area of your face receives specialized treatment, resulting in a more effective and tailored skincare routine.

6. DIY Clay Masks: Crafting Your Own Skincare Magic

Why not take control of your skincare routine by creating your clay mask at home? DIY clay masks are easy to make and allow you to personalize your skincare experience. Common ingredients like honey, yogurt, aloe vera, and essential oils can be mixed with your chosen clay to address specific concerns. Whether you want to brighten, tighten, or soothe your skin, a DIY clay mask gives you the freedom to cater to your skin’s unique needs.

7. Britta Plug’s Top Picks: Curated Clay Masks for Your Skincare Arsenal

To assist you in your clay play journey, our expert, Britta Plug, has curated a list of her top clay mask picks. These masks have been handpicked for their quality, effectiveness, and ability to cater to various skin types and concerns. Trust Britta’s expertise to guide you in choosing the perfect clay mask to enhance your skincare routine.

In conclusion, clay masks are true skincare powerhouses that can transform your complexion. From detoxification and purifying to nourishing and hydrating, clay masks offer a range of benefits that are essential for achieving healthy and radiant skin. Tailor your mask to your skin type, experiment with multimasking, or even indulge in a DIY clay mask – the options are abundant. Embrace the magic of clay and unlock a glowing, revitalized complexion.

Introduction:

Greetings beauty enthusiasts! Welcome to an exciting journey through the transformative world of Korean beauty. Britta Plug, an avid beauty enthusiast and expert, is here to unveil six game-changing hacks that can revolutionize your skincare regimen. Prepare to discover the magic of K-beauty and unlock the secrets to radiant, glowing skin.

1. The Essence of K-Beauty: Understanding the Basics

Embark on our journey by understanding the fundamental principles that govern Korean beauty. Discover the significance of a meticulous skincare routine and how it lays the foundation for achieving that coveted K-beauty glow.

2. Double Cleansing: The Key to a Fresh Start

Uncover the first hack of Korean beauty – the double cleansing method. Delve into the specifics of this technique and understand how it can help you achieve a thorough and effective cleanse, leaving your skin refreshed and rejuvenated.

Korean Beauty Secrets
Image by: https://sensient-beauty.com/insights/innovative-skincare-trends-why-the-k-beauty-wave-is-still-going-strong/

3. The Magic of Sheet Masks: A Pampering Treat

Sheet masks are a quintessential part of Korean skincare. Learn how these magical masks can provide intense hydration and address various skin concerns, all while offering a relaxing and indulgent experience.

4. Embrace the 10-Step Routine: Tailored Skincare for Optimal Results

Explore the famous 10-step skincare routine, a hallmark of Korean beauty. Break down each step and understand its purpose, enabling you to customize a regimen that suits your unique skin type and goals.

5. K-Beauty Ingredients: Nature’s Bounty for Beautiful Skin

Dive into the world of K-beauty ingredients, from snail mucin to ginseng. Gain insights into the potent natural elements that fuel the Korean skincare revolution, and learn how they can elevate your skincare routine.

6. Achieving the Coveted Glass Skin: A Culmination of K-Beauty Hacks

Discover the ultimate goal of K-beauty enthusiasts – achieving “glass skin.” Understand what it means and how to use the K-beauty hacks we’ve explored to make your skin radiant, clear, and as flawless as glass.

7. Britta Plug’s Top Picks: Your K-Beauty Starter Kit

To kickstart your K-beauty journey, our expert Britta Plug recommends her top product picks. From cleansers to serums, trust her expertise to guide you towards the right products for a radiant K-beauty transformation.

Korean Beauty Hacks: A Comparative Guide

Here’s a helpful comparison of the game-changing K-beauty hacks we’ve explored in this article, showcasing their features and benefits.

K-Beauty Hack Key Features Benefits
Double Cleansing Thorough cleansing Removes impurities effectively
Sheet Masks Deep hydration and nourishment Relaxation and improved skin texture
10-Step Routine Comprehensive skincare regimen Tailored to individual skin needs
K-Beauty Ingredients Natural, potent elements Address various skin concerns
Glass Skin Goal Radiant, flawless complexion The epitome of K-beauty perfection

Unleash the potential of your skin with these game-changing K-beauty hacks and witness a transformation that goes beyond borders.

Introduction:

Welcome to the vibrant world of nail colors, where creativity meets the season! I’m Sophy Robson, a seasoned nail artist with a passion for helping you express your style through the canvas of your nails. As winter approaches, it’s the perfect time to delve into the hues that will not only keep your fingertips warm but also elevate your style game. Join me on this nail adventure as we uncover the hottest winter nail colors and find the shades that resonate with your unique personality.

A Palette of Winter Wonders:

Winter brings a unique spectrum of shades that resonate with the season. From the classic to the bold, let’s explore the delightful colors that define winter.

Chilling Elegance: Classic Winter Nail Colors

Classic hues never go out of style. They’re timeless, sophisticated, and perfect for those who prefer an understated elegance. Shades like deep reds, rich blues, and muted grays are the epitome of timeless beauty. These colors effortlessly complement any winter outfit, making them a go-to choice for many.

Winter Nail Shades
Image by: https://www.pinterest.com/pin/802977808558935549/

Festive & Fabulous: Sparkling Winter Nail Tones

Winter is synonymous with festivities, and your nails can join the celebration too! Discover the shimmering and sparkling shades that add glamour to your winter look. Glittering golds, silvers, and iridescent shades can make a statement at any winter party. Let your nails shine bright like the winter stars!

Nature’s Whispers: Earthy Tones for Winter

Embrace the natural beauty of winter with earthy tones that mirror the season’s landscapes. From rich browns to deep greens, find the colors that echo nature’s whispers. These tones bring warmth to the chilly winter days and complement earth-toned outfits splendidly. They’re a subtle yet stylish choice for the season.

Daringly Different: Unexpected Choices for the Bold

Dare to be different this winter! Explore unconventional shades that break the norm and make a statement. Think beyond the usual winter palette and consider vibrant purples, blues, or even metallic hues. Stepping out of the ordinary can truly showcase your bold and adventurous spirit.

Nailing It Right: Tips for a Winter-Perfect Manicure

Perfecting your winter manicure is an art. Learn the tricks and techniques to achieve flawless winter nails. Start with a good base coat to protect your nails, followed by two coats of your chosen winter color. Finish off with a top coat to add shine and extend the life of your manicure. Don’t forget to moisturize your cuticles to keep them healthy and hydrated in the dry winter air.

Express Yourself: Match Your Nails with Your Winter Wardrobe

Your nails can be the perfect accessory to your winter outfits. Discover how to match your nails with your winter wardrobe and express your unique style. Coordinate your nail shades with the hues prevalent in your winter clothing. Whether it’s a pop of color or a complementary shade, let your nails enhance your overall look.

Sophy Robson’s Top Winter Nail Color Picks

As an experienced nail artist, I’ve curated a list of my favorite winter nail colors. Get ready to dazzle with these handpicked shades.

  1. Deep Burgundy: A timeless classic that exudes sophistication.
  2. Icy Silver: Perfect for capturing the winter chill and adding a touch of elegance.
  3. Forest Green: Embrace the winter landscape with this rich, earthy tone.
  4. Royal Blue: Bold and beautiful, a statement shade for the daring souls.
  5. Rose Gold Glitter: Adding a festive sparkle to your winter celebrations.
  6. Matte Black: For a chic and modern look, especially ideal for evenings.

Conclusion:

Your nails can be the perfect canvas to showcase the beauty and essence of the winter season. Whether you opt for the traditional classics, the festive sparkles, the natural earthy tones, or the daring and unexpected shades, let your nails tell a story of your style. With these winter nail color ideas and tips, you’re all set to rock the winter with fabulous, frosty fingertips. Stay stylish and embrace the hues of winter!

Visual Table for Key Points:

Heading Key Points
A Palette of Winter Wonders Explore the spectrum of winter nail colors
Chilling Elegance: Classic Winter Colors Discover timeless and elegant winter nail hues
Festive & Fabulous: Sparkling Tones Shine with festive and sparkling winter nail shades
Nature’s Whispers: Earthy Tones Embrace natural, earthy tones inspired by winter landscapes
Daringly Different: Unexpected Choices Experiment with bold and unconventional winter nail colors
Tips for a Winter-Perfect Manicure Learn techniques for achieving a flawless winter manicure
Match Nails with Your Winter Wardrobe Coordinate your nail shades with your winter fashion choices
Sophy Robson’s Top Color Picks Discover the personal favorites of expert nail artist Sophy

Comparative Table for Key Features:

Feature Classic Colors Sparkling Tones Earthy Tones Unexpected Choices
Versatility High High Moderate High
Occasion Everyday, Formal Festive, Special Occasions Everyday, Casual Bold Fashion Statements
Complementing Outfits Versatile Evening Wear Casual Wear, Neutrals Experimental Attire
Durability Long-lasting Long-lasting Long-lasting Long-lasting
Removal Ease Easy Slightly challenging Easy Varies

Introduction

Blush, the finishing touch to a makeup routine, holds the power to add a captivating glow and vitality to your complexion. However, mastering the art of applying blush flawlessly requires finesse and understanding. In this comprehensive step-by-step tutorial, we’ll guide you through the process of achieving the perfect blush application. With our guidance, you’ll unveil a natural, radiant look that beautifully accentuates your features.

Key Points Explored

1. Selecting the Right Blush Shade

The key to a perfectly applied blush starts with choosing the right shade that complements your skin tone and desired makeup look. Different shades work for various skin tones, so understanding what suits you is crucial.

2. Preparing Your Canvas

Before you apply blush, it’s essential to prepare your skin with the right base makeup. A well-prepared canvas ensures a smooth and even application of blush, allowing it to blend seamlessly with your skin.

3. Applying Blush: Techniques and Tools

Discover the different techniques and tools available for applying blush. Whether it’s brushes or your fingertips, each tool offers a unique approach to achieving the desired blush effect.

4. Blending and Layering

Master the art of blending and layering blush to achieve a seamless, natural finish that enhances your features. Blending is the key to a flawless application, ensuring the blush integrates harmoniously with your makeup.

Applied Blush
Image by: https://www.bebeautiful.in/all-things-makeup/everyday/how-to-prevent-splotchy-blush

Selecting the Right Blush Shade

The first step to achieving a perfectly applied blush is selecting the right shade based on your skin tone. Different skin tones complement various blush hues, enhancing the natural radiance of your complexion.

Visual Table: Blush Shades for Different Skin Tones

Skin Tone Recommended Blush Shades
Fair Soft pinks, light peach tones
Light Rose, peach, light coral
Medium Warm pinks, peachy tones
Olive Warm shades of coral, terracotta
Deep Deep plums, vibrant oranges
  • Fair Skin: Opt for soft pinks or light peach tones to add a subtle flush of color.
  • Light Skin: Shades like rose, peach, or light coral work wonders to enhance your complexion.
  • Medium Skin: Warm pinks and peachy tones add a natural, healthy glow to your cheeks.
  • Olive Skin: Embrace warm shades of coral and terracotta for a vibrant and flattering blush.
  • Deep Skin: Deep plums and vibrant oranges complement your skin beautifully, providing a striking blush effect.

Preparing Your Canvas

Before applying blush, it’s vital to prepare your skin to ensure a flawless application. Follow these pre-application steps to achieve a smooth, even base:

  1. Cleanse and Moisturize: Start with a clean, well-moisturized face to provide a hydrated base for your makeup.
  2. Apply Primer: Use a makeup primer to create a smooth surface for makeup application, ensuring your blush stays in place throughout the day.
  3. Foundation and Concealer: Apply your foundation and concealer to even out your skin tone and cover any blemishes or imperfections.
  4. Set with Powder: Lightly set your face with a translucent setting powder to help your blush blend seamlessly.

Applying Blush: Techniques and Tools

Brush Application

Using a makeup brush for applying blush provides a precise and even distribution of color. Here’s how to use a brush for blush application:

  1. Pick the Right Brush: Choose a medium-sized, fluffy brush with soft bristles for a natural finish.
  2. Dip and Tap: Swirl your brush in the blush, tap off excess, and start at the apples of your cheeks.
  3. Blend Outwards: Blend the blush gently towards your hairline in a sweeping, upward motion.

Fingertip Application

Applying blush with your fingertips gives a natural, blended appearance. Here’s how to apply blush using your fingertips:

  1. Use Your Ring Finger: Gently dab your ring finger into the blush.
  2. Apply to Cheeks: Smile and apply the blush to the apples of your cheeks using a light tapping motion.
  3. Blend: Use a tapping or light circular motion to blend the blush seamlessly into your skin.

Layering Technique

Layering blush involves applying blush in multiple layers to achieve the desired intensity. Here’s how to layer blush effectively:

  1. Start Light: Begin with a small amount of blush and gradually build up the color to your liking.
  2. Blend Between Layers: Blend each layer well before applying the next to avoid a patchy appearance.
  3. Assess and Adjust: After each layer, assess the color and intensity, adjusting as needed for your desired look.

Blending and Layering

Blending is the key to a flawlessly applied blush. Whether you use a brush or your fingertips, blending ensures the blush integrates seamlessly with your makeup, creating a natural, radiant look.

Conclusion

With this step-by-step tutorial, you are now equipped to achieve the perfect blush application that enhances your beauty and leaves you with a natural, radiant complexion. Remember, makeup is an art, and mastering the techniques takes practice and experimentation. Embrace the beauty of blush, play with shades, and enjoy the transformation it brings to your makeup routine. Here’s to blushing brilliance and the radiant glow it adds to your every look!

Introduction

Smooth, irritation-free shaving is the epitome of a refined grooming routine. However, for many, razor bumps and irritation are all too common, leading to discomfort and frustration. In this guide, we’ll unveil expert tips and techniques to combat razor bumps effectively. Say goodbye to post-shave irritation and embrace a smoother, more enjoyable shaving experience.

Key Points Explored

1. Understanding Razor Bumps

Gain insights into what razor bumps are, why they occur, and how different skin types can experience varying levels of irritation.

2. Pre-Shave Preparations

Discover the essential steps to prepare your skin before shaving, ensuring a smoother experience and minimizing razor bumps.

Razor Bumps
Image by: https://www.lovelyskin.com/blog/p/foolproof-guide-to-shaving-in-winter

3. Choosing the Right Razor and Shaving Cream

Learn how the type of razor and shaving cream can make a significant difference in preventing razor bumps.

4. Shaving Techniques for a Bump-Free Shave

Master the art of shaving with techniques that reduce the risk of razor bumps and irritation.

Visual Table: Types of Razors

Razor Type Description Ideal for
Safety Razor Single blade, low irritation Sensitive skin
Cartridge Razor Multiple blades for a close shave Thick or coarse hair
Straight Razor Single blade, precise control Experienced shavers
Electric Razor Motor-powered blades, convenient Quick, daily shaving

Comparative Table: Shaving Creams

Shaving Cream Type Key Features Ideal for
Foam Quick lather, easy application Time-saving shaves
Gel Moisturizing, good visibility Sensitive skin
Cream Rich lather, nourishing Hydration during shaving

Conclusion

Mastering the art of shaving involves not only perfecting your technique but also understanding the needs of your skin. By embracing the tips and techniques shared in this guide, you can bid farewell to troublesome razor bumps and welcome a smoother, more enjoyable shaving routine. Remember, a refined grooming routine is a step towards confidence and a positive start to your day. Happy shaving!