Whitehead Warfare: Tactics for a Blemish-Free Complexion

By Rosemary Gladstar, Skin Care Specialist

Are you tired of waging a never-ending battle against whiteheads and longing for a complexion that radiates health and beauty? Look no further. In this article, I, Rosemary Gladstar, a seasoned Skin Care Specialist, am here to guide you through the art of achieving a blemish-free lifestyle. With years of experience in the field, I understand the struggles you face and am excited to share my expert strategies with you.

Understanding the Whitehead Dilemma

Before we embark on our journey to a clearer complexion, let’s understand the enemy. Whiteheads, those pesky, small, raised bumps, can wreak havoc on your skin and confidence. They occur when oil, dead skin cells, and bacteria clog your pores. So, it’s crucial to get to the root of the problem.

skincare
Image By stockgiu

The Core Aspects of Whitehead Prevention

Let’s delve into the core aspects of our mission: preventing whiteheads and achieving a blemish-free complexion. Here are the key strategies:

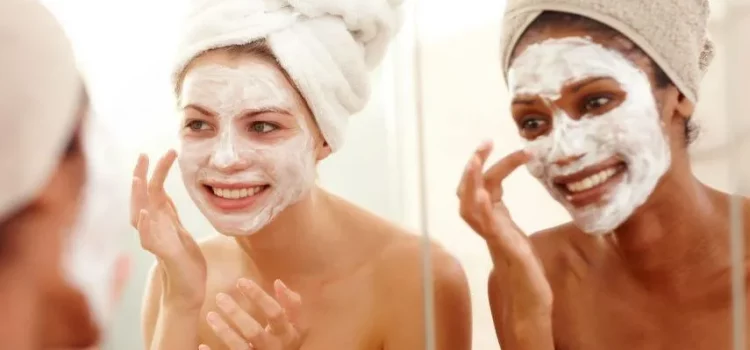
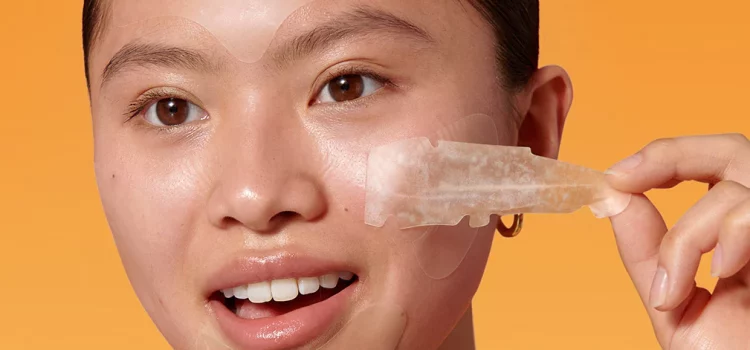
1. Gentle Cleansing and Exfoliation

  • Cleanse: Using a gentle, sulfate-free cleanser to remove dirt and impurities is the first step.
  • Exfoliate: Regular, mild exfoliation can prevent dead skin cell build-up.

2. Hydration is Key

  • Moisturize: A hydrating, non-comedogenic moisturizer keeps your skin balanced and healthy.
  • Drink Water: Staying hydrated from within is equally important.

3. Targeted Treatments

  • Salicylic Acid: A proven ingredient for whitehead treatment and prevention.
  • Spot Treatments: Apply a spot treatment containing benzoyl peroxide or tea tree oil.

4. Healthy Diet

  • Limit Dairy and Sugar: These can exacerbate whitehead formation.
  • Incorporate Antioxidants: Fruits and veggies promote healthy skin.

5. Hands Off!

  • Avoid Picking: Touching whiteheads can lead to infection and scarring.

Rosemary’s Blemish-Free Lifestyle Plan

Here’s a step-by-step plan to implement these strategies effectively:

Step Details
Morning Routine Cleanse, moisturize, and apply sunscreen.
Evening Routine Double cleanse, exfoliate (2-3 times a week), moisturize, and apply treatment.
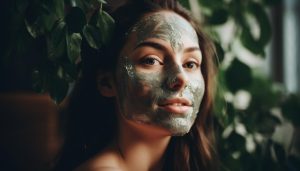
Weekly Deep cleanse, apply a face mask, and avoid makeup.
Monthly Treat yourself to a professional facial.

A Comparison of Whitehead Prevention Products

Before you embark on your blemish-free journey, let’s compare some essential products you can incorporate into your skincare routine:

Product Key Features Benefits
Salicylic Acid Serum Exfoliates and unclogs pores, reducing whiteheads. Clears blemishes and prevents future breakouts.
Non-comedogenic Moisturizer Hydrates without clogging pores. Keeps your skin balanced and moisturized.
Spot Treatment Contains benzoyl peroxide or tea tree oil to target whiteheads. Speeds up healing and reduces inflammation.

By selecting products that suit your skin type and concerns, you can tailor your routine for the best results.

In Conclusion

Your journey to a blemish-free complexion begins with understanding the enemy, adopting essential prevention strategies, and following a personalized skincare routine. With dedication and patience, you can conquer whiteheads and reveal your skin’s natural radiance. Remember, consistency is key on this path to a healthier, happier you.

As a lifestyle enthusiast, I encourage you to embrace these tactics and make them a part of your daily life. Your complexion will thank you, and you’ll step into a world of renewed self-confidence.

Introduction:

Greetings, skincare aficionados! I am David Winston, a seasoned Registered Herbalist with a passion for holistic living and skincare. Today, I’m excited to share a Japanese beauty secret – the Japanese Rice Mask. This DIY mask can do wonders for your skin, leaving it refreshed, revitalized, and with a radiant glow. Join me on this journey as we unravel the mysteries of this potent face mask and unlock the door to a luminous complexion.

Discovering the Beauty Secrets of Japanese Skincare:

Japan is renowned for its centuries-old skincare rituals, often attributed to their clear, youthful complexion. Let’s explore the principles behind Japanese skincare and understand why it’s highly sought after.

Japanese skincare embraces simplicity and a deep-rooted connection to nature. It emphasizes a gentle approach, focusing on prevention rather than correction. Central to this approach is maintaining a well-hydrated, balanced skin barrier. Traditional practices like double cleansing, ample hydration, and protection from sun damage are key components of the Japanese skincare routine. The essence of Japanese skincare lies in respecting the skin’s natural balance and harnessing the benefits of natural ingredients.

Photo by ROMAN ODINTSOV: https://www.pexels.com/photo/woman-looking-in-mirror-applying-face-mask-5912194/

Unveiling the Benefits of Japanese Rice for Your Skin:

Rice, a staple in Japanese cuisine, isn’t just a dietary delight. It’s a powerhouse for your skin too. Let’s unveil the benefits of Japanese rice and how it can promote a radiant complexion.

1. Brightens the Skin:

  • Rice flour helps to brighten the skin and reduce dark spots, giving you a more even complexion.

2. Smoothens and Exfoliates:

  • The gentle texture of rice flour acts as a natural exfoliator, sloughing off dead skin cells and leaving your skin smoother.

3. Anti-Aging Properties:

  • Rice is rich in antioxidants, which help combat free radicals and slow down the aging process, keeping your skin youthful.

4. Hydration and Moisturization:

  • Rice flour has moisturizing properties that keep your skin hydrated and soft.

Essential Ingredients and Their Skin-Enhancing Properties:

Before we dive into the recipe, let’s acquaint ourselves with the core ingredients and how they contribute to the efficacy of the Japanese Rice Mask. Each element has unique properties that synergize to deliver beautiful, glowing skin.

1. Rice Flour:

  • Benefits: Brightens, smoothens, and evens out the skin tone.
  • Usage: Acts as a gentle exfoliator, revealing fresh skin.

2. Honey:

  • Benefits: Moisturizes, reduces inflammation, and promotes healing.
  • Usage: Provides hydration and soothes the skin.

Crafting Your Japanese Rice Mask: A Recipe for Radiance:

Embark on a journey to create your Japanese Rice Mask, a simple yet effective concoction that harnesses the power of natural ingredients. Let’s explore the steps and create a skin-revitalizing mask.

Ingredients:

  • 2 tablespoons Rice Flour
  • 1 tablespoon Honey

Steps:

  1. Mixing the Ingredients:
    • In a bowl, mix 2 tablespoons of rice flour with 1 tablespoon of honey to create a paste.
    • Stir well until a smooth consistency is achieved.
  2. Applying the Mask:
    • Cleanse your face and pat dry.
    • Apply the mask evenly, avoiding the eye area.
  3. Leave it On:
    • Let the mask sit for about 20 minutes until it dries.
  4. Rinse and Cleanse:
    • Gently rinse off the mask using warm water.
    • Pat your face dry and follow up with your regular moisturizer.

Application and Incorporation into Your Skincare Routine:

Knowing how to apply and incorporate the Japanese Rice Mask into your skincare routine is crucial for achieving the best results. We’ll discuss the proper application techniques and offer tips on how to maximize the benefits of this revitalizing mask.

Usage Frequency: Apply this mask once a week to maintain a radiant complexion.

Additional Tip: Use a toner after rinsing off the mask to close your pores and complete your skincare routine.

Comparative Table: DIY Masks for Glowing Skin:

Mask Name Key Ingredients Application Method Benefits
Japanese Rice Mask Rice flour, Honey Weekly application Brightens, smoothens, and rejuvenates the complexion
Honey and Oatmeal Mask Honey, Oatmeal Weekly application Moisturizes, exfoliates, and promotes a healthy glow

Visual Table: Key Ingredients and Their Benefits:

Key Ingredients Benefits
Rice Flour Brightens, smoothens, and evens out the skin tone
Honey Moisturizes, reduces inflammation, and promotes healing
Oatmeal Exfoliates, soothes, and provides a natural glow to the skin

In the upcoming sections, we will delve into the details of each aspect, providing comprehensive information, step-by-step guides, and tips for crafting and using the Japanese Rice Mask. Prepare to elevate your skincare routine and unveil a radiant complexion that speaks of the beauty in simplicity.

Turmeric Tactics: A Guide to Avoid Face-Care Missteps

By David Winston, Registered Herbalist (AHG)

Turmeric, a golden-hued spice and ancient healing herb, has gained immense popularity in the world of skincare. However, while this natural marvel has a plethora of benefits, it’s crucial to navigate the realm of turmeric with care and knowledge. Join me, David Winston, a Registered Herbalist with the American Herbalists Guild (AHG), as we explore the art of using turmeric for a radiant complexion and how to sidestep common face-care missteps.

The Turmeric Treasure Trove: Nature’s Golden Gift

Turmeric, scientifically known as Curcuma longa, is hailed for its anti-inflammatory, antioxidant, and antimicrobial properties. This multifaceted herb can work wonders for the skin when used appropriately.

Benefits
Image by: https://pressmaverick.com/

Turmeric’s Skin Benefits

Benefit Description
Anti-Inflammatory Reduces redness and skin inflammation
Brightening Evens out skin tone and imparts a natural glow
Antimicrobial Fights acne-causing bacteria and promotes clarity

Dos and Don’ts of Turmeric in Skincare

To reap the benefits of turmeric without facing common skincare pitfalls, follow these guidelines:

Dos

  1. Patch Test First: Always perform a patch test to ensure you don’t have an allergic reaction or sensitivity to turmeric.
  2. Use Moderately: Turmeric is potent; a little goes a long way. Start with a small amount and adjust as needed.
  3. Pair with Other Ingredients: Combine turmeric with gentle ingredients like honey, yogurt, or aloe vera to enhance its effects and mitigate any potential irritation.

Don’ts

  1. Excessive Application: Avoid using too much turmeric, as it may stain the skin and cause a yellow tint.
  2. Leave on for Prolonged Periods: Don’t leave turmeric masks on for extended periods to prevent potential skin staining.
  3. Not Suitable for All Skin Types: Turmeric may be too strong for sensitive or dry skin. Exercise caution and consult a skincare professional if in doubt.

Turmeric-Infused Skincare Routine

Incorporate turmeric into your skincare routine with these simple yet effective steps:

  1. Turmeric Face Mask: Mix turmeric with honey and yogurt for a rejuvenating face mask to brighten and soothe the skin.
  2. Turmeric Scrub: Create a gentle exfoliating scrub using turmeric, rice flour, and milk to reveal a radiant complexion.
  3. Turmeric Infused Oil: Blend turmeric with a carrier oil like coconut oil to make a nourishing oil for massages or moisturizing.

Navigate Turmeric Wisely for a Radiant Complexion

Turmeric can be a game-changer for your skincare routine when used correctly. By understanding the do’s and don’ts and incorporating it into your face-care regimen, you can harness the power of this golden spice to achieve a glowing and even complexion.

For personalized skincare advice and turmeric-based recipes, consult with a registered herbalist or skincare expert. Embrace turmeric’s benefits, avoid common missteps, and let your radiant skin reflect the beauty of this natural wonder.

Introduction:

Hello, hair care enthusiasts! I am David Winston, a seasoned Registered Herbalist with a profound love for holistic living. Today, I’m delighted to share a natural solution to a common concern – hair fall and lackluster locks. Let’s delve into creating a DIY Hair Elixir that not only helps prevent hair fall but also brings out the natural shine in your beautiful tresses. Join me on this journey to nourish your locks and embrace a mane that reflects your vibrant, healthy lifestyle.

Understanding Hair Health: The Foundations of a Gorgeous Mane:

Before we explore the creation of a hair elixir, let’s understand what makes our hair beautiful and healthy. Hair health is influenced by various factors, including diet, hydration, and the products we use. By nourishing our hair from within, we can achieve lasting results and maintain luscious locks.

Your hair’s health is a reflection of your overall well-being. A balanced diet rich in vitamins, minerals, and proteins is essential. Proper hydration, regular exercise, and minimizing stress play vital roles in maintaining a vibrant mane. Additionally, the products we use on our hair can significantly impact its health. Opting for natural, nourishing ingredients is a step toward a healthier, more beautiful mane.

Hair Brushing
Image by: https://www.glam.com/1079144/brush-fine-hair-without-leaving-it-flat/

Key Ingredients for the Hair Elixir and Their Benefits:

Let’s acquaint ourselves with the essential ingredients that make up this hair elixir. Each ingredient brings unique benefits to the table, synergizing to provide a holistic solution to hair fall and dullness.

  1. Aloe Vera:
    • Benefits: Hydrates the scalp, reduces dandruff, and promotes hair growth.
    • Usage: Strengthens hair, adds natural shine, and helps prevent hair fall.
  2. Coconut Oil:
    • Benefits: Conditions, strengthens, and adds a natural shine to the hair.
    • Usage: Provides moisture, reduces hair breakage, and improves hair texture.

Crafting Your Hair Elixir: A Recipe for Vibrant Hair:

Embark on the journey of creating your hair elixir using natural, easy-to-find ingredients. This elixir is a blend of carefully selected elements that work together to strengthen your hair, reduce hair fall, and add a natural shine.

Ingredients:

  • 2 tablespoons Aloe Vera Gel
  • 1 tablespoon Coconut Oil

Steps:

  1. Mixing the Ingredients:
    • In a bowl, combine the Aloe Vera Gel and Coconut Oil.
    • Mix thoroughly until you achieve a smooth, consistent blend.
  2. Applying the Elixir:
    • Section your hair and apply the elixir from the roots to the tips.
    • Massage gently into the scalp for better absorption.
  3. Leave it On:
    • Leave the elixir on for at least 30 minutes to an hour for maximum benefits.
  4. Rinse and Cleanse:
    • Wash your hair with a gentle shampoo to remove the elixir.
    • Let your hair air dry or use a towel to pat dry.

Incorporating the Elixir into Your Routine:

Consistency is key in achieving the desired results. We’ll discuss how to seamlessly incorporate the hair elixir into your daily hair care routine to maximize its benefits and promote a healthier mane.

Usage Frequency: Apply this elixir once or twice a week, depending on your hair’s needs. Regular application will yield optimal results.

Additional Tip: Consider using a wide-tooth comb to evenly distribute the elixir through your hair for better absorption.

Additional Tips for Healthy, Lustrous Hair:

Nourishing your hair goes beyond elixirs. We’ll provide additional tips on maintaining hair health, including a balanced diet, proper hydration, and stress management. Holistic care translates to a vibrant, gorgeous mane.

  1. Balanced Diet:
    • Ensure your diet is rich in vitamins, minerals, and proteins essential for hair health.
    • Include leafy greens, nuts, fish, and eggs for a well-rounded nutritional boost.
  2. Hydration:
    • Drink plenty of water to keep your scalp and hair well-hydrated.
    • Hydration is vital for healthy hair growth and overall well-being.
  3. Stress Management:

Comparative Table: DIY Hair Elixirs for Healthy Hair:

Elixir Name Key Ingredients Application Method Benefits
Nourish & Shine Elixir Aloe vera, Coconut oil Weekly application Strengthens, adds shine, and reduces hair fall
Revitalize & Grow Elixir Castor oil, Rosemary EO Daily massage Promotes growth, nourishes, and prevents breakage

Visual Table: Key Ingredients and Their Benefits:

Key Ingredients Benefits
Aloe Vera Hydrates the scalp, reduces dandruff, and promotes hair growth
Coconut Oil Conditions, strengthens, and adds a natural shine to the hair
Castor Oil Nourishes hair follicles, stimulates growth, and prevents breakage
Rosemary Essential Oil Improves circulation, encourages hair growth, and reduces dandruff

In the upcoming sections, we will delve into the details of each aspect, providing comprehensive information, step-by-step guides, and tips for crafting and using the DIY Hair Elixir. Get ready to embrace a radiant, healthy mane that truly represents the beauty of a holistic lifestyle.

Aloe Alchemy: DIY Organic Aloe Vera Elixir in Your Kitchen

By David Winston, Registered Herbalist (AHG)

Uncover the secrets of aloe vera, the succulent with extraordinary healing properties. Are you ready to transform your kitchen into an alchemist’s workshop and concoct a revitalizing aloe vera elixir? Join me, David Winston, a Registered Herbalist with the American Herbalists Guild (AHG), as we delve into the world of aloe alchemy and create a DIY organic aloe vera elixir for a natural lifestyle boost.

The Aloe Vera Miracle: Nature’s Healing Gel

Aloe vera, also known as the “plant of immortality,” has been revered for centuries for its remarkable healing properties. From soothing skin irritations to aiding digestion, aloe vera is a versatile plant that offers a myriad of benefits.

Kitchen Remedies
Image by: https://m.indiamart.com/proddetail/natural-aloe-vera-gel-20485482173.html

Aloe Vera Benefits at a Glance

Benefit Description
Skin Healing Calms and rejuvenates the skin
Digestive Aid Supports a healthy digestive system
Anti-Inflammatory Reduces inflammation and soothes discomfort

Crafting Your Aloe Vera Elixir

Creating an organic aloe vera elixir is simpler than you think. Follow these steps to harness the power of aloe vera in the comfort of your kitchen:

  1. Harvest Fresh Aloe Vera: Obtain a healthy aloe vera leaf and carefully extract the gel from within.
  2. Prepare the Gel: Blend the aloe vera gel with a splash of water to achieve a smooth, consistent texture.
  3. Enhance the Elixir: Customize your elixir by adding natural ingredients like lemon, honey, or a hint of mint for flavor and added benefits.

Integrating Aloe Vera into Your Lifestyle

Incorporate this rejuvenating aloe vera elixir into your daily routine and witness its transformative effects:

Morning Boost

Kickstart your day with a shot of aloe vera elixir to promote digestion and boost your energy levels naturally.

Skin Nourishment

Apply a thin layer of aloe vera gel to your face and body for hydrated, radiant skin. Aloe vera can also soothe minor burns and skin irritations.

Internal Healing

Incorporate aloe vera elixir into your wellness routine to support a healthy digestive system and reduce inflammation.

Begin Your Aloe Alchemy Journey

Embrace the wonders of aloe vera and let its magic infuse into your daily life. With a few simple steps and the guidance provided here, you can concoct your very own organic aloe vera elixir, elevating your natural lifestyle.

For personalized advice and more aloe vera recipes, consult with a registered herbalist or wellness expert. The power of aloe vera is within your reach—start your aloe alchemy journey today, and witness the transformative effects of this remarkable plant.

Unlock Radiant Skin: Vaseline and Egg Face Mask Revealed

Introduction:

Greetings, fellow skincare enthusiasts! I am David Winston, a seasoned Registered Herbalist with a passion for holistic living and skincare. Today, I’m thrilled to share an age-old beauty secret – the Vaseline and Egg Face Mask. This DIY mask can work wonders for your skin, leaving it refreshed, revitalized, and glowing. Join me on this journey as we unravel the mysteries of this potent face mask and unlock the door to radiant skin.

The Magic of Vaseline and Egg: A Brief Overview:

Before we delve into the details of crafting this incredible face mask, let’s understand why Vaseline and egg are a dynamic duo for your skin. These humble ingredients, when combined, create a nourishing and rejuvenating mask that can help you achieve the radiant complexion you desire.

Vaseline, known for its powerful moisturizing properties, acts as a hydrating base for the mask, locking in moisture and promoting a dewy glow. Eggs, on the other hand, are rich in proteins and vitamins that can tighten pores, improve skin elasticity, and leave your face looking rejuvenated.

Fuller Lips
Image by: https://ediblebeautyaustralia.com/blogs/skincare/8-tips-for-naturally-pink-and-plump-lips

Understanding Your Skin: Why This Mask Works:

To appreciate the effectiveness of the Vaseline and Egg Face Mask, let’s explore how these ingredients cater to various skin types and concerns.

  1. For Dry Skin: The Vaseline in this mask provides deep moisturization, alleviating dryness and flakiness, resulting in a more supple and hydrated complexion.
  2. For Mature Skin: Eggs are packed with protein and collagen, helping to diminish fine lines and improve skin elasticity, giving a more youthful appearance.
  3. For Oily/Combination Skin: Contrary to concerns, using Vaseline on the skin in controlled amounts can provide adequate moisture without making the skin excessively oily.

Essential Ingredients and Benefits:

Let’s break down the core ingredients – Vaseline and egg – and understand the unique benefits they bring to this face mask.

  1. Vaseline:
    • Benefits: Deep moisturization, creating a protective barrier to lock in hydration.
    • Usage: Hydrates the skin, reduces fine lines, and leaves a youthful glow.
  2. Egg:
    • Benefits: Rich in proteins and vitamins, tightens pores, and improves skin elasticity.
    • Usage: Firms the skin, nourishes, and promotes a rejuvenated complexion.

How to Prepare and Apply the Vaseline and Egg Face Mask:

Creating this mask is a straightforward process, and the application is even easier. Here’s a step-by-step guide to preparing and applying the Vaseline and Egg Face Mask:

Ingredients:

  • 1 tablespoon Vaseline
  • 1 egg

Steps:

  1. Separate Egg White and Yolk: Crack the egg and separate the egg white from the yolk.
  2. Mix with Vaseline: In a bowl, mix the egg white with 1 tablespoon of Vaseline until well combined.
  3. Apply Evenly: Cleanse your face and pat dry. Apply the mixture evenly to your face, avoiding the eyes and mouth.
  4. Leave it on: Let the mask sit for 15-20 minutes until it dries.
  5. Rinse Off: Gently rinse off with lukewarm water and pat your face dry with a clean towel.

Tips for Maximizing the Benefits:

Apart from the application process, there are additional tips and tricks that can elevate the effectiveness of this face mask.

  1. Patch Test: Before applying the mask, do a patch test to ensure you’re not allergic to any ingredients.
  2. Consistency is Key: For best results, use this mask once a week to maintain healthy, glowing skin.
  3. Follow with Moisturizer: After using the mask, apply a lightweight moisturizer to lock in the benefits.

Comparative Table: DIY Face Masks for Glowing Skin:

Face Mask Name Key Ingredients Application Method Benefits
Vaseline & Egg Face Mask Vaseline, Egg Weekly application Hydration, tightening, and a youthful complexion
Honey & Yogurt Face Mask Honey, Yogurt Weekly application Soothing, brightening, and acne-fighting

Visual Table: Key Benefits of Vaseline and Egg Face Mask:

Key Benefits
Deep moisturization for a radiant complexion
Pore tightening and reduction of fine lines
Nourishment for a healthier, rejuvenated skin
Enhanced elasticity and a more youthful appearance

In the sections that follow, we will delve deeper into each aspect, providing comprehensive insights, step-by-step guides, and tips for crafting and using the Vaseline and Egg Face Mask. Prepare to elevate your skincare routine and embrace the natural beauty that awaits you!

Youth in a Cup: Start Every Day with the Ultimate Age-Reversing Brew

By David Winston, Registered Herbalist (AHG)

Are you seeking the elixir of youth, a daily ritual to revitalize your body and mind? Look no further than the art of crafting a special age-reversing brew. In this article, I, David Winston, a Registered Herbalist with the American Herbalists Guild (AHG), will reveal the secrets to infusing youth into your daily routine by starting each day with a cup of this magical elixir.

The Age-Reversing Elixir: A Blend of Nature’s Best

Brewing a youth-enhancing potion involves combining carefully selected herbs and spices, each renowned for their age-reversing properties. These natural ingredients work synergistically to promote vitality and radiance from within.

fitness
Photo by Angela Roma : https://www.pexels.com/photo/fit-black-woman-drinking-carrot-smoothie-from-straw-7479787/

Key Ingredients for Age Reversal

Ingredient Benefits
Ashwagandha Supports vitality and combats stress
Holy Basil Enhances resilience and promotes overall wellness
Turmeric Anti-inflammatory and aids in a youthful complexion

Crafting the Perfect Elixir

To create your age-reversing brew, blend the ingredients in the right proportions and steep them in hot water. Allow the brew to infuse its healing magic, then sip and savor the taste of youthfulness.

Youth-Enhancing Lifestyle Habits

Enhancing your youthfulness isn’t limited to sipping a daily brew. Incorporate these practices into your daily routine for optimal results:

Exercise Regularly

Engage in a mix of cardiovascular, strength, and flexibility exercises. Regular physical activity boosts circulation and keeps your body and mind vibrant.

Stay Hydrated

Water is life’s elixir. Keep your body hydrated to maintain youthful skin, energy levels, and overall vitality.

Mindfulness and Meditation

Practice mindfulness to reduce stress and cultivate a youthful mindset. Incorporate meditation to achieve mental clarity and focus.

Adequate Sleep

Prioritize quality sleep for cellular repair and rejuvenation. Aim for 7-9 hours of restorative rest every night.

The Youthful Journey Begins Now

Embrace the art of crafting your age-reversing brew and integrating youth-enhancing habits into your lifestyle. With dedication and the guidance of experts like myself, you can unlock the secrets to a youthful, energetic life.

Remember, the elixir of youth is within your reach, waiting to be brewed and sipped. Let every cup remind you of the journey towards a vibrant and rejuvenated you.

For personalized guidance and expert advice on your youthful living journey, consult a registered herbalist or wellness professional. Youthfulness is a choice, and it’s yours to make. Start each day with a cup of age-reversing brew and step into a life brimming with vitality and youthful exuberance.

Introduction: Meet Your Herbal Nail Guru

Allow me to introduce myself. I’m David Winston, a Registered Herbalist (RH) with the American Herbalists Guild (AHG). I’ve spent years delving into the world of herbal remedies and natural solutions to common lifestyle concerns. Today, I’m here to share my expertise in helping you unlock the secrets of stunning nail growth. Your nails are a canvas of self-expression, and with a little herbal wisdom, you can nourish and flourish. Join me in creating your very own DIY Nail Growth Elixir.

1. Understanding the Basics of Nail Health

Before we dive into crafting your DIY Nail Growth Elixir, it’s essential to understand the fundamentals of nail health. Your nails are not just pretty accessories; they’re indicators of your overall well-being. Learn what factors influence nail growth and how to spot signs of deficiency or damage.

2. Herbal Power: The Key Ingredients

Let’s explore the magic of herbs! Discover the herbal wonders that can boost nail growth and strengthen your nails. I’ll introduce you to the essential ingredients for your DIY elixir and explain how they work their miracles on your nails.

Nail Resilience
Image by: https://majesticpure.com/blogs/selfcare-wellness/how-to-get-strong-nails-and-soft-cuticles-naturally

3. DIY Nail Growth Elixir Recipe

Here’s the heart of our journey – the recipe for your DIY Nail Growth Elixir. I’ll walk you through the step-by-step process of creating this natural elixir, ensuring that you get the best results. It’s easier than you think!

DIY Nail Growth Elixir Recipe

Ingredients Purpose
Aloe Vera Gel Hydration and nail strength
Horsetail Extract Silica for nail growth
Lavender Oil Antiseptic and soothing properties
Jojoba Oil Nourishment and healthy cuticles
Vitamin E Oil Promotes circulation and nail strength
Lemon Essential Oil Nail brightening and freshness

4. Application Techniques for Optimal Results

Your elixir is ready, but how do you use it for the best results? I’ll provide you with expert techniques for applying your DIY Nail Growth Elixir. Maximize its benefits and watch your nails transform.

5. The Journey to Beautiful, Strong Nails

Embark on your journey to stunning nails with patience and care. I’ll guide you through what to expect as your nails grow and flourish. From day one to your desired results, we’ll cover it all.

6. FAQs: Your Nail Growth Queries Answered

You might have questions about nail growth, your elixir, or herbal remedies. In this section, I address some common queries to ensure you have all the information you need to nourish and flourish your nails.

In conclusion, your nails are a reflection of your well-being and personality. By crafting your own DIY Nail Growth Elixir with the herbal wisdom I’ve shared, you can unlock the secret to healthy, beautiful nails. Nourish and flourish, because your nails deserve it!

Get ready to embark on this exciting journey towards stunning nail growth. Your nails will thank you, and you’ll be proud of your beautiful, strong nails in no time.

The Art of Radiance: 5 Tips to Illuminate Your Skin Naturally

By David Winston, Registered Herbalist (AHG)

Are you ready to unveil your inner glow and achieve radiant, healthy skin naturally? In the pursuit of luminous skin, many often turn to skincare products, but there’s an art to achieving true radiance that goes beyond creams and serums. In this article, I, David Winston, a Registered Herbalist with the American Herbalists Guild (AHG), will share with you five expert tips to help you illuminate your skin naturally.

1. Nourish from Within

The path to radiant skin begins on your plate. Opt for a diet rich in fruits, vegetables, and whole grains. Foods high in antioxidants, like berries and leafy greens, help combat free radicals, the culprits behind premature aging and dull skin. Don’t forget to stay hydrated; water is your skin’s best friend.

Radiant Skin
Image by: https://beauty-report.de/special/make-up/no-makeup-makeup

2. Herbal Elixirs

Harness the power of nature with herbal elixirs. Herbs like calendula, chamomile, and lavender have been used for centuries to soothe and rejuvenate the skin. They can be applied topically or consumed as teas. Their anti-inflammatory and antioxidant properties work wonders.

Key Herbs for Skin Health

Herb Benefits
Calendula Skin soothing and healing
Chamomile Anti-inflammatory and calming
Lavender Antioxidant and skin cell rejuvenation

3. Mindful Skincare

When choosing skincare products, opt for natural and gentle options. Look for ingredients like aloe vera, shea butter, and jojoba oil. Avoid harsh chemicals that can harm your skin in the long run. Less is often more when it comes to skincare.

4. Beauty Sleep

A good night’s sleep is truly transformative. During deep sleep, your skin repairs and rejuvenates. Aim for 7-9 hours of quality rest each night. You’ll wake up with a refreshed and radiant complexion.

5. Stress Management

Stress can wreak havoc on your skin. Practice stress-reduction techniques like meditation, yoga, or deep breathing. Lowering stress levels can reduce skin issues like acne and dullness.

Radiance Boosting Techniques

Technique Benefits
Meditation Stress reduction and clarity
Yoga Improved blood circulation
Deep Breathing Calm and relaxation

In conclusion, achieving radiant skin isn’t just about external treatments. It’s an art that combines internal and external care. By nourishing your body, using herbal elixirs, selecting gentle skincare, prioritizing sleep, and managing stress, you’ll be well on your way to illuminating your skin naturally.

Remember, there’s no one-size-fits-all approach, and finding the right balance for your unique skin is key. Embrace the art of radiance, and let your inner glow shine through.

For more expert advice and personalized tips, consult with a registered herbalist or skincare specialist. Your journey to radiant skin starts here.

The Natural Pucker: 5 Techniques for Fuller Lips Without Injections

Introduction

Meet Chris Kresser, a distinguished expert in holistic health and wellness. With a passion for natural beauty, Chris shares his expertise in this article to help you achieve fuller lips without resorting to injections or artificial enhancements. Learn the secrets to enhancing your pout the natural way.

Embracing Your Lips: Understanding Your Unique Beauty

The Beauty of Natural Lips

In this section, Chris celebrates the uniqueness of every individual’s lips. He emphasizes the importance of embracing your natural features and enhancing them in a way that complements your overall beauty.

Photo by Jonaorle: https://www.pexels.com/photo/close-up-photo-of-woman-with-blonde-hair-and-pink-lipstick-3828268/

The Power of Facial Exercises

Sculpting Your Lips Naturally

Discover how facial exercises can play a significant role in enhancing the fullness of your lips. Chris provides a set of exercises that target the lip muscles, promoting blood circulation and a plumper appearance.

Lip Care: Nourishment for a Fuller Pout

Pampering Your Lips

Explore effective lip care routines that nourish and rejuvenate your lips. Chris shares tips on gentle exfoliation, hydration, and using natural ingredients to enhance the natural beauty of your lips.

Makeup Magic: The Illusion of Fuller Lips

Artistry for Enhanced Fullness

Learn makeup techniques that create the illusion of fuller lips. Chris offers guidance on lip lining, selecting the right lipstick shades, and highlighting, allowing you to accentuate your lips naturally.

A Comparative Table: Techniques for Fuller Lips

Let’s compare the discussed techniques for achieving fuller lips:

Technique Description Effectiveness
Facial Exercises Targeted exercises for lip muscles to enhance fullness naturally Moderate to High
Lip Care Routine Hydration, exfoliation, and natural nourishment for lips Low to Moderate
Makeup Techniques Lip lining, shade selection, and highlighting for illusion Immediate enhancement

Nutrition for Luscious Lips

Feeding Your Lips

Discover how proper nutrition can influence the health and appearance of your lips. Chris discusses essential vitamins and minerals that support lip health and recommends incorporating them into your diet.

A Holistic Approach: Embrace Your Natural Pout

Confidence in Your Uniqueness

Chris concludes by encouraging you to celebrate your natural beauty and embrace your unique lip shape and size. With these holistic techniques, you can achieve fuller lips in harmony with your individuality.

Enhancing your lips isn’t about conforming to a standard; it’s about celebrating your distinct beauty. Let this guide by Chris Kresser inspire you to nurture your lips naturally and adorn them with the confidence that comes from embracing who you are.