Understanding Dark Underarms

Different things like shaving, too much sweating, dead skin cells buildup, and using some deodorants can make your underarms dark. But, some natural cures and therapies can assist in making the skin in that region lighter and brighter. Knowing why it happens can assist you in picking the correct methods to brighten your underarms efficiently.

These are helpful suggestions that can help to lighten dark underarms

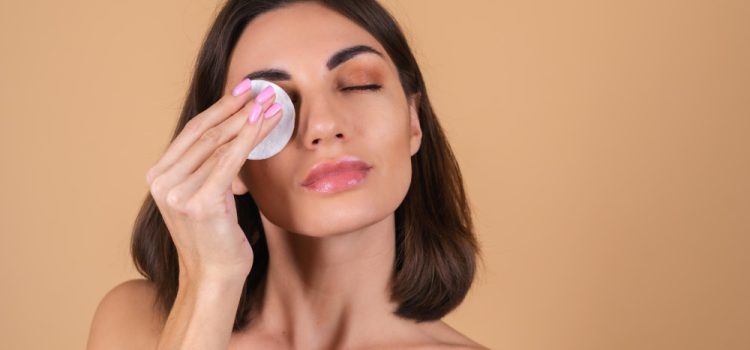
Wash your underarms often with gentle cleanser and warm water to maintain good hygiene.

Choose to remove hair in a gentler way by using waxing or depilatory cream instead of shaving. Shaving may make your underarms dark and irritated.

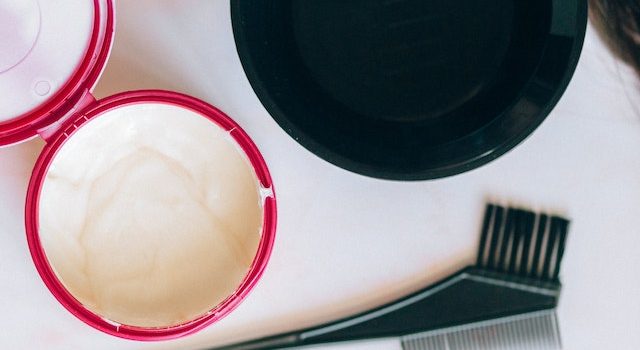
To make your underarms smoother and brighter, you should remove dead skin cells by exfoliating them regularly. Use a mild scrub or a natural exfoliant such as baking soda and water.

Keep your underarms hydrated to avoid dryness and encourage healthier skin. Pick a lotion without strong chemicals or perfumes.

Underarms
Photo by Juliano Astc: https://www.pexels.com/photo/a-beautiful-woman-wearing-white-dress-11816918/

Ways to naturally lighten dark underarms are discussed in the third heading

Lemon juice can naturally lighten dark underarms due to its bleaching properties. Put some lemon juice on your underarms and wait for 10-15 minutes before washing it away.

Rubbing potato slices on your underarms can make the skin lighter because potatoes have natural bleaching properties. Wait for 10-15 minutes after applying the potato juice and then wash it off.

Aloe vera gel can help calm and brighten your skin. Put a little bit of only aloe vera gel on your armpits and let it stay for 20 minutes, then wash it off. Then, rinse it off.

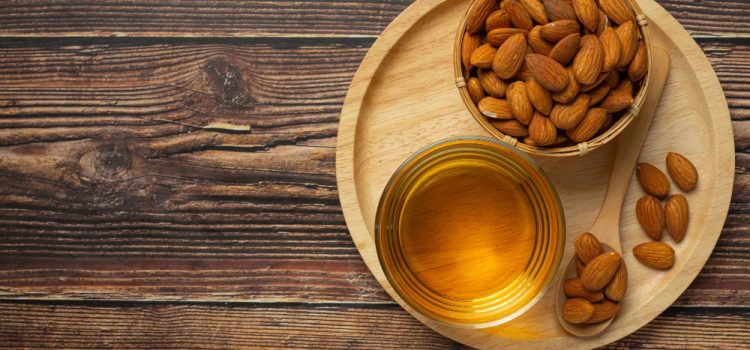
Coconut oil can moisturize and lighten dark underarms. Put a little bit of coconut oil on your underarms every day for a massage.

Conclusion:

You can make your underarms lighter and brighter by following helpful advice. To make your underarms smoother, you should practice good hygiene, choose less harsh hair removal techniques, and exfoliate often. Use things like lemon juice, potato slices, aloe vera gel, and coconut oil from nature in your skin care routine. These solutions can make dark underarms appear lighter. Say goodbye to dark underarms and get smoother, more confident underarms by using these effective strategies.

Get a fresh look this spring by embracing the latest makeup trends

It’s time to update how you do your makeup as the flowers blossom and the weather gets warmer. Let your beauty shine by embracing the spring spirit. This season is about fresh and glowing looks that show the start of new things. These 16 makeup trends are perfect for spring and include glowing skin and pops of pastel colors.

Dewy skin is important to have a youthful glow

To get a youthful and glowing appearance, concentrate on keeping your skin hydrated and prepared. To achieve a fresh and glowing look, try applying a sheer foundation or moisturizer with a light texture.

Use a shiny highlighter to make your best features stand out. Put some on your cheekbones, eyebrows, and the inside corners of your eyes to give yourself a little glow and depth.

Choose a foundation or BB cream with lighter coverage so that your natural skin texture can be seen. Put some translucent powder on it to prevent it from shining too much, but still keep a dewy look.

Include skincare items such as serums and facial oils that help make your skin look brighter in Glow Boosters. These items can provide extra moisture and brightness to your skin.

Spring Look
Photo by Victoria Strelka_ph: https://www.pexels.com/photo/woman-in-polka-dot-blue-dress-posing-under-a-fruit-tree-in-blossom-12361825/

Add a touch of gentle color with “Pastel Perfection

Try using soft colors like lilac, mint green, or baby blue to make your eyes look fresh and dreamy. Wear less eyeliner and mascara to achieve a gentle and delicate look.

You can get a natural pink or peach color on the apples of your cheeks by applying a gentle blush. Mix it thoroughly to make a gentle and young shine.

Choose gentle and light hues for your lips such as pinkish roses, coral tones, or nude peaches with a petal-like appearance. These colored glasses make you look more feminine and fresh.

Try using eyeliners in fun pastel or bright colors to make your eyes stand out and look playful. To change up the usual cat-eye look, you can either put on a thin line above your upper eyelashes or go for a daring wing.

Conclusion:

Spring is a great time to try new makeup looks that reflect starting over and feeling fresh. These 16 makeup trends can help you add some soft pastel colors and achieve a youthful glow with dewy skin, making your beauty routine more exciting. They can also assist you in achieving a new and lively appearance for the current time of year. Let your makeup show how beautiful spring is.


This article discusses how using powder puffs can improve the way you apply makeup

Using a powder puff is a helpful tool to improve your makeup skills, as makeup application is like creating art. Using powder puffs is a special method to put on and mix beauty items, giving you a perfect and smooth result. Learning how to use powder puffs can improve your makeup skills, whether you just love makeup or work as a professional artist. We can learn some helpful tips to use powder puffs for flawless makeup application.

Choose the best powder puff by thinking about some things

Choosing a powder puff involves thinking about some things. The kind of material used for the puff is significant. Choose gentle fabrics such as velour, silk, or foam without latex. Their application works really well without any bumps or glitches. It’s important that the puff is easy to hold and move on your face, so its size matters. Think about the puff’s form too. Many people like round or square puffs. In the end, pick a form that you like and lets you apply it accurately.

Powder Puff
Image by kroshka__nastya on Freepik

Learn how to apply makeup flawlessly using powder puffs with the techniques

It’s important to learn the correct methods to apply makeup perfectly using powder puffs. Begin by taking a little bit of the product using the puff and softly remove any extra by tapping. To apply powder, gently press or roll the puff onto your skin. Pay attention to the places that need attention or adjustment. To apply liquid or cream products, utilize the puff to blend and buff them onto your skin. This will make it smooth without any bumps. Make sure to put on a little bit of product at a time and add more slowly for a look that appears more like you.

Learn how to apply makeup perfectly using powder puffs with this step-by-step guide

This is how you can use powder puffs to apply makeup flawlessly, with a guide that breaks down the steps.

Get your skin ready by making sure it is clean and moisturized before putting on any makeup.

Pick the right powder or product that matches your preferred look and skin type.

To get the right amount, softly press or roll the powder puff onto the product.

Tap off excess. Tap the puff gently on your hand or the product container to remove extra product.

Put the product on your face by pressing or rolling it. Pay attention to places that need attention or arrangement.

Blend and buff. To get a smooth finish, use the puff to blend and buff liquid or cream products onto your skin.

Gradually add more product as necessary to achieve a natural appearance with increased coverage.

Keep it clean by regularly washing your powder puff to avoid product buildup and ensure it stays hygienic.

Conclusion:

Learning how to use powder puffs for makeup can make your routine better and give you perfect results. You can improve your abilities by selecting the appropriate puff, learning the methods, and adhering to a sequential manual. You can make perfect makeup styles too. Use powder puffs to get a perfect and smooth makeup look. You can become an expert in using powder puffs and make beautiful makeup styles easily by practicing and trying different methods.

Let your natural beauty shine by using soft and glowing makeup

When you get married, it’s important to feel and look like the greatest you! To get a timeless and easy bridal look, use soft and glowing makeup that makes you embrace your natural beauty. Firstly, make your skin ready by using a moisturizing primer to form an even base. Choose a not so heavy foundation or tinted moisturizer to make your skin tone even without feeling too much weight. Make your face shine and glow by putting shimmering dew on the top parts of it with a dewy highlighter.

Brides
Photo by Sasha Kim: https://www.pexels.com/photo/women-in-wedding-gowns-holding-white-roses-8484306/

Get a dreamy wedding with romantic makeup looks that showcase subtle elegance

Choose a sweet and magical wedding; pick a delicate and graceful makeup style. Select eyeshadows in light, gentle colors such as pastels. Softly combine them to make a dreamy, magical mood. Make your eyes look brighter by adding glitter to the inside corners of them. Choose a blush that looks pink like a rose and use a lipstick that looks natural in light pink or pale colors. Enhance your natural lip color. Put on mascara to make your eyelashes look pretty and fluttery.

Makeup Ideas for an Outdoor Wedding with Boho Chic style by using natural looks

Are you planning a boho chic themed wedding outdoors? Go for natural makeup. Use eyeshadow with earthy colors like cozy brown and shiny gold. Use a gel with color on your eyebrows to make them look more full and natural. Use a colored lip balm or light lipstick in a peach or skin color to keep your lips soft and natural. Put fresh flowers or a beautiful headband on your hair to make it look magical and playful.

Get inspired with simple and fancy wedding makeup ideas that look classy in Minimalist Glam theme

Choose a stylish and easy makeup style for the simple bride who likes glamour. Use a matte foundation or lightweight powder to make your skin look perfect. Use a black eyeliner to draw a thin line and apply mascara on your eyes to make them look subtle but glamorous. Wear a natural or pinkish lipstick to keep your lips simple. Put some shiny powder on your cheeks to make them glow. Remember to use it on your nose bridge as well.

Conclusion:

You can look pretty on your wedding day by trying these 11 natural makeup ideas. These ideas work for any wedding style or personal taste! These makeup looks make you look beautiful in a timeless way by enhancing your features. You can choose from soft and glowing to subtle and romantic looks that celebrate your natural beauty. These makeup ideas will make any bride feel beautiful, whether she’s having an outdoor boho chic wedding or a simple but glamorous celebration.

Introduction:

Many people can get upset because their hair falls out. Almond oil can be a game-changer to prevent hair loss naturally. People have been using almond oil for many years because it has lots of good vitamins and helps hair grow strong and not fall out. We will learn how to add almond oil to our hair routine by following simple steps in this guide. You will do great and get amazing outcomes!

Almond Oil
Image by jcomp on Freepik

Choose oil made only from almonds:

Choose the best and purest almond oil at first. Search for cold-pressed or organic choices to make sure you get the most advantageous characteristics with no extra chemicals or additives.

Massage your scalp with almond oil

Take a little bit of almond oil and make it warm in a bowl. Use your fingertips to softly rub it on your scalp. Do circular movements to make your blood go around better and wake up the hair roots. Keep the oil on your hair for 30 minutes so it can go inside the roots. Next, use a gentle shampoo to rinse it away.

Make a special mask to feed your hair with good things

You can mix almond oil and other healthy things to make your own special hair mask at home. You can make a mixture that will feed your skin by stirring almond oil, yogurt, honey or aloe vera gel together. Put the mask onto your hair. You should begin at the bottom and move up to finish. Let the conditioner stay on your hair for 1-2 hours so that it can make your hair very strong and healthy before washing it off really well.

Put almond oil in your hair and leave it there like a conditioner

When you finish washing your hair, use a little bit of almond oil on the tips and ends like a conditioner that stays in. Putting this on your hair will keep the water inside, stop it from getting messy, and defend it from harm. To stop your hair from getting too oily, don’t put almond oil straight onto your head.

Consistency is Key:

If you want to do really well, you have to keep doing it regularly. Use almond oil for your hair care two or three times every week. As time goes by, your hair will become healthier, fall less, and grow more.

Conclusion:

If you add almond oil to your hair routine, it can help stop your hair from falling out and change your look a lot! It can help hair to grow better. When we do scalp massages or put some hair masks and leave-in conditioner, we help make the most out of the good things that almond oil can do for our hair. Embrace the power of almond oil for healthier, stronger, and more beautiful hair by following these easy steps.

Eating healthy foods help our hair grow better

Your hair health and growth depend a lot on what you eat. Our hair needs some special food to grow and look nice. These foods are called “nutrients”. If you eat special foods, your hair will become beautiful without using anything else.

Hair
Photo by Andrea Piacquadio: https://www.pexels.com/photo/a-sad-woman-in-black-and-white-polka-dots-3783808/

Leafy Greens for Hair Health

Spinach, kale, and Swiss chard are great for hair growth since they have vitamins A and C. Those vitamins help our hair grow healthy! Sebum production is aided by these nutrients. Your scalp stays moisturized and hair follicles healthy thanks to the natural oil. Eat lots of green veggies to make your hair healthy from the inside.

Protein-Packed Foods for Stronger Hair

Hair is built using protein as its building block. Eating enough foods with lots of protein is very important for growing healthy hair. Eat healthy protein sources like chicken, fish, eggs and beans to stay strong. These foods help our body make keratin by giving us important building blocks called amino acids. The stuff that creates your hair strands is called protein.

Hair growth needs important vitamins and minerals

To have strong and shiny hair, we need to eat foods that have special vitamins and minerals. Almonds and avocados have vitamin E that helps the blood flow on our head. It nourishes the hair follicles. Whole grains and nuts have vitamin B that makes hair stronger and stops it from breaking easily. Oysters and pumpkin seeds have a mineral called zinc that help hair grow. Eating spinach and beans that have iron can help stop losing hair.

Healthy hair needs Omega-3 Fatty Acids

Having Omega-3 fatty acids is important to keep your head healthy and help your hair grow. Salmon and sardines are very good at giving us omega-3 fatty acids because they are fatty fish. Healthy fats make the hair roots strong, stop itchy scalp and help keep hair healthy. You can choose to eat walnuts and flaxseeds for omega-3 fatty acids if you don’t eat meat.

Foods rich in nutrients that can help your hair grow healthy

Eating certain foods can help your hair grow better and make it healthier, apart from the special nutrients we already talked about. Oranges and lemons have vitamin C which helps make collagen and makes hair strong. Beta-carotene is present in sweet potatoes and carrots. Beta-carotene turns into vitamin A when our body needs it to have a healthy scalp. Nuts and seeds have lots of good stuff like vitamins, minerals, and healthy fats. Overall hair health is helped by these.

Understanding Stretch Marks During Pregnancy

Many pregnant women worry about getting stretch marks. When the skin stretches quickly during pregnancy, they appear. The body has visible lines or streaks. You can lessen how often they happen even though they usually happen by themselves. Keep your skin healthy.

Pregnancy
Photo by Pavel Danilyuk: https://www.pexels.com/photo/an-expected-mother-rubbing-holding-her-baby-bump-7055942/

Make sure you keep your skin moist

Keeping your skin moist can help prevent stretch marks. To keep your body hydrated all day, drink lots of water from morning till night. Put some cream or oil on your belly, breasts, and other parts that could get stretch marks. Search for things that have stuff like shea butter, cocoa butter, or vitamin E inside. These things make your skin smooth and healthy because they hydrate and feed it.

Make sure to have a routine for taking care of your skin and keep doing it!

You need to have a regular skincare routine so that your skin stays healthy. It’s important to make stretch marks less visible too! Clean your skin with a mild soap. After you put on lotion or oil to make it not dry. Choose things that are made just for pregnant ladies or stuff that has things like collagen, elastin, or hyaluronic acid inside. These ingredients make your skin plumper and firmer.

Make sure to eat foods that give you lots of nutrients to stay healthy!

Eating healthy foods helps you stay strong and healthy. Your skin’s stretchiness is helped by it too. To make your body stronger, eat food with lots of vitamin C, E, and A. Also try to eat things like zinc and healthy proteins that can help make collagen. Make sure to eat lots of fruits, veggies, healthy grains, lean meats and good fats in your food. Healthy skin needs essential nutrients that are provided by this.

Do some easy exercises and stretching to keep yourself active

Doing exercise often when you are pregnant can make your blood move better and keep your skin stretchy. You can do easy and calm things like walking, swimming, or prenatal yoga to keep your body moving. Promote overall well-being. Do stretching exercises that aim at the belly and legs to prevent stretch marks. Maintaining flexibility and supporting skin health will be improved with this.

Conclusion

Experts suggest that pregnant women can’t completely avoid stretch marks, but they can make them less noticeable and keep their skin healthy by following some recommendations. Keep your skin hydrated. Make sure to take care of your skin by cleaning it every day, eating healthy foods that have lots of vitamins, and doing easy exercises and stretches. Focus on taking care of yourself and appreciate how beautiful pregnancy can be. Remember that you are doing things to help your skin during this important period.

Let’s investigate why people are arguing about sea salt spray

Many people use sea salt spray for styling their hair and it has become very famous. People love it because it can make their hair wavy like the beach. But, some people argue that it might damage hair. We want to tell you what’s true and what’s not about sea salt spray by showing that some things people say are wrong. We will show how it really affects the health of your hair.

Spray
Photo by Polina Tankilevitch: https://www.pexels.com/photo/woman-holding-a-hair-spray-7382917/

Using sea salt spray is helpful

Using sea salt spray can help your hair look better and be easier to style. You can get a beachy style by adding texture, volume and natural-looking waves to your hair. The spray’s salt soaks up extra oil. You can easily refresh your hair between washes with this convenient option. People often like to use sea salt spray because it is easy and saves time. People who want easy, messy hair often choose this style.

Problems that can happen from using Sea Salt Spray

People worry that sea salt spray could damage hair even though it has some good things about it. Salt makes hair dry. If you use too much sea salt spray for a long time without taking enough water and care, your hair can become dry and more frizzy. Additionally, chemically treated or colored hair can get harmed by the salt content. This can maybe make the color change or fade away.

How to use sea salt spray safely and keep your hair healthy


Don’t use too much ocean salt spray so your hair doesn’t get too dry. Only use it for special events or when you want a specific hairdo.

Hydration is key

Make sure you put lotion and conditioner on your hair so it doesn’t get too dry from salty sea spray. Use shampoos, conditioners, and treatments that hydrate your hair so it stays healthy and moist.

Protect color-treated hair

If you dyed or treated your hair with chemicals, be extra careful when using spray made of sea salt. Opt for color-protecting products. Talk to a hair expert to get special tips about how to keep your hair color safe when using ocean salt spray.

Protect your hair from the bad things outside by using hair oil or serum before putting on sea salt spray. Prepare and prime.

Rinse thoroughly

Make sure you wash your hair well after using sea salt spray to take off anything left behind. Salt left on hair for a long time can make it dry and harm it.

Conclusion

To sum up, sea salt spray doesn’t always damage hair as people say. Dryness and damage can be caused by using hair products too much or not taking good care of your hair. Sea salt spray is good for styling if you use it a little bit and are careful. You can keep your hair healthy and still use sea salt spray by learning what your hair needs and doing it safely.Make sure to take care of your hair in a balanced way for it to stay healthy. To keep your hair healthy and strong, use good stuff for it, like oils and creams, take care of it often, and shield it from harm.

Introduction: DIY Hair Coloring can empower you.

Are you prepared to transform your hair with a stunning new color and unleash your creativity? (Active voice, same language) Taking control of your style and expressing your unique personality is possible through DIY hair coloring. You can achieve professional-looking hair color at home with proper guidance and techniques. You will master the art of DIY hair coloring by following 11 easy steps, which are comprehensively guided.

Dye
Photo by Nataliya Vaitkevich: https://www.pexels.com/photo/hair-coloring-supplies-on-white-surface-8468141/

Choose the right hair color and shade in the first step

To embark on DIY hair coloring, you must select the appropriate hair color and shade that match your preferences and enhance your skin tone. To achieve the specific undertones you want, consider factors such as your desired level of change and natural hair color. Find the perfect match for your vision by researching various brands and product lines.

Gather the essential tools and products

Gather all the essential tools and products you’ll need to ensure a successful DIY hair coloring experience. (Active voice) You need gloves, an applicator brush or bottle, a mixing bowl, clips or foils for sectioning, a timer, and protective clothing or towels. Moreover, opt for a premium hair coloring kit that comprises the mandatory developer and colorant.

Performing a Strand Test for Color Preview

Performing a strand test to preview the color result is crucial before applying hair color all over. Apply the color mixture as instructed on a less conspicuous small section of hair. Follow the recommended processing time and keep it on. You should evaluate the color result after rinsing and drying the strand. Determining if any adjustments are necessary before proceeding with the entire application is facilitated by this step.Preparation, Application, Processing Time, Rinsing, Conditioning and Drying should be continued.

Evaluating and adjusting

Evaluate the color result after drying your hair. Congratulations if the outcome satisfies you! You have successfully become a master of DIY hair coloring. Consider seeking professional guidance if you want to make any adjustments, such as intensifying the color or correcting unevenness. (Active voice) Get tips and recommendations from experienced DIY hair colorists through consultation.

Maintain your beautiful color

You must adopt a proper maintenance routine to extend the life of your DIY hair color. Prevent fading by using shampoos and conditioners specifically formulated for colored hair that are safe for colors. Keep your color vibrant. To protect your hair from excessive sun exposure and reduce the use of heat styling, minimize it. Furthermore, keep your color looking fresh between touch-ups by using color-refreshing products or toning treatments.

Incorporate the voyage and look for motivation

Embarking on a DIY hair coloring journey fosters self-expression and creativity. Take hold of the process and fearlessly try out diverse colors and techniques. Gain inspiration from online communities, tutorials, and hair color trends. Share your success stories. Connect with DIY enthusiasts who can offer helpful tips and support.

Conclusion

Embark on your DIY hair coloring adventure with confidence by following these 11 easy steps. (Active voice, same language) You can achieve salon-worthy hair color at home by choosing the right hair color, following application and aftercare steps actively. Make sure to be patient, take your time, and relish the voyage. Happy coloring!

The hidden beauty secret found in honey

The natural world offers powerful ingredients that can have amazing benefits for our skin. One such treasure is honey. Honey has been highly valued for its skincare benefits for countless years due to its sweet taste and culinary applications. This article will examine the ways honey can revolutionize your skincare regimen. Utilizing its nutrients, revitalizing abilities, and therapeutic qualities for a luminous and vibrant skin tone.

honey
Photo by Pixabay: https://www.pexels.com/photo/blur-close-up-flowing-focus-315420/

The Skin-Benefitting Qualities of Honey

Honey serves as more than just a tasty indulgence; it possesses powerful healing properties for your skin. Honey is abundant in antioxidants, enzymes, and minerals, and it has antimicrobial and anti-inflammatory characteristics. These qualities can provide relief and promote the healing of different skin issues. Honey’s natural properties can help address a range of skin issues, including acne, blemishes, dryness, and irritation. Its unique compounds work together to promote overall skin health and restore balance.

Renew and Revitalize: How Honey Can Transform Your Skincare Regimen

Honey provides numerous advantages when it comes to revamping your skincare regimen. Firstly, it naturally attracts moisture to your skin and helps it stay hydrated, resulting in a youthful and plump appearance. In addition, honey’s exfoliating properties can effectively eliminate dead skin cells, leading to a more radiant and smoother complexion. Furthermore, the antioxidants in honey fight against harmful free radicals and safeguard against premature aging, resulting in rejuvenated and glowing skin.

Adding honey to your everyday beauty routine can provide numerous benefits for your skin and hair.

There are multiple methods to include honey in your everyday beauty routines to experience its transformative advantages. To cleanse your skin, combine raw honey with a small amount of water and gently massage the mixture onto your damp skin using circular motions. Rinse off afterwards. To create a beneficial facial mask, combine honey with ingredients such as yogurt, turmeric, or crushed fruits. This will provide a lavish treatment that targets your unique skincare concerns. To rejuvenate and hydrate your skin, mix honey with water or floral hydrosols for a refreshing toner.

Conclusion

The natural properties of honey have incredible potential to revolutionize your skincare regimen. Including it in your beauty routine will provide numerous benefits due to its healing properties, ability to rejuvenate, and nourishing effects. Discover the incredible benefits of honey for your skin and harness its transformative properties. Honey’s natural properties can enhance your skin’s appearance, leaving it looking radiant and glowing. This showcases the inherent beauty found in nature.