Introduction:

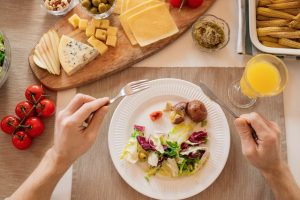
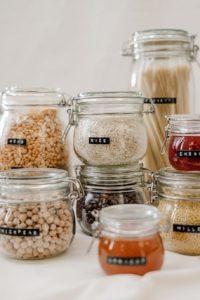
Clean eating is a philosophy that nourishes both body and soul. It transcends the realm of mere dietary choices, emphasizing the importance of whole, unprocessed foods and mindful nutrition. In the words of Deliciously Ella, “Clean eating is about embracing the vibrancy of whole foods, celebrating their natural flavors, and realizing that the path to wellness begins at your plate. “At its core, clean eating revolves around the selection of foods in their natural state, untouched by artificial additives and unnecessary chemicals. It’s a commitment to nourishing the body with the purest fuel and celebrating the vibrant, nutrient-rich offerings of nature. Deliciously Ella is not just an advocate of clean eating; she is a living embodiment of its potential. Her profound personal transformation from illness to wellness is a source of inspiration for countless individuals on a similar path.

fruits
Photo by Ioana Motoc: https://www.pexels.com/photo/breakfast-and-coffee-at-table-in-cozy-home-12815076/

Wellness Maven

we immerse ourselves in advanced clean eating techniques, let’s acquaint ourselves with the maven guiding us on this journey – Deliciously Ella. With a background marked by personal health struggles, Ella Mills embarked on a mission to reclaim her well-being through mindful nutrition. Her journey led her to discover the transformative power of clean eating. Deliciously she is a living testament to the potential of clean eating. Her personal transformation from illness to wellness is an inspiration to countless individuals on a similar path. With her bestselling cookbooks, popular blog, and thriving brand, Deliciously Ella has illuminated the path to wellness for countless others. Her insights are more than just theories; they are practical, well-tested, and rooted in a deep passion for nourishing the body.

fruits
Photo by Jane Doan: https://www.pexels.com/photo/sliced-fruits-on-tray-1132047/

Advanced Clean Eating Techniques

Our journey into clean eating doesn’t end at the basics. It’s an exploration of advanced techniques that will empower you to deepen your understanding of this lifestyle. Here’s a sneak peek at what lies ahead:

Advanced Clean Eating Techniques

Technique Description
Mindful Meal Planning Elevate your clean eating experience with comprehensive meal planning that ensures balanced, nutrient-dense meals.
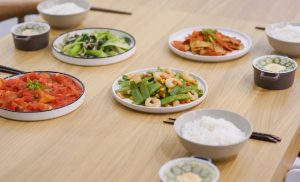
Plant-Based Power Embrace the vitality of plant-based eating and explore the multitude of options for a plant-focused lifestyle.
Mindful Eating Practices Dive into the art of mindful eating, building a healthier relationship with food, and enjoying each bite fully.
Holistic Wellness Connect the dots between clean eating, emotional well-being, and overall wellness for a balanced and fulfilling life.
Sustainability Matters Explore the intersection of clean eating and sustainability, making conscious choices for your health and the planet.

Our guide, Deliciously Ella, will illuminate these advanced techniques and provide insights that will transform the way you think about clean eating. Join us on this transformative journey to embrace a holistic approach to your well-being.

A Holistic Approach to Well-Being

Clean eating is not a static set of rules but a dynamic, evolving lifestyle. It’s an invitation to nourish your body with intention and mindfulness. The insights and techniques you’ll discover in this guide will empower you to deepen your clean eating journey and embrace a more holistic approach to your well-being. By joining us on this path to wellness, you’re choosing to transcend dietary choices and step into a vibrant, mindful, and fulfilling life. The journey awaits, and with Deliciously Ella as your guide, you’re on the brink of a transformative experience that will elevate your well-being to new heights.

Conclusion:

Our journey into the world of clean eating, guided by the wisdom of Deliciously Ella, has been nothing short of transformative. We’ve explored advanced techniques, delved into mindful meal planning, celebrated the vitality of plant-based eating, and immersed ourselves in the art of mindful eating. Along the way, we’ve also embraced a holistic approach to wellness and connected the dots between clean eating and sustainability. Clean eating isn’t just a diet; it’s a lifestyle that beckons you to transcend mere dietary choices and step into a world of vibrant well-being and mindful living. It is a path to wellness that rejoices in the vibrancy of whole, unprocessed foods and champions a healthier relationship with what’s on your plate. Ella, we have a guide who is not just a proponent of clean eating; she is a living testament to its transformative potential. Her journey from personal health struggles to remarkable wellness serves as an inspiration and a beacon of hope for countless individuals on a similar path. As we conclude this journey, remember that clean eating is not a set of rigid rules but a flexible lifestyle that adapts to your unique needs and preferences. It’s about nourishing your body with intention, embracing the vibrancy of whole foods, and celebrating your journey toward wellness.

Introduction:

In the whirlwind of modern life, breakfast often becomes an afterthought, a hurried meal amidst the morning rush, or sometimes even skipped altogether. However, the importance of breakfast should never be underestimated, as it has the power to set the tone for your entire day. In this comprehensive exploration of clean eating breakfasts, we’ll delve into the transformative potential of these morning meals and their profound impact on your overall well-being. A clean eating breakfast is more than just a nutritional necessity; it’s a deliberate choice to fuel your body and mind effectively, providing you with the energy and vitality you need to embrace the day ahead. Throughout this article, we will uncover the multifaceted advantages of embracing clean eating breakfasts, as well as delve into the art of crafting these wholesome meals. This journey will be guided by the expertise of Sarah, the founder of Breakfast Bliss Pro, who has made it her life’s mission to inspire individuals to embrace clean eating as a path to wellness. In this introduction, we’ll set the stage for our exploration by discussing the vital role breakfast plays in your daily routine, introduce you to Sarah and her dedication to clean eating, and provide a glimpse into the principles and benefits of clean eating breakfasts.

CLEAN
Photo by Alexy Almond: https://www.pexels.com/photo/salad-on-a-plate-3756525/

 Nourishing Body and Mind

To understand the essence of clean eating breakfasts, we will delve into the core principles that underpin this approach. Clean eating is not a fleeting dietary trend but a holistic lifestyle choice. It revolves around the selection of whole, unprocessed foods such as fresh fruits, vegetables, whole grains, lean proteins, and healthy fats. Minimizing processed items, prioritizing nutrient density, and ensuring adequate hydration are the pillars of clean eating. In this article, we will decode these principles and debunk common myths, making clean eating an approachable and realistic choice for individuals from all walks of life.

CLEAN
Photo by Cats Coming: https://www.pexels.com/photo/three-bowls-of-rice-and-four-vegetable-meals-on-the-table-2335683/.

  Power of Clean Eating Breakfasts

In our fast-paced world, breakfast is often viewed as a rushed affair, if not entirely skipped. However, the choices you make for your morning meal can be the cornerstone of a day filled with vitality, productivity, and overall well-being. This section explores the transformative power of clean eating breakfasts and their significance in your daily routine. A clean eating breakfast is more than just a meal; it’s a conscious decision to nourish your body and mind effectively. It serves as a crucial foundation for the day ahead. Here, we delve into why these breakfast choices matter and how they can empower you to seize each day.

  1. Nourishing the Body: A clean eating breakfast focuses on whole, unprocessed foods such as fresh fruits, vegetables, whole grains, lean proteins, and healthy fats. These nutrient-dense choices provide essential vitamins, minerals, and other vital compounds that your body needs to function optimally.
  2. Fueling the Mind: The benefits of a clean breakfast aren’t limited to the body; they extend to your mental clarity and focus. A clean meal can help you start the day with a clear mind, free from the fog often associated with processed, sugary breakfasts.
  3. Boosting Energy: Clean eating breakfasts are carefully designed to provide a steady and sustainable source of energy throughout the morning. By avoiding sugary cereals and pastries, you can prevent energy crashes and mid-morning slumps.
  4. Supporting Digestion: Processed breakfast options can often lead to digestive discomfort, including bloating and heartburn. Clean eating choices are easier on the digestive system, promoting a sense of comfort and well-being.
  5. Appetite Control: Clean eating breakfasts are known for their satiating properties. By choosing nutrient-dense foods, you can feel full and satisfied, reducing the urge for unhealthy snacks later in the day and aiding in weight management.
  6. Mood Enhancement: A nutritious breakfast can have a profound impact on your mood. Starting the day with clean and wholesome foods can lead to increased feelings of positivity, reducing irritability and mood swings.
  7. Immune Support: Nutrient-rich foods in a clean breakfast contribute to a robust immune system. This reduces the risk of illnesses and can help you maintain good health.
CLEAN
Photo by Bethany Hicks: https://www.pexels.com/photo/a-close-up-shot-of-brownies-and-a-chocolate-cupcake-14577525/

10 Exceptional Clean Eating Breakfast Recipes

Recipe Ingredients Prep Time Calories Key Benefit
Sunrise Smoothie Berries, Spinach, Almond Milk 5 min 220 Boosts Immune System
Quinoa Power Bowl Quinoa, Avocado, Egg 15 min 320 Sustained Energy
Chia Pudding Chia Seeds, Coconut Milk 10 min 180 Omega-3 Rich
Overnight Oats Rolled Oats, Greek Yogurt 5 min 250 Fiber and Probiotics
Veggie Omelette Eggs, Peppers, Spinach 10 min 300 Protein-Packed
Sweet Potato Toast Sweet Potato Slices, Nut Butter 15 min 280 Complex Carbs for Stamina
Greek Yogurt Parfait Greek Yogurt, Berries, Granola 5 min 280 Gut Health Support
Almond Butter Banana Toast Whole Wheat Bread, Almond Butter 5 min 240 Balanced Nutrients
Avocado and Egg Breakfast Avocado, Eggs, Tomato 10 min 350 Healthy Fats for Satiety
Green Breakfast Burrito Whole Wheat Tortilla, Egg, Spinach 20 min 310 Fiber and Protein Combo

Conclusion:

In the world of wellness and nutrition, the importance of breakfast cannot be overstated. It’s the foundational meal that sets the tone for the day, influencing your energy levels, mood, focus, and overall health. Clean eating breakfasts are the key to not only nourishing your body but also igniting your wellness journey. As we conclude this journey through clean eating breakfasts guided by Sarah, the founder of Breakfast Bliss Pro, it’s crucial to emphasize the profound impact these choices can have on your life. Here, we encapsulate the core messages and key takeaways from this exploration. Your Mornings Matter: Your morning rituals shape the quality of your day. Whether you’re racing against the clock or savoring a few moments of tranquility, the breakfast you choose plays a pivotal role. Clean eating breakfasts are not only about sustenance but also about nurturing yourself and ensuring that you start the day with vigor and positivity. Sarah’s Journey but a testament to the transformative power of clean eating breakfasts. Her expertise shines through her recipes, crafted with love and a deep understanding of the intricate relationship between food and well-being.10 Exceptional Recipes: Sarah’s 10 meticulously curated recipes offer a delightful and nutritious experience for your mornings. Each recipe is not only delicious but also carefully designed to cater to your specific health needs. From the immune-boosting Sunrise Smoothie to the fiber-packed Overnight Oats, there’s a breakfast option to suit every palate and requirement.

Introduction

Meet Becky Rapin Chuk, the celebrated cleaning guru with a passion for infusing zest into your kitchen cleaning routine. With a wealth of knowledge and years of experience, Becky has uncovered a treasure trove of advanced lemon cleaning tricks that will take your kitchen cleaning game to the next level. If you’re a lifestyle enthusiast looking to elevate your cleaning skills, you’re in for a treat.  we’ll explore 10 expert techniques that will not only keep your kitchen sparkling but also make the process a refreshing and eco-friendly experience. Before we dive into the lemon-fueled magic, let’s get to know the brain behind these innovative cleaning methods. Becky Rapin Chuk, also known as the “Clean Mama,” has garnered a massive following for her exceptional insights and approach to cleaning. She’s the author of several best-selling books on the subject, a trusted source for lifestyle enthusiasts worldwide, and a real advocate for environmentally friendly cleaning methods.

LEMON
Photo by Liana Horodetska: https://www.pexels.com/photo/lemons-stacked-in-transparent-glass-vase-in-gray-studio-7494448/

The Versatility of Lemons

Lemons are nature’s cleaning wonders, and Becky Rapin Chuk recognizes their potential. These vibrant yellow fruits are not only rich in vitamins but also packed with natural cleaning power. From tackling stubborn stains to deodorizing, lemons can do it all. Let’s see how you can harness their potential in your kitchen.

1. Stubborn Stains and Grease: Lemons’ natural acidity is a potent weapon against stubborn stains and grease. When combined with baking soda, it forms a dynamic duo capable of cutting through the most challenging kitchen messes. This technique not only cleans effectively but also does so in an environmentally friendly way.

2. All-Purpose Cleaning Solution: Lemon-infused vinegar is your go-to all-purpose cleaner. It can disinfect countertops, wipe away grime, and even freshen up your kitchen with its pleasant citrus scent. No need for harsh chemical cleaners when you have this natural alternative at hand.

3. Aromatic Cabinets: Ever wondered how to make your cabinets smell fresh and inviting, Lemon-scented cleaner is your answer. It leaves a delightful, invigorating aroma behind, making your kitchen feel cleaner and more welcoming.

4. Garbage Disposal Odors: Lemon juice ice cubes are a clever solution for dealing with garbage disposal odors. Not only do they eliminate unwanted scents, but they’re also convenient and long-lasting. Simply pop one into the disposal and let it work its magic.

5. Cutting Board Sanitization: Safety in the kitchen begins with clean cutting boards. Lemon and salt scrub is a gentle yet effective way to sanitize your cutting surfaces. This natural scrub will remove stains and odors while ensuring your cutting boards are safe for food preparation.

6. Reusable Air Freshener: Lemon peel air fresheners are an eco-friendly way to keep your fridge smelling pleasant. The best part? They are reusable! Just replace the lemon peels regularly for a continuous burst of citrusy freshness.

7. Microwave Stain Removal: Microwaves often fall victim to stubborn stains and splatters. Lemon comes to the rescue with its quick and hassle-free stain removal capabilities. No need for harsh chemicals or excessive scrubbing.

8. Shiny Stainless Steel: For stainless steel surfaces, lemon is the key to achieving a brilliant, streak-free shine. Say goodbye to dull and smeared steel surfaces and hello to a kitchen that glistens.

9. Deodorizing Drains: Few things are as unpleasant as foul odors from your garbage disposal. Lemon, once again, steps in as a natural deodorizer, eliminating unwanted scents and leaving your drains smelling fresh.

10. Aromatic Dish Cleaning: Lemon-infused dish soap not only cuts through grease but also leaves a delightful lemony scent on your dishes. Your post-meal clean-up will be both efficient and aromatic.

LEMON
https://i.pinimg.com/originals/0b/fa/9f/0bfa9f0a9ad6fd3b02024cf73594f7e6.jpg

KeyPoint:

Trick Problem Solved Benefits
Lemon and Baking Soda Stubborn Grease Natural, eco-friendly
Lemon-Infused Vinegar Countertop Disinfection All-purpose cleaning solution
Lemon-Scented Cleaner Freshening Cabinets Pleasant kitchen aroma
Lemon Juice Ice Cubes Garbage Disposal Odors Convenient and long-lasting
Lemon and Salt Scrub Cutting Board Sanitization Safe and effective.
Lemon Peel Air Freshener Fridge Odor Elimination Reusable and sustainable
Lemon for Microwave Easy Stain Removal Quick and hassle-free
Lemon for Stainless Steel Shine and Polish Brilliant, streak-free results
Lemon Garbage Disposal Deodorizing Drains Eliminate unpleasant odors.
Lemon-Infused Dish Soap Enhanced Dish Cleaning Grease-cutting and aromatic.

Detailed Insights

Lemon and Baking Soda: Say goodbye to stubborn grease with this natural, eco-friendly combo. Lemon-Infused Vinegar versatile, all-purpose solution for countertop disinfection and more. Lemon-Scented Cleaner: Freshen up your cabinets with an aromatic twist. Lemon Juice Ice Cubes: Convenient, long-lasting garbage disposal odor eliminators. Lemon and Salt Scrub: Safely sanitize cutting boards with this effective scrub. Lemon Peel Air Freshener: Reusable and sustainable, banish fridge odors with style. Lemon for Microwave: Quick and hassle-free stain removal. Lemon for Stainless Steel Achieve brilliant, streak-free results with a lemony shine. Lemon Garbage Disposal: Say goodbye to unpleasant drain odors. Lemon-Infused Dish Soap: Enhance dish cleaning with grease-cutting and aromatic properties.

LEMON
https://i.pinimg.com/originals/c4/d2/0d/c4d20d73b008cd39f099e38565855c0d.jpg

Conclusion:

In the world of cleaning, where innovation and eco-consciousness are of paramount importance, Becky Rapin Chuk’s lemon cleaning tricks emerge as a revelation for lifestyle enthusiasts. The 10 advanced techniques we’ve explored today have the power to transform your kitchen cleaning experience from mundane to exciting. Eco-Friendliness: Lemon cleaning is a sustainable choice. It not only cleans effectively but also minimizes your carbon footprint. Aroma and Freshness: Your kitchen will be infused with a delightful lemony fragrance that’s both invigorating and welcoming. Cost-Effective: Lemons are affordable and readily available, making them an excellent choice for your cleaning arsenal. Versatility: From disinfecting countertops to polishing stainless steel, lemons can tackle a variety of cleaning challenges. Convenience: Many of these tricks are quick, easy, and use ingredients you likely already have in your kitchen. Health and Safety: Lemon cleaning is gentle on your health, family, and the environment. By adopting Becky Rapin Chuk’s advanced lemon cleaning techniques, you’re not just maintaining a clean kitchen; you’re creating a space that’s vibrant, healthy, and sustainable.

Introduction:

In the world of strawberries and food safety, Dr. Doug Powell is a name that resonates with authority. With decades of experience and a passion for preserving the delightful flavors of strawberries, Dr. Powell is your trusted guide to mastering the art of washing these delectable fruits. In this article, we delve into the world of strawberry preservation, catering to the lifestyle and enthusiast audient people who are eager to elevate their strawberry game to a whole new level. He delicate nature of strawberries makes them especially susceptible to spoilage. Their high moisture content and delicate skin provide a welcoming environment for microbes to thrive. The challenge, then, is to find a way to clean strawberries effectively without compromising their taste, texture, or appearance.

FRUITS
Photo by Boryslav Shoot: https://www.pexels.com/photo/fruits-in-blue-ceramic-bowl-12501805/

 Strawberry Preservation

Strawberries are not just a delightful fruit; they’re a culinary masterpiece. But they’re also incredibly delicate. Understanding the science of strawberry preservation is the first step to savoring their flavor. Dr. Powell explains the basics of what makes strawberries prone to spoilage and how proper washing techniques can make all the difference. Strawberries are a rich source of vitamins and antioxidants, but they are also highly perishable. They can go from sweet and succulent to moldy and inedible in the blink of an eye. Bacteria, molds, and yeasts that are naturally present on the berries and in the environment.

 The Vinegar Soak Discover the first hack in your quest to preserve strawberry flavor. Dr. Powell introduces the vinegar soak method and explains why the acidity of vinegar can be a game-changer. Learn the step-by-step process to ensure your strawberries remain fresh and delicious.

The vinegar soak is a popular method for cleaning strawberries. It takes advantage of the natural antibacterial properties of vinegar. Here’s how you can use this technique:

  1. Ingredients: You’ll need a bowl, water, and white vinegar (or apple cider vinegar).
  2. Mix the Solution: In the bowl, create a mixture of 3 parts water and 1 part vinegar.
  3. Soak the Strawberries: Gently place your strawberries in the mixture and let them soak for a few minutes, typically about 5 minutes.
  4. Rinse and Dry: After the soak, rinse the strawberries thoroughly with clean water to remove any vinegar residue. It’s important to rinse them well to ensure no vinegar taste lingers. Finally, pat them dry with a paper towel.

This method helps remove some of the surface bacteria and molds that can lead to spoilage while preserving the strawberry’s natural taste. It’s particularly favored by those who prefer organic methods for cleaning produce.

FRUITS
Photo by PNW Production: https://www.pexels.com/photo/a-child-eating-and-father-washing-bowl-of-strawberrries-7677895/

 Saltwater Solution In this section, we dive into the saltwater solution hack. Dr. Powell unveils the secrets of this technique, exploring how saltwater can extend the shelf life of your strawberries. Find out how to apply this method for the best results.

Saltwater is another effective method for cleaning strawberries. The saltwater solution helps to kill off surface bacteria and molds. Here’s how you can use this technique:

  1. Ingredients: You’ll need a bowl, water, and salt.
  2. Create the Solution: In the bowl, mix about ½ to 1 teaspoon of salt into 4 cups of water. The solution should be salty but not overly so.
  3. Soak and Swish: Gently place your strawberries in the saltwater solution and let them soak for a few minutes. You can also gently swish them around to ensure the saltwater reaches all surfaces.
  4. Rinse and Dry: After the soak, rinse the strawberries thoroughly under clean water to remove any salt residue. Pat them dry with a paper towel.

This method is quick and easy and requires minimal ingredients. It’s especially suited for those with busy lifestyles who want an efficient way to clean their strawberries.

 Hydrogen Peroxide Rinse Ready to take your strawberry preservation skills to the next level? Dr. Powell presents the hydrogen peroxide rinse. Learn how this method can effectively kill harmful bacteria and enhance the longevity of your strawberries. Safety and flavor go hand in hand.

Hydrogen peroxide is a powerful antibacterial agent and can be used to clean strawberries effectively. Here’s how to use this method:

  1. Ingredients: You’ll need hydrogen peroxide (3% solution) and water.
  2. Prepare the Solution: Mix 1 part hydrogen peroxide with 5 parts waters. This dilutes the hydrogen peroxide to a safe level for cleaning produce.
  3. Rinse and Soak: Place your strawberries in the solution for a few minutes, ensuring they are fully submerged.
  4. Rinse and Dry: After the soak, rinse the strawberries thoroughly with clean water and pat them dry with a paper towel.

The hydrogen peroxide rinse is especially useful if you are concerned about bacteria on your strawberries, making it suitable for health-conscious individuals. It’s important to dilute the hydrogen peroxide to ensure it’s safe for consumption.

 The Gentle Spin Method Discover a unique approach to strawberry washing. Dr. Powell introduces the gentle spin method, which can help you maintain the integrity of your strawberries. Say goodbye to bruising and hello to pristine flavor.

The gentle spin method is an alternative to soaking, which can be gentler on strawberries and prevent bruising.

  1. Equipment: You’ll need a salad spinner or a large bowl with a lid.
  2. Rinse and Drain: Rinse your strawberries under cold running water, gently shaking them to remove any loose dirt or debris.
  3. Spin or Shake: Place the rinsed strawberries in a salad spinner or a lidded bowl. Spin the salad spinner or gently shake the bowl to remove excess water.
  4. Dry: Carefully remove the strawberries from the spinner or bowl and pat them dry with a paper towel.


FRUITS
Photo by Анна Романченко: https://www.pexels.com/photo/photo-of-strawberries-3186961/

Key point:

Washing Hack Key Features Best Suited For
Vinegar Soak Natural acidity, effective against mold Enthusiasts who prefer organic methods.
Saltwater Solution Quick and easy, minimal ingredients Busy lifestyles
Hydrogen Peroxide Rinse Powerful antibacterial action Health-conscious individuals
Gentle Spin Method Gentle on berries, minimal water usage Those valuing strawberry aesthetics.

 Conclusion:

In the world of strawberries, where flavor reigns supreme, the battle against spoilage is a constant one. Dr. Doug Powell, our trusted guide in the realm of food safety and strawberry preservation, has unlocked the secrets to ensure you savor the sweetness of this delectable fruit. We started by delving into the science of strawberry preservation, understanding why these delicate berries are susceptible to spoilage and how proper washing techniques can make all the difference. we explored four expert strawberry washing hacks, each with its unique advantages. The vinegar soak, known for its natural acidity and effectiveness against molds, is an excellent choice for those who prefer organic methods and want to ensure their strawberries remain fresh. The saltwater solution, quick and easy, with minimal ingredients, suits busy lifestyles perfectly. It efficiently removes surface contaminants, extending the shelf life of your strawberries. As we conclude our strawberry washing journey, remember that preserving the flavor of these luscious fruits can be both a science and an art. Dr. Doug Powell’s insights have equipped you with the knowledge and techniques needed to enjoy strawberries at their finest. Whether you’re an enthusiast or a lifestyle connoisseur, the path to strawberry perfection is now clear.

Introduction:

As a seasoned chef and culinary enthusiast, I invite you to embark on a flavorful journey to revitalize your spice cabinet this spring.  who already have a basic understanding of spices and are eager to elevate your culinary game. We’ll delve into the art of spring cleaning for your spice cabinet, unlocking the secrets to a well-organized, fragrant, and inspiring kitchen’s guide you on this flavorful journey, we’ve enlisted the expertise of a seasoned culinary expert, Nina Simonds. With a rich background in culinary arts and an extensive repertoire of cookbooks, Nina brings a wealth of knowledge to the table. Her culinary journey has taken her across diverse cuisines and flavors, and now she’s here to share her insights on the art of spring cleaning for your spice cabinet. But let’s not forget the human element. After all, it’s you, the enthusiast, who will breathe life into your spice cabinet. You’re someone who already possesses a basic understanding of spices and cooking but seeks more advanced techniques, a deeper understanding of flavors, and a more organized kitchen.

SPICE
Photo by ire rosa: https://www.pexels.com/photo/jars-with-pasta-and-oats-7476685/

 Spice Cabinet

Your spice cabinet is more than just a storage space; it’s the heart and soul of your kitchen. It’s where you craft your signature dishes, experiment with new flavors, and infuse your culinary creations with personality. To kickstart this journey, let’s understand the core aspects of a spice cabinet transformation. Before you can transform your spice cabinet, it’s essential to take stock of what you have. Start by creating a spice inventory. Here’s a simple table to help you get organized: Now, go through your spices and fill in the table. Pay close attention to the expiration dates. Any spices that are past their prime should be discarded. This initial step is crucial as it sets the stage for a well-organized spice cabinet.

SPICE
Photo by Markus Spiske: https://www.pexels.com/photo/food-in-jars-3905826/

Organize Alphabetically

Sorting Your Spices: Begin by arranging your spices in alphabetical order. This can be done on a dedicated shelf or in a designated section of your spice cabinet.

Label and Store: Ensure that each spice container is clearly labeled with its name. Using uniform containers for your spices not only keeps your cabinet looking neat but also makes it easier to find what you need.

Access and Visibility: Alphabetically arranged spices make it effortless to locate the right spice quickly. When you’re in the midst of cooking, this method simplifies the process, saving you valuable time.

Organize by Cuisine

Categorize by Cuisine: Group your spices according to the cuisine they are commonly associated with. For example, create sections for Indian, Italian, Mexican, and more. Label and Store: Similar to the alphabetical method, make sure each spice container is clearly labeled, and consider using uniform containers for a cohesive look. Enhanced Cooking Experience: This organization method enhances your cooking experience. When preparing a dish from a specific cuisine, you’ll know exactly where to find the required spices, streamlining your cooking process.

Color-Coded Organization

For those who appreciate aesthetics and want a visually pleasing spice cabinet, color-coded organization can be a great choice. This approach not only looks stylish but also provides a quick visual cue for the type of spice. Here’s how to do it: Assign Colors: Associate specific colors with different spice categories. For example, use red for hot spices, green for herbs, and yellow for mild spices. Label and Store: Along with the color-coding, make sure to label your spice containers. Transparent containers work well to showcase the colors effectively. Aesthetically Pleasing: Color-coded organization not only streamlines your spice cabinet but also adds a beautiful and harmonious aspect to your kitchen decor.

SPICE
Photo by Ruslan Kamenetsky: https://www.pexels.com/photo/close-up-photo-of-glass-jars-with-preserved-food-covered-with-grain-sack-fabric-13447632/

Frequency of Use

Organizing spices based on their frequency of use ensures that the spices you reach for most often are readily accessible. Here’s how to implement this method: Categorize Spices: Divide your spices into three categories – daily use, occasional use, and rarely used. Storage Placement: Store the spices you use daily at eye level or in the most accessible area. Occasional use spices can be placed slightly higher or lower, and rarely used spices can be stored in less accessible locations, like higher shelves or the back of the cabinet. Efficient Cooking: By placing frequently used spices within easy reach, you’ll streamline your cooking process. No more rummaging through your cabinet for the basics; they’re right at your fingertips.

Combination Approach

The combination approach allows you to harness the strengths of different organization techniques, resulting in a highly personalized and efficient spice cabinet organization system. Let’s explore some practical combinations:

1. Alphabetical within Cuisine

This combination approach is perfect for those who enjoy diverse cuisines and want a quick, logical way to find spices while staying true to specific flavor profiles.

  • Categorize by Cuisine: Group your spices into categories by the cuisine they are commonly associated with. For instance, you could have sections for Indian, Italian, Mexican, and so on.
  • Alphabetical Order: Within each cuisine category, arrange the spices alphabetically. Make sure each container is labeled with the spice’s name and cuisine category.
  • Uniform Containers: Using uniform containers maintains a neat and consistent look, even when spices are divided by cuisine.
SPICE
Photo by Ella Olsson: https://www.pexels.com/photo/six-fruit-cereals-in-clear-glass-mason-jars-on-white-surface-1640768/

 Color-Coded Frequency

Combining color-coding with the frequency of use creates an attractive spice cabinet that’s also highly functional. It’s great for those who appreciate aesthetics and want quick access to their most-used spices.

  • Assign Colors: Associate specific colors with different spice categories. For example, you could use red for hot spices, green for herbs, and yellow for mild spices.
  • Frequency of Use: Categorize your spices into daily use, occasional use, and rarely used. Apply the color-coding to all categories.
  • Storage Placement: Arrange daily use spices at eye level for immediate access, place occasional use spices slightly higher or lower, and keep rarely used spices in less accessible locations.
  • Clear Labels: Ensure that each spice container is clearly labeled with both the spice’s name and the corresponding color code.

 Seasonal Rotation

  • Alphabetical Order: Organize your spices alphabetically for easy access.
  • Label and Date: Each spice container should be clearly labeled with the spice name and the purchase date or expiration date. Using uniform containers can enhance the overall organization.
  • Spice Rotation Schedule: Develop a schedule for reviewing and rotating your spices regularly. Ground spices might need replacement every six months, while whole spices can last up to a year. Regularly check and refresh your spices according to this schedule.

Custom Hybrid

You can always create a custom hybrid approach tailored specifically to your preferences. Mix and match any combination of the methods mentioned above or come up with your own unique system. The primary aim is to design an organization method that simplifies your cooking process, maintains spice freshness, and adds a pleasing touch to your kitchen decor. The combination approach allows for the ultimate customization of your spice cabinet organization. Regardless of the method or combination you choose, a well-organized spice cabinet is the key to creating delicious, well-seasoned dishes and elevating your culinary journey.

SPICE
Photo by cotton Bro studio: https://www.pexels.com/photo/clear-glass-jars-filled-with-cereals-3737639/

 Spice Cabinet Organization

Approach Benefits Ideal for
Alphabetical within Cuisine Quick access to spices while adhering to specific flavor profiles. Enthusiasts who enjoy diverse cuisines and want logical organization.
Color-Coded Frequency A visually attractive and functional cabinet. Quick access to most-used spices. Those who appreciate aesthetics and seek quick access to frequently used spices.
Alphabetical and Seasonal Rotation Balance between quick access and spice freshness. Individuals who want frequently used spices within reach without compromising on quality.
Custom Hybrid Ultimate customization. Mix and match methods to create a system tailored to individual preferences. Anyone who wants a unique organization system that perfectly suits their needs.

 Conclusion:

The combination approach, which allows you to blend multiple organization methods, offers a highly customizable solution. Whether you opt for alphabetically within cuisine, color-coded frequency, alphabetical and seasonal rotation, or create a custom hybrid, the key is to design a system that simplifies your cooking process, maintains the freshness of your spices, and complements your personal style. A well-organized spice cabinet not only saves time but also ensures that you have easy access to the spices you need, resulting in flavorful and well-seasoned dishes. Additionally, an organized spice cabinet adds a touch of elegance and harmony to your kitchen’s decor. Remember that the best organization method is the one that works for you, aligning with your cooking habits, aesthetics, and personal preferences. the benefits of efficiently organizing your spice cabinet extend far beyond mere tidiness. It’s about elevating your culinary experience, saving time, ensuring spice freshness, personalizing your kitchen, and enhancing your cooking journey. The combination approach, which blends various organization methods, offers the flexibility to create a system that aligns perfectly with your cooking habits and preferences.

Introduction:

Erin McCarthy, a seasoned coffee connoisseur, and lifestyle expert has dedicated her life to perfecting the art of brewing the perfect cup of Joe. In this comprehensive guide, she shares her extensive knowledge on the ultimate coffee maker cleanup routine. Whether you’re a budding enthusiast or a seasoned coffee lover, Erin’s insights will elevate your coffee game to a whole new level. Meet Erin McCarthy, a passionate coffee connoisseur and seasoned lifestyle expert, whose journey in the world of coffee has been nothing short of a love affair. With years of experience under her belt, she has mastered the nuances of coffee making. she unveils her treasure trove of insights, honed through countless coffee brews and experimentation.


COFFEE
Photo by Rachel Claire: https://www.pexels.com/photo/coffee-machine-on-white-kitchen-counter-4993062/

 Cleanup Matters

Before we delve into the nitty-gritty, let’s understand why coffee maker cleanup is crucial. It’s not just about aesthetics – it directly impacts the flavor and lifespan of your coffee maker. Maintaining a pristine coffee maker isn’t merely for appearances; it’s the secret to brewing exceptional coffee. Over time, leftover coffee oils, mineral deposits, and residue can accumulate, resulting in a bitter, lackluster brew. Erin McCarthy advises that a clean machine is essential for preserving the purity of your coffee’s flavor. To maintain that exquisite taste in every cup, Erin suggests using organic coffee cleaner, citric acid, or a mixture of vinegar and water. These natural solutions ensure your coffee stays free from chemical residues, allowing the true flavors to shine through.

.

COFFEE
https://home.lamarzoccousa.com/wp-content/uploads/2019/02/clean-machine-3-of-8.jpg

 Coffee Cleanup Philosophy

Erin’s approach to coffee cleanup is both pragmatic and holistic. She emphasizes the significance of routine maintenance, ensuring that every cup is a masterpiece. Erin firmly believes that a little effort every day goes a long way in ensuring the longevity and optimal performance of your coffee maker. Consistency is key. By adhering to a daily routine, you’ll not only maintain the quality of your coffee but also prevent the growth of mold and bacteria in the machine’s hidden nooks and crannies. Erin’s philosophy revolves around proactive and mindful coffee maker maintenance.

The Essential Tools

Erin knows that having the right tools can make all the difference. She recommends investing in a set of brushes, coffee maker cleaner tablets, and a microfiber cloth. These tools will help you reach every corner of your machine and keep it sparkling clean.

Brushes: Invest in a set of brushes with different sizes and shapes to clean various parts of your coffee maker effectively. The brush designed for the carafe is different from the one used to clean the coffee grounds basket.

Coffee Maker Cleaner Tablets: These tablets are designed to dissolve coffee residue and mineral buildup inside your machine. They offer a hassle-free way to maintain the cleanliness of your coffee maker.

Microfiber Cloth: A microfiber cloth is perfect for wiping down the exterior of your coffee maker. It’s gentle on the machine’s surface and won’t leave lint behind.


COFFEE
Photo by Quintin Gellar: https://www.pexels.com/photo/chocolate-drink-filled-clear-glass-cup-1190165/

Daily Cleanup Routine

Your daily coffee maker cleanup should be quick and easy, and Erin provides a step-by-step guide to make it hassle-free. Here’s the breakdown of the daily routine:

  1. Dispose of Used Coffee Grounds: Start by removing and disposing of the used coffee grounds. This is crucial for preventing the buildup of rancid oils that can affect the flavor of your coffee.
  2. Rinse the Carafe: Rinse the carafe thoroughly to remove any coffee residue. Use warm, soapy water to ensure its spotless.
  3. Wipe Down the Exterior: Use a microfiber cloth to wipe down the exterior of your coffee maker. Pay attention to the control panel, buttons, and any other surfaces that may accumulate splashes and spills.
COFFEE
Photo by Masood Aslami: https://www.pexels.com/photo/dark-coffee-beans-18662754/

Deep Cleaning

Every week, Erin suggests a thorough deep cleaning ritual to prevent the buildup of residue and mold. This deep cleaning ensures a long and flavorful life for your coffee maker. Here’s how to perform the weekly deep clean:

  1. Prepare the Cleaning Solution: Mix a solution of equal parts water and white vinegar. This natural solution is effective in breaking down mineral deposits and coffee oils.
  2. Start the Cleaning Cycle: Fill the water reservoir with the vinegar solution. Run the coffee maker through a brew cycle, just as you would with water and coffee grounds.
  3. Rinse Thoroughly: After the cycle is complete, run two more brew cycles with clean water. This will ensure that the vinegar smell and residue are completely removed.
  4. Wipe Down Exterior and Parts: While your coffee maker is cooling, wipe down the exterior and clean any removable parts like the coffee grounds basket and the drip tray.
COFFEE
Photo by Zeynep M.: https://www.pexels.com/photo/milk-coffee-wax-candle-and-book-18567306/

Coffee Maker Maintenance

Maintaining your coffee maker goes beyond cleaning; it includes essential tasks like descaling and part replacement. Erin’s advice on these aspects is invaluable for true coffee aficionados.

Descaling: Over time, mineral deposits from water can build up in your coffee maker. Descaling involves using a descaling solution or a mixture of water and citric acid to dissolve these deposits. The frequency of descaling depends on the hardness of your water; Erin recommends doing it every 1-3 months.

Part Replacement: Coffee makers have components that wear out over time. It’s important to monitor the condition of your machine’s parts and replace them as needed. This includes the water filter, which should be replaced according to the manufacturer’s recommendations, and other parts that may wear out with regular use.

KeyPoint:

Product Type Key Features Rating
Organic Cleaner Natural Solution Organic, chemical-free 5/5
Descaling Solution Descaling Agent Effectively removes mineral deposits 4/5
Vinegar Household Item Budget-friendly, readily available 3/5

Organic Cleaner is Erin’s top pick. It’s a natural solution that keeps your coffee maker chemical-free, ensuring the purest coffee flavor.

Descaling Solution is a reliable choice for breaking down mineral deposits. It’s essential for maintaining your coffee maker’s performance.

Vinegar is a budget-friendly option and a household item that can be used in a pinch. While it’s effective, some may not prefer its smell and taste.

 Conclusion:

Erin McCarthy’s guidance on mastering the ultimate coffee maker cleanup routine is more than just a set of cleaning instructions; it’s a journey toward elevating your coffee experience. The cleanliness of your coffee maker is not a mere chore but a critical element that directly influences the quality of every cup you brew. Erin’s expertise, combined with your enthusiasm, will help you unlock the full potential of your coffee maker and take your coffee game to a whole new level. By understanding the importance of coffee maker cleanup, you’ve gained valuable insights into the role it plays in preserving the purity of your coffee’s flavor. Whether you’re a casual coffee lover or a dedicated enthusiast, the difference between a well-maintained coffee maker and one that’s been neglected is striking. Erin’s emphasis on using organic and natural cleaning solutions ensures that your coffee remains free from chemical residues, allowing its true flavors to shine through. Erin’s coffee cleanup philosophy is rooted in proactive and consistent maintenance. It’s the daily and weekly rituals that, over time, make a profound impact on the quality and lifespan of your coffee maker.

Introduction:

Lynsey Crombie, a renowned authority on household cleanliness and organization, welcomes you to dive into the depths of your kitchen appliance. With her wealth of experience and knowledge, she’s here to shed light on a rather overlooked aspect of our daily lives the back of our refrigerators. Meet Lynsey Crombie, an authority in the realm of household cleanliness and organization. With years of experience and a passion for helping individuals achieve a cleaner, more organized lifestyle, she’s the perfect guide to take you on a quest to uncover the filthy secrets lurking behind your refrigerator. Our mission is not just about revealing the secrets behind your refrigerator but also equipping you with the knowledge and techniques to ensure your kitchen is not just clean but also cost-effective and energy efficient. Whether you’re a seasoned lifestyle enthusiast or someone looking to elevate your home’s cleanliness, this article is your gateway to transforming your kitchen.

FRIDGE
Photo by cotton Bro studio: https://www.pexels.com/photo/evening-kitchen-neon-home-4058699/

Secrets Behind Your Refrigerator

Most of us focus on what’s inside this trusty appliance, ensuring our food stays fresh and cool. But the back of your fridge is a different story. It’s a zone often ignored, hiding secrets you’d never imagine. In this comprehensive guide, you’re about to embark on an eye-opening journey led by Lynsey Crombie, a household cleanliness and organization expert. For lifestyle enthusiasts who seek advanced tips and in-depth insights, this article is your gateway to a cleaner and more efficient kitchen.

The Neglected Territory

In our homes, the refrigerator stands as a beacon of freshness and sustenance. It’s the gateway to your food supply. However, the backside of this trusty kitchen companion often remains neglected, pushed against the wall, out of sight and out of mind. It’s this neglected territory that Lynsey Crombie is passionate about, and she’s here to tell you why it deserves your attention. Behind your refrigerator, a world of neglect lurks. Dust, dirt, and grime accumulate over time, forming an unhygienic underbelly. As Lynsey emphasizes, “While we diligently clean the interior of our refrigerators, we often forget the filth that lurks behind them. This is where the real issues begin.

FRIDGE
Photo by Emre Can Acer: https://www.pexels.com/photo/white-refrigerator-near-door-2079698/

The Consequences of Neglect

You might be wondering what the consequences of ignoring the back of your fridge could be. Prepare to be surprised. Behind this essential appliance, mold can thrive, dust piles up, and grime settles in. The result? A breeding ground for health problems, ranging from allergies to respiratory issues. However, it’s not just about health concerns. Neglecting the back of your refrigerator can also compromise its efficiency. The cooling coils at the back, responsible for releasing heat, can become less effective when covered in dust and dirt. In turn, your fridge has to work harder to keep your food cool, leading to increased energy consumption and higher electricity bills.

Cleaning Essentials

Before you embark on the mission to clean the back of your refrigerator, gather the essential tools and products. Lynsey recommends a set of cleaning essentials to make this task more manageable and effective.

  1. Microfiber Cloth: A soft microfiber cloth is your best friend when it comes to gentle cleaning. It’s gentle on surfaces and won’t scratch.
  2. Baking Soda: Baking soda is a natural deodorizer, perfect for eliminating any lingering odors.
  3. Vinegar Solution: A mixture of vinegar and water creates a powerful disinfectant that can tackle hidden germs.
  4. Vacuum Cleaner: Equip your vacuum cleaner with a brush attachment. It’s ideal for removing dust and dirt from those hard-to-reach areas.
  5. Coil Brush: For a more thorough clean, consider investing in a coil brush specifically designed for cleaning refrigerator coils efficiently.

Advanced Tips for Hygiene Enthusiasts

For those of you who want to elevate your refrigerator hygiene game, Lynsey Crombie has some advanced techniques and additional tools to achieve an immaculate result:

  • Fridge Liners: Consider using fridge liners, which can make future cleaning easier. Just remove and replace them periodically.
  • Condenser Cleaning: For a deeper clean, remove the back panel to access the condenser. Clean it thoroughly and reassemble.
  • Regular Maintenance: Make cleaning behind your fridge a regular part of your cleaning routine. Schedule it once every few months to maintain cleanliness and efficiency.

    FRIDGE
    Photo by Curtis Adams: https://www.pexels.com/photo/gray-refrigerator-in-the-kitchen-4092029/

Conclusion:

In our journey to unveil the secrets hidden behind your refrigerator, you’ve gained a wealth of knowledge and practical insights, thanks to the guidance of Lynsey Crombie. We’ve ventured into the often-neglected territory that is the back of your fridge, a world of dust, grime, and overlooked hygiene, and we’ve emerged equipped with advanced techniques and expert advice. As we conclude this enlightening expedition, it’s vital to underscore the transformation that you’re now poised to bring to your home. By exposing the unhygienic underbelly of your refrigerator, you’ve taken a step towards creating a cleaner, healthier living environment for yourself and your loved ones. Remember, maintaining a clean and efficient refrigerator is not merely an act of hygiene and its cleanliness and efficiency resonate throughout your daily life. By keeping the back of your fridge immaculate and the coils free of dirt, you’re not only ensuring your food stays fresher for longer, but you’re also contributing to a more cost-effective, energy-efficient household. Lifestyle enthusiasts, you now have the knowledge and tools to transform your kitchen and elevate your way of living.

Introduction:

Meet Melissa Maker, a seasoned expert in the world of cleaning and founder of Clean My Space. With years of experience, Melissa has developed a foolproof oven cleaning method that will transform your kitchen appliances. In this article, we dive deep into the art of oven cleaning, revealing advanced techniques and tips that will leave your oven looking and performing like new. Uncover advanced techniques and foolproof methods for a spotless oven. Join lifestyle enthusiasts on a journey to cleaner, more efficient cooking. Meet Melissa Maker, a seasoned expert in the world of cleaning and founder of Clean My Space. With years of experience, Melissa has developed a foolproof oven cleaning method that will transform your kitchen appliances. In this article, we dive deep into the art of oven cleaning, revealing advanced techniques and tips that will leave your oven looking and performing like new.

oven
https://irp-cdn.multiscreensite.com/69d96810/dms3rep/multi/Oven-4.jpg

The Importance of a Clean Oven

A clean oven is the unsung hero of your kitchen, quietly ensuring that your meals are cooked to perfection. But beyond culinary prowess, there are compelling reasons why you should keep your oven spotless. A dirty oven isn’t just an eyesore; it can affect the taste of your food and even pose health risks. When food particles and grease accumulate, they can emit unpleasant odors and even create smoke, affecting the flavor of your dishes. Moreover, the buildup of grease can become a fire hazard, putting you and your home at ris cleaning your oven also promotes energy efficiency. A clean oven heats up faster and maintains a consistent temperature, reducing energy consumption and saving you money on your utility bills. Plus, it’s more environmentally friendly.

Preparing for the Cleaning Process

Before diving into the cleaning process, there are essential steps you need to take. Proper preparation ensures safety and maximizes the effectiveness of your cleaning efforts.

  1. Gather Your Supplies: To clean your oven effectively, you’ll need some essential supplies. These typically include a high-quality oven cleaner, gloves, a cleaning brush or scrubbing sponge, and a trash bag. Make sure to select a cleaner that’s safe and effective for your oven type.
  2. Safety First: Oven cleaning can involve strong chemicals, so it’s crucial to take safety precautions. Open windows and ensure proper ventilation to avoid inhaling fumes. Wear protective gloves and consider using safety glasses to protect your eyes.
  3. Remove Oven Racks: Before you begin, take out the oven racks and set them aside. You’ll clean these separately, as they can’t be cleaned inside the oven.

    oven
    https://2.bp.blogspot.com/-S4PxwWn7GN4/VTlzVycl_UI/AAAAAAAAA94/VmeVdbjokkQ/s1600/Clean%2Boven%2Bremoving%2Bracks.jpg

Mastering the Art of Oven Cleaning

  1. Cool Down the Oven: Before starting, make sure your oven is completely cool. You don’t want to burn yourself during the cleaning process.
  2. Remove Loose Debris: Use a dry cloth or paper towel to wipe away any loose debris inside the oven. This will make the cleaning process more effective.
  3. Apply the Cleaner: Following the manufacturer’s instructions, apply the oven cleaner to the interior of the oven. Be thorough but avoid oversaturating. Allow the cleaner to sit for the recommended time to soften the grime.
  4. Scrub Gently: Once the cleaner has had time to work its magic, take your scrubbing sponge or brush and start gently scrubbing away the built-up grime. Use a circular motion to tackle tough spots. Be patient; some stains may require a bit of elbow grease.
  5. Rinse and Wipe: Once you’ve removed most of the grime, rinse your sponge or scrubbing brush and wipe down the interior of the oven to remove any remaining cleaner. Continue rinsing and wiping until the oven is residue-free.
  6. Clean the Oven Racks: Remember those oven racks you set aside earlier? Now is the time to tackle them. Use warm, soapy water and a scrubbing brush to remove the grime. Rinse and dry them thoroughly before placing them back into the oven.
  7. Final Touches: To ensure a pristine finish, take a clean, damp cloth and wipe down the oven’s interior one last time. This will remove any remaining residue and leave your oven sparkling.

    oven
    https://st2.depositphotos.com/1000572/7748/i/450/depositphotos_77486146-stock-photo-woman-cooking-meal-in-the.jpg

Advanced Tips and Techniques

we have a few advanced cleaning techniques up our sleeve.

  1. Tackling Stubborn Stains: Some stains are more stubborn than others. If you encounter a particularly tough stain, try using a paste of baking soda and water. Apply it to the stain, let it sit for a while, then scrub gently.
  2. Cleaning Oven Racks: Oven racks can accumulate stubborn, baked-on grime. Consider placing them in a large garbage bag with a mixture of ammonia and warm water. Seal the bag and let it sit overnight. The next day, scrub the racks with a brush to remove the loosened grime.
  3. Using Natural Cleaners: If you prefer to go the natural route, a mixture of vinegar and baking soda can be used as an alternative to commercial oven cleaner. It’s eco-friendly and can effectively tackle grease and grime.

    oven
    https://gordanladdskitchen.com/wp-content/uploads/2017/06/how-to-clean-an-oven-door.jpg

Maintaining a Pristine Oven

Cleaning your oven is essential, but so is maintaining it. To keep your oven in top shape for the long term, here are some tips:

  1. Regular Cleaning: Don’t wait until your oven is a mess. Try to clean it periodically to prevent the buildup of stubborn stains.
  2. Use Oven Liners: Consider using oven liners or mats to catch spills and prevent them from sticking to the oven’s interior. These can be easily removed and cleaned.
  3. Avoid Harsh Chemicals: While strong oven cleaners can be effective, they can also be harsh on your oven’s interior. Consider using milder, natural cleaners for routine maintenance.

KeyPoint: 

Feature Traditional Cleaning Melissa Maker’s Method
Cleaning Time 2-4 hours 1-2 hours
Chemical Usage Often harsh chemicals Less aggressive, effective
Required Scrubbing Extensive Scrubbing Less intensive scrubbing.
Odor and Fumes Strong, unpleasant Minimal, well-ventilated
Energy Efficiency Reduced Efficiency Maintains efficiency.
Safety Precautions Required Yes Yes
Stubborn Stains Challenging Easier to remove.
Oven Rack Cleaning Separate Process Included in method.
Environmental Impact Less Eco-friendly More eco-friendly

Conclusion:

As we conclude our journey into the realm of oven cleaning, it’s evident that maintaining a pristine oven is not just about aesthetics but also about ensuring the safety and efficiency of your kitchen. A clean oven enhances the taste of your culinary creations, saves energy, and prevents potential hazards. Whether you choose to stick with traditional methods or adopt Melissa Maker’s expert technique, the key lies in regular maintenance. By keeping your oven clean and following best practices, you’ll enjoy hassle-free cooking and a kitchen that’s not only visually appealing but also safe. Now armed with advanced tips, expert insights, and a foolproof cleaning method, you can confidently embark on the path to a cleaner, more efficient oven. Happy cooking, and may your culinary endeavors shine as brightly as your spotless oven! We’ve journeyed through the essentials of maintaining a clean and efficient kitchen appliance. A clean oven not only enhances your culinary creations but also ensures safety and energy efficiency. With the traditional and expert approaches, we’ve explored, you’re equipped to choose the method that suits your preferences and needs. The key to success lies in regular maintenance and attention to detail. A clean oven is the cornerstone of a healthy, efficient, and pleasant cooking experience.

Introduction:

Lunchtime enthusiasts! If you’re a parent or caregiver looking to add some excitement to your child’s school lunch, you’ve come to the right place. and a passionate advocate for healthy and enjoyable eating experiences., making them both fun for kids and functional for parents. So, let’s dive into the world of school lunch reinvention. One of the secrets to a successful school lunch is the gear. Children are naturally drawn to lunch accessories that are colorful, fun, and practical. This section will delve into innovative lunch gear that kids absolutely adore, from bento boxes with clever compartments to reusable utensils with delightful designs.At the core of every great school lunch is nutrition. This section will guide you in striking the right balance between kid-friendly favorites and nutritious options. We’ll discuss the significance of macronutrients, whole foods, portion control, and how to avoid the pitfalls of sugary and processed foods.

A Great School Lunch

A well-balanced, tasty school lunch is not just about filling empty stomachs; it’s about fueling young minds and fostering healthy eating habits. Research shows that children who enjoy their school lunches are more likely to make nutritious choices later in life. It’s not just about the food; it’s also about the overall experience. School lunch provides a significant portion of a child’s daily nutritional intake. It’s a valuable opportunity to ensure they get the right balance of macronutrients, vitamins, and minerals. A healthy meal at lunchtime can help your child stay focused, energized, and ready to tackle the afternoon’s challenges. What your child eats at school can shape their eating habits for life. Exposing them to a variety of foods and teaching them about making healthy choices is essential. When kids enjoy their school lunches, they’re more likely to develop positive attitudes toward food.

lunch box
https://spy.com/wp-content/uploads/2021/06/EasyLunchboxes-Bento-Lunch-Boxes.jpg?resize=393

Creative Lunch Gear 

One of the keys to a successful school lunch is the gear. Kids love a lunchbox with personality and style. It’s not just a container; it’s a statement. Here are some creative lunch gear options that kids adore: Bento boxes are a hit among kids and adults alike. These multi-compartment lunch containers allow you to create visually appealing, balanced meals. With separate sections for fruits, veggies, proteins, and snacks, they encourage variety and portion control. Kids are more likely to eat their veggies when they’re presented in an enticing way. Use small cookie cutters to shape cucumber slices or carrot sticks into fun shapes. You can even include a dipping sauce for added excitement. Invest in some reusable utensils that make lunchtime feel like an adventure. You can find kid-friendly sets with vibrant colors and quirky designs. Reusable utensils are not only environmentally friendly, but they also add a playful element to the lunch experience.

lunch box
https://theorganisedhousewife.com.au/wp-content/uploads/2017/01/go-green-lunchbox-review-1.jpg

Thermos Containers

Thermos containers are excellent for keeping hot foods hot and cold foods cold. This opens up a world of lunch options. From pasta and soup to yogurt and smoothies, you can pack a diverse range of foods that stay at the perfect temperature until lunchtime. To maintain the temperature and freshness of your child’s lunch, consider using an insulated lunch bag. These bags come in various sizes and designs, making it easy to find one that suits your child’s style. They are ideal for keeping perishable items safe until lunch. One of the best ways to get kids excited about their school lunch is to involve them in the planning and preparation. Let them choose some of their favorite healthy foods to include in their lunch. This not only empowers them to make healthier choices but also ensures they’ll be eager to eat what they’ve helped create. Kids have their favorites, and that’s perfectly fine. Instead of eliminating these beloved treats, find ways to incorporate them into a balanced lunch. For example, if your child loves pizza, consider making homemade whole-wheat mini pizzas with plenty of veggies. This way, you can control the ingredients and make it a more nutritious option.

lunch box
https://cdn.apartmenttherapy.info/image/fetch/f_auto,q_auto:eco,w_1460/https://storage.googleapis.com/gen-atmedia/3/2017/07/c3bb8f245d517ed85c95162fd70fcbf3c74cf18b.png

Key Points Summary:

Lunch Gear Key Features Benefits
Bento Boxes Multiple compartments for variety Portion control
Reusable Utensils Eco-friendly and kid-friendly designs Reduces waste.
Thermos Containers Keeps food hot or cold for hours Versatile for different meals.
Insulated Lunch Bags Maintains temperature and freshness. Ideal for perishable items.

Conclusion:

we’ve embarked on a lunchtime revolution, redefining the way we approach school lunches for our children. We’ve explored the significance of school lunches, innovative lunch gear that kids crave, and gained valuable insights from Jessica Levinson, a registered dietitian. We’ve navigated the intricate landscape of nutritional choices, discovered inspiring lunchbox recipes, and learned practical budget-friendly hacks for parents. The transformation of school lunch isn’t just about filling a lunchbox; it’s about fueling growing bodies and minds, cultivating lifelong healthy eating habits, and making lunchtime an enjoyable experience for both children and parents. So, take this newfound knowledge and embark on your own lunchtime revolution. Involve your child in the process, create colorful and nutritious meals, and watch as school lunches become a highlight of their day. With Jessica Levinson’s expert insights and the tools at your disposal, you have the power to make school lunch an exciting adventure that your kids will adore.

Introduction

In a world where sustainability and well-being are paramount, real estate is making strides in nurturing a green connection through biophilia. This journey goes beyond eco-conscious living; it’s about fostering a profound relationship between sustainability and serenity. In this article, we will explore real estate’s embrace of biophilia with a focus on sustainability. Discover the key principles, understand the synergy between sustainable living and well-being, and draw inspiration from a comparative table showcasing properties at the forefront of the green biophilic movement.

The Essence of Biophilic Design

Biophilic design isn’t just about aesthetics; it’s a holistic approach that combines sustainability and well-being. It involves weaving the natural world into our living spaces, embracing sustainable practices, and creating an environment that fosters serenity.

The 6 Principles of Green Biophilic Design

  1. Visual Connection with Nature: Utilizing large windows, open spaces, and an abundance of greenery to seamlessly incorporate the surrounding natural environment into the design.
  2. Non-Visual Connection with Nature: Infusing nature’s sounds, scents, and textures into the design by incorporating sustainable materials, eco-friendly finishes, and energy-efficient systems.
  3. Non-Rhythmic Sensory Stimuli: Integrating nature’s non-repeating patterns and textures into design with sustainable, organic materials that minimize environmental impact.
  4. Thermal and Airflow Variability: Creating dynamic indoor environments that mimic natural temperature variations and air movement while conserving energy.
  5. Presence of Water: Incorporating water features that are sustainably managed, conserving water and energy while enhancing tranquility.
  6. Dynamic and Diffuse Light: Utilizing sustainable lighting systems that replicate the ever-changing natural light, reducing energy consumption while positively affecting mood.

Comparative Table of Green Biophilic Design in Real Estate

Explore how properties leading the green biophilic movement have integrated these principles:

Property Location Key Green Biophilic Features
EcoHaven Residences Stockholm, Sweden Green rooftops, recycled materials, energy-efficient solar panels
Sustainable Seascape Maldives Eco-friendly bungalows, rainwater harvesting, sustainable coral reef restoration
UrbanSustain Towers Toronto, Canada Sustainable urban gardens, energy-efficient HVAC systems, natural stone accents
LakesideLiving Homes Lake Tahoe, USA Sustainable interiors, energy-efficient windows, eco-conscious landscaping
ForestHarmony Estates Copenhagen, Denmark Forest surroundings, biophilic artwork, eco-friendly color palette

The Impact on Sustainable Living

The green connection fostered by biophilic design transcends individual well-being. It promotes sustainable living, reducing environmental impact and paving the way for a more eco-conscious future. Real estate properties that incorporate these principles contribute to a healthier planet.

Sustainable Living
Image by: https://biofriendlyplanet.com/

Real Estate’s Commitment to Green Living

Real estate is embracing a future that is both sustainable and serene. The green biophilic design movement epitomizes this commitment, where living in harmony with nature aligns seamlessly with sustainability practices. As the industry continues to champion these principles, it is charting a course for a future where green living and well-being coexist harmoniously.

Conclusion

The real estate industry’s dedication to green living through biophilic design is a testament to its commitment to sustainability and well-being. By merging the natural world into living spaces and integrating sustainable practices, it creates environments that enrich lives and minimize environmental impact. These principles have a profound impact on reducing stress, enhancing cognitive function, and increasing overall satisfaction with living spaces. The transformation in real estate is paving the way for a future where homes and living spaces are not only serene and harmonious but also environmentally responsible, fostering a healthier planet and happier residents.