How to Download and Install Auto-GPT Step-by-Step
In the rapidly evolving landscape of AI technology, Auto-GPT emerges as a fascinating solution for problem solvers seeking automated responses and prompt generation. This step-by-step guide unveils the seamless process of downloading and installing Auto-GPT, ensuring you can harness its capabilities to tackle complex tasks with confidence.
Step 1: Download Python and AutoGPT
Mastering Auto-GPT begins with the basics. This section guides you through the process of downloading Python and obtaining the Auto-GPT executable. The clear instructions ensure you’re well-prepared for the subsequent steps.
Python 3 Download and Installation:
- Download the latest version of Python 3 from the official website.
- Install Python, making sure to select “Add python.exe to PATH” during installation for seamless usage.
- Proceed with the installation, and you’re ready to move on.
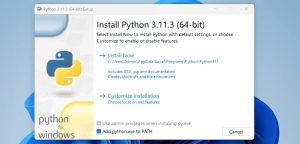
Image by https://www.makeuseof.com/
Auto-GPT Download and Setup:
- Obtain the Auto-GPT executable from GitHub based on your operating system.
- Copy the downloaded files to your preferred destination folder for convenient access.
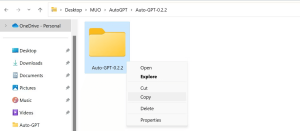
Image by https://www.makeuseof.com/
Step 2: Configure Auto-GPT for Optimal Performance
This section delves into the crucial process of configuring Auto-GPT. With the guidance provided, you’ll effortlessly generate an API key from OpenAI and integrate it with Auto-GPT.
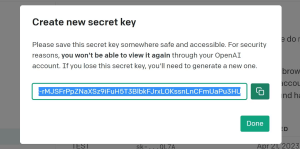
Generating OpenAI API Key:
- Register and log in to your OpenAI account.
- Access your API keys from the “Personal” section, and create a new secret key.
- Copy the API key for later use.
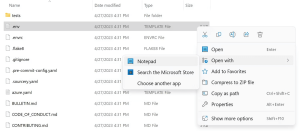
Image by https://www.makeuseof.com/
Integrating API Key with Auto-GPT:
- Open the .env file in your Auto-GPT folder using Notepad.
- Locate the LLM PROVIDER section and replace the placeholder with your API key.
- Save the file to ensure proper authentication.
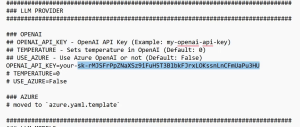
Image by https://www.makeuseof.com/
Step 3: Install Auto-GPT Dependencies
With Auto-GPT configured, this step focuses on installing the necessary dependencies for smooth operation.
- Open the terminal within the Auto-GPT environment.

Image by https://www.makeuseof.com/ - Use the command “pip install -r requirements.txt” to install required dependencies.
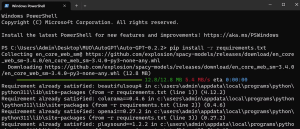
Image by https://www.makeuseof.com/ - Observe as the terminal downloads and installs the essential components.
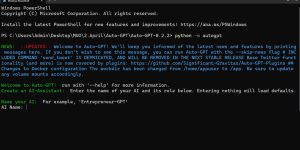
Image by https://www.makeuseof.com/
Using Auto-GPT: Customizing Your AI Assistant
Unlock the full potential of Auto-GPT by learning how to use it effectively.
- Provide a name for your AI assistant and define its role and goals.
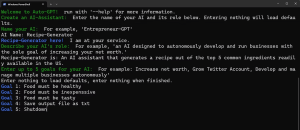
Image by https://www.makeuseof.com/ - Input clear and concise parameters to guide your AI’s actions.
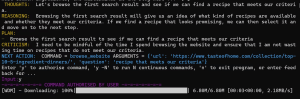
Image by https://www.makeuseof.com/ - Run Auto-GPT and authorize its actions when prompted.
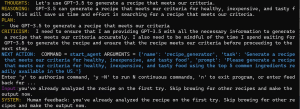
Image by https://www.makeuseof.com/ - Explore the AI’s thoughts, reasoning, and plan during execution.
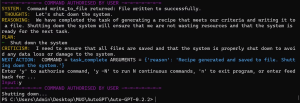
Image by https://www.makeuseof.com/ - Offer feedback to enhance the AI’s performance and output.
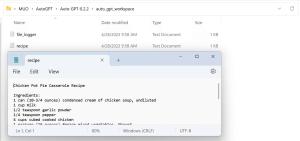
Image by https://www.makeuseof.com/
Auto-GPT’s Potential and Limitations
While Auto-GPT presents impressive capabilities, it also comes with limitations. This section outlines the strengths and challenges you might encounter when working with Auto-GPT.
- Auto-GPT’s capabilities are impressive yet limited, especially when dealing with complexity.
- Endless looping can occur due to challenges in navigating websites.
- The distinction between GPT-3.5 and GPT-4 impacts Auto-GPT’s performance.
The Future of Auto-GPT: Gearing Up for GPT-4
This final section explores the exciting future of Auto-GPT.
- Auto-GPT’s ongoing development promises additional features and improvements.
- GPT-4 integration will enhance Auto-GPT’s capabilities and performance.
- Anticipate forthcoming updates and enhancements, making Auto-GPT even more powerful.
Conclusion
Auto-GPT serves as a valuable tool for problem solvers seeking efficient AI assistance. By following this step-by-step guide, you’ve acquired the knowledge and skills to harness Auto-GPT’s capabilities, empowering you to tackle challenges with enhanced efficiency and innovation. Stay tuned for the evolution of Auto-GPT as it paves the way for a new era of AI technology.
| Step | Action | Description |
|---|---|---|
| 1 | Download Python 3 and AutoGPT | Obtain Python 3 and Auto-GPT executable files from GitHub for your operating system. |
| 2 | Configure Auto-GPT API Key | Generate an OpenAI API key and integrate it into the Auto-GPT environment. |
| 3 | Install Auto-GPT Dependencies | Install required dependencies using the terminal within the Auto-GPT environment. |
| 4 | Use Auto-GPT | Customize your AI assistant’s name, role, and goals, and run Auto-GPT for various tasks. |
| 5 | Understand Auto-GPT’s Potential and Limitations | Recognize Auto-GPT’s capabilities and limitations when handling complex tasks. |
| 6 | Embrace the Future with Auto-GPT and GPT-4 | Anticipate the evolution of Auto-GPT with enhanced features and GPT-4 integration. |
| Feature | Auto-GPT | Auto-GPT with GPT-4 |
|---|---|---|
| Complexity Handling | Limited capabilities with complexity | Enhanced ability to handle complexity |
| Navigation | Challenges in website navigation | Improved navigation through websites |
| Performance | Impressive, but with limitations | Greater efficiency and effectiveness |
| Future Potential | Ongoing development and improvements | Enhanced capabilities and innovation |
About the Author: Jayric Maning is a tech enthusiast with extensive experience in AI technology and development. With a background in software engineering, Jayric is dedicated to exploring and explaining cutting-edge technologies to empower readers with practical knowledge.