Are you tired of looking at your dull and uneven skin tone in the mirror? Do you dream of having a glowing, radiant complexion that turns heads wherever you go? Well, it’s time to say goodbye to those skin woes once and for all! The magic ingredient you need is Vitamin C – the ultimate skincare superhero that can transform your skin from drab to fab. In this blog post, we’re going to explore the incredible benefits of using Vitamin C in your skincare routine and show you how easy it is to achieve flawless, even-toned skin with this powerful antioxidant. Get ready for a brighter future (and brighter skin!) with our ultimate guide to Vitamin C.

Introducing Vitamin C

Vitamin C is a powerful antioxidant that can help to brighten your skin and even out your skin tone. When applied topically, vitamin C can help to protect your skin from damage caused by environmental stressors like pollution and UV rays. Vitamin C can also help to stimulate collagen production, resulting in firmer, smoother skin.

What are the benefits of Vitamin C?

Vitamin C is not only great for boosting immunity, but it also has amazing benefits for the skin. Here are some of the ways Vitamin C can improve your skin health:

1. Vitamin C can help to brighten your skin tone.
2. It can help to reduce inflammation and redness.
3. It can promote collagen production, which can help to reduce the appearance of fine lines and wrinkles.
4. It can help to protect your skin from damage caused by free radicals.
5. It can boost circulation, which can give your skin a healthy glow.

How to use Vitamin C for your skin

Vitamin C is a powerful antioxidant that can help to improve the appearance of your skin. It can help to brighten your skin tone, reduce the appearance of fine lines and wrinkles, and protect your skin from damage. Here are some tips on how to use vitamin C for your skin:

– Use a vitamin C serum: A vitamin C serum is a great way to get all the benefits of vitamin C for your skin. Look for a serum that contains at least 10% vitamin C. Apply the serum to your face and neck every morning and evening.

– Add a vitamin C supplement to your diet: You can also get the benefits of vitamin C by taking a supplement. Look for a supplement that contains at least 500 mg of vitamin C per day.

– Eat foods rich in vitamin C: Foods like oranges, strawberries, bell peppers, and broccoli are all good sources of vitamin C. Eating these foods will help you get the nutrients you need for healthy skin.

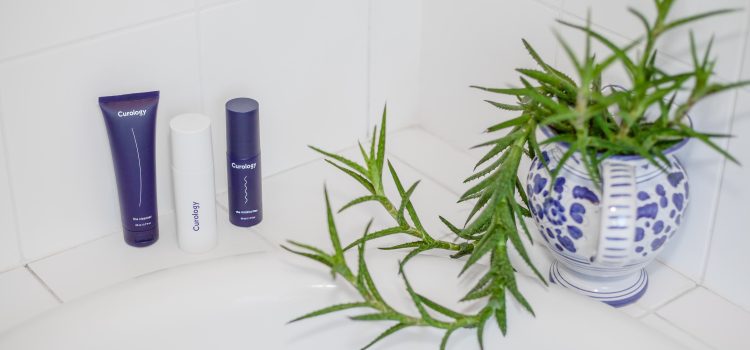
The best Vitamin C products on the market

Vitamin C is one of the most effective ingredients in skincare, and it’s no wonder that there are so many products on the market that contain it. But with so many options out there, it can be tough to know which product is right for you.

To help you narrow down your options, we’ve compiled a list of the best Vitamin C products on the market. Whether you’re looking for a serum, a cream, or a mask, we’ve got you covered.

One of our favorite Vitamin C serums is the Skinceuticals CE Ferulic Serum. This powerful product contains 15% L-ascorbic acid, 1% alpha tocopherol, and 0.5% ferulic acid. It’s ideal for those who are looking to brighten their skin tone and improve the appearance of fine lines and wrinkles.

If you prefer a cream formula, we recommend the drunk elephant c-firma day serum. This product contains 25% L-ascorbic acid and is perfect for those who want to target specific areas of their face with Vitamin C.

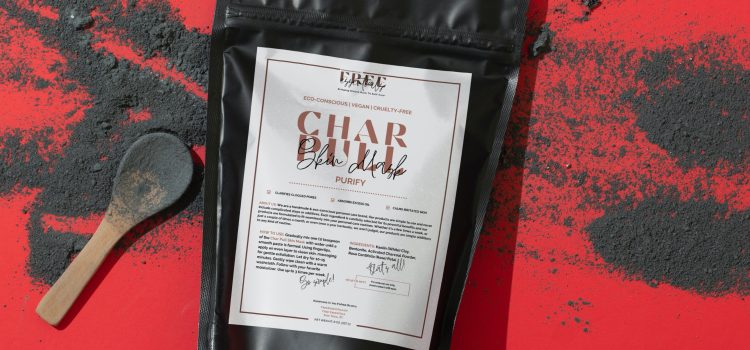
For a quick and easy way to get your dose of Vitamin C, try the Kiehl’s Powerful-Strength Line-Reducing Concentrate Mask. This mask contains 12.5% ascorbic acid and works to brighten skin and reduce the appearance of fine lines and wrinkles

DIY Vitamin C recipes

If you’re looking for a way to improve your skin tone, look no further than vitamin C! This nutrient is essential for collagen production and can help to brighten and even out your skin tone.

There are plenty of ways to get your daily dose of vitamin C, but if you’re looking for a more natural option, why not try making your own vitamin C serum at home? Here are two recipes to get you started:

Recipe #1:

Ingredients:

– ½ cup rosewater
– ¼ cup aloe vera gel
– 1 tsp. vitamin C powder
– ½ tsp. glycerin
– 10 drops lavender essential oil (optional)

Directions: Combine all ingredients in a bowl and mix well. Pour into a clean glass bottle and store in the fridge for up to 2 weeks. Apply to face morning and night after cleansing.

Recipe #2:

Ingredients: ˆ/span> – 1/3 cup carrier oil of choice (jojoba, grapeseed, etc.) – 1 Tbsp. vitamin C powder – 1 Tbsp. aloe vera gel – 10 drops lavender essential oil (optional) Directions: Combine all ingredients in a bowl and mix well. Pour into a clean glass bottle and store in the fridge for up to 2 weeks. Apply to

Conclusion

Vitamin C is a powerful antioxidant that can help brighten and even out your skin tone. Whether you’re dealing with sunspots, hyperpigmentation, or simply want to add some life back into your complexion, using the right products with Vitamin C is a great way to achieve healthy, glowing skin. Remember to use sunscreen and keep it savvy when choosing ingredients! With its magic power, Vitamin C will surely make dullness and uneven skin tone say goodbye for good.

Are you tired of constantly battling with stubborn dirt, oil and impurities on your skin? Do you want to achieve a radiant, glowing complexion without breaking the bank or spending hours at the spa? Well, it’s time to bring out the big guns – clay masks! These natural wonders have been used for centuries to detoxify and nourish the skin. In this blog post, we’ll explore all the amazing benefits of using clay masks as part of your beauty routine. From deep cleansing pores to improving texture and tone, get ready to discover how these simple yet powerful skincare solutions can transform your complexion into a beautiful canvas!

What is a clay mask and how does it work?

A clay mask is a type of facial mask that is made from natural clay. Clay masks have been used for centuries to improve the appearance and health of skin. The main benefits of using a clay mask are that it can help to deeply cleanse the skin, remove impurities and dead skin cells, and make the skin appear more glowing and radiant.

Clay masks work by absorbing excess oil and dirt from the surface of the skin. They also help to unclog pores, which can reduce the risk of acne breakouts. Clay masks can be used on all skin types, but they are particularly beneficial for those with oily or acne-prone skin.

Types of clay masks

There are many different types of clay masks available on the market today. The most common type is the bentonite clay mask, which is made from a natural clay that is found in the earth. This type of clay mask is known for its ability to absorb oil and impurities from the skin, as well as help to reduce inflammation.

Another popular type of clay mask is the kaolin clay mask. This type of clay mask is also made from a natural clay, but it does not have the same absorbent properties as bentonite clay. Kaolin clay masks are typically used to detoxify and purify the skin, as well as help to soothe irritated skin.

Last but not least, there is also the Fuller’s earth clay mask. This type of clay mask contains a high amount of minerals and can help to exfoliate dead skin cells, as well as absorb excess oil and impurities. Fuller’s earth clay masks are often used to treat acne and other skin conditions.

Benefits of using a clay mask

Clay masks are beneficial for the skin because they help to remove impurities and excess oil. They also improve circulation and help to tighten pores. Clay masks can be used on all skin types, but are especially helpful for those with oily or combination skin. When used regularly, clay masks can help to achieve and maintain clear, glowing skin.

How to use a clay mask

After cleansing your face, take a small amount of clay mask and apply to your face with wet fingers. Gently massage the clay mask into your skin in a circular motion and let it sit for 10-15 minutes. Rinse off the clay mask with warm water and follow up with your regular skincare routine.

Clay masks are an excellent way to deep cleanse your skin and get rid of impurities. They can also help to detoxify and revitalize your skin, leaving you with a radiant and healthy complexion. Clay masks are suitable for all skin types, but if you have sensitive skin, be sure to test the mask on a small area first before applying it to your whole face.

DIY Clay Mask Recipes

Clay masks are a great way to deep cleanse your pores and give your skin a beautiful, healthy glow! There are many different recipes for clay masks, so you can tailor the mask to your specific skin type. Here are some recipes for DIY clay masks that you can try at home:

For oily skin: Mix one tablespoon of bentonite clay with one tablespoon of water. Apply the mask to your face and let it dry for 15 minutes. Rinse off with warm water.

For dry skin: Mix one tablespoon of bentonite clay with one tablespoon of apple cider vinegar. Apply the mask to your face and let it dry for 15 minutes. Rinse off with warm water.

For sensitive skin: Mix one tablespoon of bentonite clay with one tablespoon of honey. Apply the mask to your face and let it dry for 15 minutes. Rinse off with warm water.

Looking for a way to enhance your facial features and achieve that perfect chiseled look? Contouring can help you achieve just that! But with so many products, techniques, and tools out there, it can be overwhelming to figure out where to start. Fret not, because we’ve got you covered! Our ultimate guide to achieving a natural-looking contour is here – packed with tips from beauty experts who know all the tricks of the trade. From product recommendations to step-by-step tutorials, get ready to master the art of contouring like a pro!

What is contouring?

Contouring is a makeup technique that uses light and dark colors to create the illusion of more defined features. It can be used to slim down the nose, create cheekbones, or even make the face look more oval-shaped.

When contouring, it’s important to use a light hand. You should start with a small amount of product and build up gradually until you achieve the desired effect. It’s also important to blend well so that the lines are not visible.

There are a few different ways to contour your face. The most common method is to use a bronzer or contouring powder that is two shades darker than your skin tone. Another option is to use a cream or liquid foundation that is one shade darker than your skin tone.

If you’re new to contouring, it’s best to start with a powder product because it’s easier to control the amount of product that you’re using. Once you get the hang of it, you can experiment with liquids and creams.

When choosing a color for contouring, make sure to avoid anything with shimmer or glitter because this will make your face look shiny instead of matte. A good rule of thumb is to choose a color that is two shades darker than your skin tone for powder products and one shade darker for liquids and creams.

Now that you know the basics of contouring, it’s time to put

Different types of contouring products

When it comes to contouring, there are a few different types of products you can use to achieve the look you want. Powder contouring products are great for those who want a more natural-looking contour, as they can be blended into the skin more easily. Cream contouring products are ideal for those who want a more dramatic look, as they provide more coverage and can help to sculpt the face. For those who want an even more intense contour, liquid contouring products are the way to go. These provide the most coverage and can help to create a very defined look.

How to contour your face

When it comes to contouring, the general rule of thumb is to go one or two shades darker than your natural skin tone. But, as with most things in life, there are always exceptions to the rule. If you have a very fair complexion, you might want to use a bronzer instead of a contour powder. And if you have a deeper skin tone, you might want to use a darker shade of foundation or concealer.

The key to contouring is finding the right product for your skin type and desired look. If you want a more natural-looking contour, opt for a cream or liquid formula instead of a powder. Powder can often look cakey and overdone, whereas creams and liquids blend seamlessly into the skin.

When applying your contour product, use a small brush or sponge and concentrate the colour on the areas where you want to create shadow: along your hairline, under your cheekbones, down the sides of your nose, and around your jawline. Blend well so that there are no harsh lines. And don’t forget to highlight! Use a lighter shade of concealer or foundation on the areas you want to bring forward, like the tops of your cheekbones and down the centre of your nose.

Tips from beauty experts

When it comes to contouring, the key is to make sure that your skin looks as natural as possible. To help you achieve a natural-looking contour, we asked some of our favorite beauty experts for their top tips. Here’s what they had to say:

1. Use a light hand. When it comes to contouring, less is definitely more. A light hand will help ensure that your contour looks natural and subtle.

2. Use the right products. Make sure you use products that are specifically designed for contouring, such as creams, powders, or sticks. These products will help create a smooth and even finish.

3. Choose the right shade. When selecting a contouring product, be sure to choose one that’s slightly darker than your skin tone. This will help create definition and depth without looking unnatural.

4. Blend, blend, blend! The key to a natural-looking contour is blending. Be sure to take your time and blend thoroughly for the best results

Conclusion

Getting a natural-looking contour can be tricky, but with these helpful tips from beauty experts, you’re sure to achieve the look you desire. Whether it’s finding the right products or using the proper techniques when applying makeup, following our advice should help you achieve an effortlessly beautiful and natural-looking contour. And if all else fails, there are always professional makeup artists who can help perfect your look!

Are you looking for a natural remedy to soothe your skin woes? Look no further than the aloe vera plant! Aloe vera gel has been used for centuries as a healing agent and is known for its anti-inflammatory, antibacterial, and moisturizing properties. In this expert’s guide, we’ll explore how aloe vera gel can help with everything from sunburns to acne and share tips on how to incorporate it into your skincare routine. Get ready to discover the amazing healing powers of this versatile plant!

What is Aloe Vera Gel?

Aloe vera gel is a natural product made from the leaves of the aloe vera plant. It has a variety of uses, including as a topical treatment for skin conditions such as sunburn and acne.

Aloe vera gel contains active compounds that have been shown to have anti-inflammatory, wound-healing, and antimicrobial properties. These properties make aloe vera gel an effective treatment for a number of skin conditions.

Sunburn: Aloe vera gel can be applied to the skin to help relieve pain and inflammation associated with sunburn.

Acne: Aloe vera gel has been shown to reduce redness and swelling associated with acne. Additionally, the antimicrobial properties of aloe vera gel may help to kill bacteria that can cause acne breakouts.

Wound healing: Aloe vera gel has been shown to accelerate wound healing by increasing collagen production and reducing inflammation. Additionally, aloe vera gel has antimicrobial properties that can help to prevent infection in wounds.

Skin conditions: Aloe vera gel can be used to treat a variety of other skin conditions, including psoriasis, eczema, and dermatitis.

The Different Types of Aloe Vera Gel

There are three different types of aloe vera gel: inner leaf, whole leaf, and decolorized.

Inner leaf gel is the clear, mucilaginous substance that is found inside the leaves of the aloe plant. This is the type of gel that is most commonly used in skin care products and has the highest concentration of active compounds.

Whole leaf gel contains both the inner leaf gel and the green outer leaf pulp. It has a lower concentration of active compounds than inner leaf gel but still contains many beneficial properties.

Decolorized gel is made from whole leaf gel that has been processed to remove the green pigment. This type of gel is less potent than other types but may be more suitable for those with sensitive skin.

The Benefits of Aloe Vera Gel

Aloe vera gel is widely known for its healing properties. The gel is made from the leaves of the aloe vera plant and has been used to treat a variety of skin conditions for centuries.

There are many benefits of aloe vera gel, including its ability to:

-Soothe sunburns
-Reduce inflammation
-Heal wounds
-Moisturize skin
-Treat acne
-Lighten dark spots

The anti-inflammatory properties of aloe vera gel can help to soothe sunburns and reduce inflammation. The gel can also be used to heal wounds, moisturize skin, and treat acne. Aloe vera gel may also help to lighten dark spots on the skin.

How to Use Aloe Vera Gel

If you’re looking for a natural way to heal your skin, look no further than aloe vera gel. This clear, jelly-like substance is derived from the leaves of the aloe vera plant, and has been used for centuries to treat a variety of skin conditions.

When applied topically, aloe vera gel can help to soothe sunburned skin, heal cuts and scrapes, and hydrate dry, flaky skin. It can also be used as a natural acne treatment, as it helps to reduce inflammation and redness.

To use aloe vera gel, simply apply it to the affected area of skin and massage in until absorbed. You can use it as often as needed until your skin heals.

Recipes with Aloe Vera Gel

Aloe vera gel is a clear, jelly-like substance that is extracted from the leaves of the aloe vera plant. It is often used as a natural remedy for various skin conditions, such as burns, wounds, and rashes.

There are many different ways to use aloe vera gel for its healing properties. One popular way is to create a DIY aloe vera gel mask. This can be done by mixing the gel with other ingredients like honey or lemon juice.

Another great way to use aloe vera gel is in recipes. It can be used as a healthy alternative to oil or butter in many different dishes. For example, you can use it to make a delicious healthy smoothie or add it to your favorite salad dressing recipe.

If you’re looking for more ideas on how to use aloe vera gel, be sure to check out the resources below:

Conclusion

Aloe vera gel has been used for centuries, but only recently have people taken a closer look at its healing properties. From moisturizing the skin to treating sunburns and other conditions, aloe vera gel is an incredibly versatile product that can help you achieve a healthier and happier lifestyle. We hope this article has given you insight into how aloe vera gel works and why it’s so beneficial. Try incorporating some of these tips into your daily routine – you won’t regret it!

Are you tired of spending a fortune on skincare products that promise to transform your skin overnight, only to see little to no results? Look no further than the facial steamer! This innovative device is quickly becoming a game-changer in the beauty industry for its ability to give you glowing, youthful-looking skin in just minutes. Say goodbye to dull and lifeless skin and hello to a radiant complexion with the power of steam. In this blog post, we’ll explore all the benefits of using a facial steamer and how it can take your skincare routine to the next level. Get ready for some serious #skingoals!

What is a facial steamer?

Assuming you don’t already know, a facial steamer is a device that emits water vapor to cleanse and moisturize the skin. The steam opens up pores and allows for better absorption of skincare products. It also hydrates the skin and can help reduce the appearance of wrinkles.

If you’re looking for a quick and easy way to transform your skin, a facial steamer is the way to go. Just a few minutes with this magical device will leave you with glowing, youthful skin.

How to use a facial steamer

A facial steamer can help to improve your skin in a matter of minutes. It is the key to achieving glowing, youthful skin. Here are some tips on how to use a facial steamer:

-Start by cleansing your face with a gentle cleanser.

-Next, fill the steamer with distilled water and turn it on.

-Hold your face about 10-12 inches away from the steamer and let the steam hit your face for about 5 minutes.

-After 5 minutes, turn off the steamer and pat your face dry with a clean towel.

-Apply a serum or moisturizer to your face while it is still damp.

The benefits of using a facial steamer

One of the best things you can do for your skin is to give it a good steam. Facial steaming opens up your pores and encourages detoxification. It’s also incredibly relaxing, which does wonders for your complexion. If you don’t already own a facial steamer, now is the time to invest in one. Here are some of the benefits of using a facial steamer:

-Facial steaming helps to cleanse the skin by opening up the pores and removing impurities.
-It improves circulation and gives the skin a healthy glow.
-Steaming can help to soothe irritations such as acne, eczema, and psoriasis.
-It can help to reduce fine lines and wrinkles by increasing collagen production.
-Facial steaming is a great way to relax and de-stress after a long day.

The best facial steamers on the market

If you’re looking for a facial steamer that will give you the best bang for your buck, look no further! We’ve rounded up the best facial steamers on the market that will help transform your skin in minutes.

No matter what your budget is, there’s a facial steamer on this list that will suit your needs. From handheld steamers to salon-grade machines, we’ve got you covered.

So, what are you waiting for? Get ready to achieve glowing, youthful skin with one of these amazing facial steamers!

How to make your own facial steamer

A facial steamer is a great way to achieve glowing, youthful skin. There are many ways to make your own facial steamer, but we will outline the most popular and effective method.

To make your own facial steamer, you will need:

-1 cup of distilled water

-A bowl that can hold the distilled water
-A clean towel
-Something to cover your head (such as a shower cap or large towel)

Instructions:

1. Boil the distilled water in a pot on the stove. You want the water to be hot, but not boiling. If the water is too hot, it can scald your skin.
2. Carefully pour the hot water into the bowl.
3. Drape the towel over your head and lean over the bowl so that your face is about 10 inches away from the surface of the water.
4. Make sure that the towel forms a seal around your head so that no steam escapes.
5. Allow yourself to steam for 5-10 minutes, or until you feel your skin has had enough time to absorb the moisture.
6. Rinse your face with cool water and apply a moisturizer immediately after steaming.

Conclusion

A facial steamer is a great way to take your skin care routine to the next level and achieve glowing, youthful-looking skin. Not only can it help you relax and destress, but it also helps open up pores so that you can better target any blemishes or acne problems. With regular use of a facial steamer, you’ll be able to transform your complexion in minutes for a healthier looking complexion that lasts. Give it a try today and see just how amazing your skin can look!

Are you tired of dealing with dry patches, oily T-zones, and pesky breakouts? If so, you’re not alone. Combination skin can be a challenge to manage, but with the right skincare routine, achieving that coveted glowing complexion is within reach. Say goodbye to guessing which products will work best for your unique skin type and unlock the secret to radiant skin with our perfect skincare routine for combination skin. Get ready to fall in love with your skin all over again!

The Different Types of Combination Skin

If you have combination skin, you may be wondering what the best skincare routine is for you. The good news is that there are a few simple steps you can take to get your skin looking its best.

One of the most important things you can do for your skin is to use products that are designed for your specific skin type. If you use products that are too harsh, they can strip away the natural oils that your skin needs to stay healthy. Likewise, if you use products that are too emollient, they can clog your pores and lead to breakouts.

The best way to find products that work for your combination skin is to consult with a dermatologist or esthetician. They can help you identify the right cleanser, toner, moisturizer, and other treatments for your individual skin type.

In general, people with combination skin should avoid using bar soaps, which can strip away natural oils. Instead, opt for a gentle gel or cream cleanser. Be sure to cleanse twice a day – in the morning and at night – to remove dirt, oil, and makeup from your skin.

After cleansing, apply a light weight lotion or gel moisturizer to lock in hydration without clogging pores. If you tend to get dry patches on your cheeks or forehead, consider using a richer cream moisturizer in those areas only. You may also want to use a separate eye cream to keep the delicate skin around

The Perfect Skincare Routine for Combination Skin

Assuming you have a basic understanding of the skincare do’s and don’ts, the following routine is what we recommend for combination skin:

Cleanser:
First things first, you need to start with a good cleanser. You want something that will clean your skin without stripping it of its natural oils. We recommend using a gentle, non-foaming cleanser like our Purifying Gel Cleanser. Massage it onto damp skin and rinse with lukewarm water.

Exfoliator:
Next, you’ll want to exfoliate once or twice a week. This helps to remove dead skin cells and unclog pores. We recommend our Refining Face Scrub, which contains jojoba beads and ginseng to help brighten and energize the skin. Apply it to damp skin and massage in circular motions before rinsing with lukewarm water.

Toner:
After cleansing and exfoliating, follow up with a toner. This helps to restore your skin’s pH balance and prep it for the next step in your routine. We like our Rebalancing Toner, which contains witch hazel and rosewater to soothe and tone the skin. Apply it to a cotton pad and swipe over clean, dry skin. Avoid the eye area.

Serum:
Now it’s time for serum! This step is important because it helps target

The Best Skincare Products for Combination Skin

If you have combination skin, you know that finding the right skincare products can be a bit of a challenge. You want something that will hydrate your dry areas without making your oily areas worse. And, of course, you want something that will give you the glowy, dewy skin of your dreams.

Luckily, we’ve done the research for you and compiled a list of the best skincare products for combination skin. From cleansers to serums to moisturizers, these products will help you get the perfect balance for your skin type.

Cleanser:

When it comes to cleansing your combination skin, you want to find a product that will cleanse your pores without stripping away all of your natural oils. The CeraVe Hydrating Face Wash is perfect for this. It contains ceramides and hyaluronic acid, which help to restore and maintain your skin’s natural barrier. Plus, it’s gentle enough for everyday use.

Serum:

Serums are an important step in any skincare routine, but they’re especially important for those with combination skin. That’s because they can help to target specific concerns like dryness or uneven texture. The Klairs Freshly Juiced Vitamin Drop is a great option for combination skin types. It contains 5% ascorbic acid (aka vitamin C), which brightens and evens out the skin tone. Plus, it has hyalur

How to Treat Common Skincare Issues for Combination Skin

If you have combination skin, you know that it can be a tricky skin type to manage. Combination skin is usually characterized by an oily T-zone (forehead, nose, and chin) and dry or normal cheeks. If you’re not sure whether you have combination skin, take a close look at your complexion. Do you see shine on your forehead and nose but dryness or normalcy on your cheeks? If so, then you likely have combination skin.

Now that we’ve determined that you have combination skin, let’s talk about how to treat some of the most common skincare issues associated with this skin type.

One of the most common concerns for those with combination skin is managing oiliness and preventing breakouts in the T-zone while still keeping the cheeks hydrated. The key to success is using different products on different areas of the face. For example, use a light moisturizer on the T-zone to control oil without drying out the skin. On the cheeks, however, you may need a richer moisturizer to combat dryness.

Exfoliation is also important for combination skin types. Be sure to exfoliate both the oily and dry areas of your face to unclog pores and prevent breakouts. Just be careful not to overdo it – exfoliating too often can strip away essential oils and leave your skin feeling dry and irritated.

Finally, don’t forget sunscreen! Even if you don’t spend

Conclusion

The best skincare routine for combination skin is one that caters to both your needs and demands. It should be tailored specifically according to the type of combination skin you have, as well as the environmental factors that could affect it. With the right balance of cleansers, moisturizers, serums, and exfoliators; you can unlock the secret to glowing skin! Taking care of your face with a specific regimen designed just for combination skin will help make sure you look and feel your best every day.

Are you tired of struggling to create that perfect eyebrow shape? Look no further because we have the ultimate guide for achieving flawless eyebrows! Eyebrows frame our face and can enhance or detract from our overall appearance. Let us help you master the art of shaping and achieve stunning, natural-looking brows. Whether your eyebrows are sparse, unruly, or simply need a little TLC, we’ve got tips and tricks that will transform them into your best feature yet. Get ready to say goodbye to bad brow days forever!

What are the Different Types of Eyebrows?

There are many different types of eyebrows, and the perfect eyebrow shape for you depends on the shape of your face. The most common eyebrow shapes are arched, straight, and curved.

If you have a round face, you should go for an eyebrow shape that is more curved or straight. An arched eyebrow can make your face look even more round. If you have an oval face, you can go for any eyebrow shape you want. However, if you have a square face, it is best to avoid an arched eyebrow as it can make your face look even more square. Instead, go for a more curved or straight brow.

The type of eyebrows you have also depends on the thickness of your hair. If you have very thin hair, it is best to go for thinner eyebrows so as not to overpower your face. Conversely, if you have very thick hair, thicker eyebrows can help balance out your features. Ultimately, the perfect eyebrow shape for you is the one that makes you feel the most confident and complements the shape of your face.

How to Find the Right Eyebrow Shape for Your Face

When it comes to eyebrows, there is no one-size-fits-all. The shape of your eyebrows should be determined by the shape of your face. Here are some tips on how to find the right eyebrow shape for your face:

If you have a round face:

Go for an angular eyebrow shape. This will help give your face a more elongated look. Avoid rounded or over-arched brows, as they will only make your face look rounder.

If you have an oval face:

You’re lucky, because almost any eyebrow shape will suit you! However, if you want to further accentuate your features, go for a slightly arched brow. This will help give your face more definition.

If you have a square face:

Rounded or softbrow shapes will help soften the angles of your face. Avoid straight or severe brow shapes, as they will only accentuate the squareness of your jawline.

How to Trim and Fill in Your Eyebrows

If you’re looking to achieve the perfect eyebrows, then you need to know how to trim and fill them in correctly. Here are some tips on how to do just that:

– Use a small, sharp pair of scissors to trim any stray hairs. Be careful not to take too much off, as you can always trim more if needed.

– Once you’ve trimmed your eyebrows, it’s time to fill them in. Use an eyebrow pencil or powder to create a more defined shape. Start by filling in the sparse areas, and then blend outwards.

– If you want a more natural look, you can use a clear or tinted brow gel instead of pencil or powder. This will help keep your brows in place all day long.

following these simple steps, you’ll be well on your way to perfect eyebrows that will frame your face perfectly!

The Best Eyebrow Products

There are a lot of great eyebrow products out there, but how do you know which ones are the best? Here are a few things to consider when choosing the perfect eyebrow product for you:

-Your skin type: If you have oily skin, you’ll want to stay away from waxy pencils or pomades that can slide right off. Instead, try a powder or gel formula.

-The color of your brows: Choose a shade that’s close to your natural brow color for a subtle look, or go a few shades darker or lighter for a more dramatic effect.

-The desired finish: If you want your brows to look polished and defined, go for a product with a matte finish. For a softer, more natural look, opt for something with a bit of shine.

How to Get the Perfect Eyebrow Shape

There are a few things to keep in mind when shaping your eyebrows. First, you need to find the right tools. Second, you need to know what shape you want. And third, you need to be careful not to overdo it.

The Right Tools

To get the perfect eyebrow shape, you need the right tools. This includes tweezers, scissors, and an eyebrow pencil or powder. Tweezers are used to pluck any stray hairs that are outside of your desired shape. Scissors are used to trim any long hairs that might interfere with your eyebrow shaping. And an eyebrow pencil or powder is used to fill in any sparse areas and help define the shape of your brows.

The Right Shape

When it comes to choosing the right eyebrow shape, there are a few things to keep in mind. First, take into account the natural shape of your brows. If they’re naturally straight, then you’ll want a more defined arch. If they’re naturally curved, then you’ll want a softer arch. Second, think about the size and proportions of your face. If you have a small face, then you’ll want smaller brows that don’t overpower your features. If you have a larger face, then you can go for bigger brows that make more of a statement. Lastly, consider what kind of look you’re going for -whether it’s natural and understated or bold and dramatic. Once you’ve considered all of these

Conclusion

We hope this article on the art of shaping and how to achieve perfect eyebrows has been helpful. With practice and patience, you can master the skills needed to shape your eyebrows perfectly every time. Whether you opt for an arch or a more natural look, remember that it is important to be gentle with your skin as you work to create an eyebrow style that frames your face beautifully. The key is finding what works best for you and having fun experimenting with different shapes until you find one that suits you!

Are you tired of constantly switching between different foundation formulas, only to find that none of them seem to work for your skin type? Look no further! In this blog post, we’ll guide you through the process of finding your ideal foundation match – whether your skin is oily or dry. Say goodbye to cakey finishes and patchy coverage, and hello to a flawless complexion that lasts all day. Let’s get started!

The Different Types of Foundation

If you have dry skin, you might want to try a foundation with hydrating ingredients like glycerin or Shea butter. For oily skin, look for water-based or oil-free formulas. If you have sensitive skin, choose a foundation that is fragrance-free and noncomedogenic. You can also look for foundations that contain SPF to protect your skin from the sun.

How to Find Your Perfect Foundation Match

When it comes to foundation, finding your perfect match can be a tough process. There are so many different formulas on the market, and it can be hard to know where to start. But don’t worry – we’re here to help you out.

Here are a few tips on how to find your perfect foundation match:

1. Know Your Skin Type

The first step in finding your perfect foundation is to know your skin type. Are you oily, dry, or somewhere in between? This will help you narrow down the types of foundations that will work best for you.

2. Identify Your Coverage Needs

Do you need full coverage, or are you looking for something more sheer? Again, this will help you narrow down your options.

3. Consider Your Skin Tone

What color is your skin? You’ll want to make sure you find a foundation that matches your skin tone closely, otherwise it will look unnatural.

4. Test Out Different Formulas

Once you’ve narrowed down your options, it’s time to start testing out different formulas. The best way to do this is by going to a Sephora or Ulta and getting color matched by one of the experts there. They’ll be able to help you find the right shade and formula for your skin type and coverage needs.
Once you’ve found a few foundations that you like, it’s time to put them to the test. Apply a small

The Best Foundations for Oily Skin

If you have oily skin, you know the constant battle of keeping your makeup in place. It can feel like no matter what you do, your foundation is always sliding off or getting shiny throughout the day. The good news is, there are plenty of foundations out there that can help control oil and keep your makeup looking fresh all day long.

Here are our picks for the best foundations for oily skin:

1. L’Oréal Paris Infallible Pro-Matte Foundation

2. Maybelline New York Fit Me Matte + Poreless Foundation

3. NYX Professional Makeup Can’t Stop Won’t Stop Full Coverage Foundation

4. Revlon Photoready Airbrush Effect Makeup Foundation

5. Covergirl Outlast All-Day Active Moisturizing Foundation

The Best Foundations for Dry Skin

If you have dry skin, you know the foundation struggle is real. Most formulas end up clinging to dry patches, accentuating lines and wrinkles, or just generally looking cake-y. But never fear—we’ve got your back. We’ve rounded up the best foundations for dry skin that will give you a hydrated, luminous complexion.

From drugstore to high-end, there’s a formula for everyone in this lineup. For light coverage with a dewy finish, we love Maybelline Fit Me Dewy + Smooth Foundation. If you prefer a full-coverage foundation that won’t leave your skin looking dry and dull, try NARS All Day Luminous Weightless Foundation. And for those days when you just want a little something to even out your skin tone, reach for IT Cosmetics CC+ Cream Illumination with SPF 50+.

No matter what your foundation preference is, we’ve got a pick that will work for you—and your dry skin. So go ahead and give these foundations a try, and say goodbye to flaky, dry skin for good!

The Best Foundations for Sensitive Skin

If you have sensitive skin, you know the drill: You try a new foundation, only to find that it irritates your skin or makes you break out. The good news is that there are plenty of foundation options out there for people with sensitive skin. Here are our picks for the best foundations for sensitive skin:

1. bareMinerals BarePro Performance Wear Powder Foundation: This powder foundation is formulated with minerals and other ingredients that are gentle on sensitive skin. It provides buildable coverage and has a matte finish.

2. Glossier Perfecting Skin Tint: This lightweight tinted moisturizer evens out the complexion and gives the skin a healthy-looking glow. It contains hyaluronic acid, which helps to hydrate the skin, and niacinamide, which helps to reduce redness.

3. La Roche-Posay Toleriane Teint Mineral: This mineral-based foundation is free of fragrances, parabens, sulfates, and other potential irritants. It provides buildable coverage and has a natural finish.

4. Clinique Even Better Refresh Hydrating and Repairing Makeup: This foundation contains hyaluronic acid and aloe vera to help hydrate the skin. It also contains antioxidants to help protect the skin from environmental damage.

5. Nars Sheer Glow Foundation: This foundation contains glycerin and other ingredients that help to hydrate the skin. It

Conclusion

Finding the right foundation for your skin type can be daunting, but it doesn’t have to be. With these tips in mind, you should be able to find a foundation that works best for your skin type and gives you an even and natural-looking finish. Remember that everyone’s skin is different so don’t hesitate to experiment with different foundations until you find the one that works best for you!

Are you tired of waking up to puffy eyes and dark circles? Do you wish there was a magic remedy that could give you a refreshed look every morning? Well, good news – it’s possible! We’ve gathered expert tips and tricks to help you eliminate those pesky under-eye issues. Say goodbye to looking like you didn’t get enough sleep (even if that’s the case) and say hello to waking up feeling confident and revitalized. Keep on reading for our top secrets on how to wake up looking refreshed!

Causes of Dark Circles and Puffy Eyes

There are many potential causes of dark circles and puffy eyes, including genetics, allergies, fatigue, and sun exposure. However, the most common cause is simply not getting enough sleep. When you don’t get enough sleep, your body doesn’t have time to repair itself properly, and this can lead to the formation of dark circles and puffiness around the eyes.

Other potential causes of dark circles and puffiness include dehydration, which can make the skin around your eyes appear sunken and wrinkled; crying, which can cause the blood vessels under your eyes to swell; and hormonal changes, which can cause fluid retention and lead to a puffy appearance.

If you’re concerned about the dark circles or puffiness around your eyes, talk to your doctor or a dermatologist. They can help you determine the cause and find the best treatment options.

Home Remedies for Dark Circles and Puffy Eyes

While there are a number of factors that can contribute to the formation of dark circles and puffy eyes, including genetics and lifestyle choices, there are also a number of simple home remedies that can help to diminish their appearance.

Some of the most effective home remedies for dark circles and puffy eyes include cucumber slices, cold compresses, tea bags, and petroleum jelly.

Cucumber slices can help to reduce puffiness by constricting blood vessels. Simply place a few slices on your eyes for 10-15 minutes.

Cold compresses can also help to reduce puffiness and relieve any tension or fatigue in the eye area. Simply apply acold compress to the area for 5-10 minutes. Tea bags contain tannins which can help to reduce swelling and inflammation. Place a cold, damp tea bag on each eye for 10-15 minutes. Petroleum jelly is an effective way to moisturize dry, sensitive skin around the eyes and prevent further irritation. Apply a small amount of petroleum jelly to the area before bedtime and in the morning.

Medical Treatments for Dark Circles and Puffy Eyes

There are a number of medical treatments that can help reduce the appearance of dark circles and puffy eyes. These include:

1. Laser treatment: This involves using a laser to target the blood vessels under the eyes, which can help to reduce the appearance of dark circles.

2. Intense pulsed light therapy: This involves using pulses of light to target the blood vessels under the eyes, which can help to reduce the appearance of dark circles.

3. Microneedling: This involves using fine needles to create tiny punctures in the skin, which can stimulate collagen production and help reduce the appearance of wrinkles and fine lines.

4. Platelet-rich plasma therapy: This involves injecting platelets from your own blood into the skin, which can help to speed up healing and reduce inflammation.

5. Topical creams and gels: There are a number of topical creams and gels that contain ingredients that can help to reduce puffiness and darkness under the eyes.

Prevention of Dark Circles and Puffy Eyes

There are a few things you can do to prevent dark circles and puffy eyes. Start by getting enough sleep. Aim for at least eight hours a night. If you have trouble sleeping, try relaxation techniques such as yoga or meditation.

In the morning, splash cold water on your face to wake up your skin cells and help reduce puffiness. Apply a cucumber slice or tea bag over each eye for about 10 minutes to reduce inflammation.

Be sure to wear sunglasses when you’re outdoors to protect your eyes from the sun’s harmful UV rays. And lastly, don’t smoke. Smoking constricts blood vessels and can contribute to wrinkling around the eyes.

Conclusion

With the right methods and products, you can have beautiful, glowing eyes in no time. Dark circles and puffiness are common issues that many people face at one point or another, but by following the tips we outlined in this article, you can make sure that these problems will become a thing of the past. Dedicate some extra time to your skincare routine and soon enough you’ll wake up looking refreshed!

Welcome to the world of natural ingredients, where facial oils are taking the beauty industry by storm! Are you tired of using skincare products loaded with chemicals that only worsen your skin’s condition? If yes, then it’s time to switch to nature’s best-kept secret – facial oils. No matter what your skin type is, these potent formulas can work wonders for you. From locking in moisture and improving texture to reducing fine lines and combating acne, there isn’t much a good quality facial oil can’t do. So why not unlock the power of natural ingredients today and transform your skin from dull to radiant? Let’s dive right in!

What are facial oils?

Facial oils are one of the best kept secrets in the natural beauty world. Unlike creams and lotions, which can sit on the surface of the skin and never fully penetrate, oils are able to deeply nourish and hydrate. Additionally, because our skin is naturally slightly acidic, using an oil can help to restore balance and improve overall texture.

One of the biggest misconceptions about facial oils is that they will make your skin greasy or cause breakouts. In reality, properly formulated facial oils can actually help to regulate oil production and keep pores clear. The key is to find an oil that is compatible with your individual skin type.

If you have oily or acne-prone skin, look for a light oil like jojoba or grapeseed. These won’t clog pores or leave your skin feeling greasy. If you have dry skin, opt for a richer oil like avocado or coconut. These will help to replenish lost moisture and leave your skin soft and glowing. For sensitive skin, try a soothing oil like chamomile or lavender.

No matter what your skin type, adding a facial oil to your routine is a great way to boost hydration and promote healthy, radiant skin!

The benefits of using facial oils

There are many benefits to using facial oils, regardless of your skin type. One of the primary benefits is that they are packed with nutrients that can help to improve the overall appearance of your skin. Facial oils can also help to lock in moisture, which is essential for keeping your skin hydrated and looking its best.

Another benefit of using facial oils is that they can help to reduce the appearance of fine lines and wrinkles. This is due to the fact that they help to plump up the skin and smooth out any imperfections. In addition, facial oils can also help to brighten the complexion and even out the skin tone.

Finally, facial oils can also be helpful in combating various skin conditions such as acne, eczema, and psoriasis. This is because they can help to soothe inflammation and reduce redness. If you suffer from any of these conditions, then using facial oils may be a good option for you.

The best facial oils for each skin type

When it comes to facial oils, there is no one-size-fits-all solution. Just as our bodies and lifestyles are unique, so is our skin. That’s why it’s important to tailor your skincare routine to your specific skin type.

If you’re not sure what kind of facial oil is right for you, here’s a quick rundown of the best options for each skin type:

Normal Skin: If you have normal skin, you’re in luck! Almost any facial oil will work for you. Try an lightweight oil like jojoba or grapeseed oil if you’re concerned about clogging your pores.

Dry Skin: If your skin is prone to dryness, look for facial oils that are rich in omega-3 fatty acids, like rosehip seed oil or evening primrose oil. These will help to replenish your skin’s moisture barrier and prevent future dehydration.

Oily Skin: Believe it or not, even oily skin can benefit from the occasional use of a facial oil. Look for non-comedogenic oils like hemp seed oil or avocado oil that won’t clog your pores but will help to balance your skin’s natural sebum production.

Sensitive Skin: If you have sensitive skin, opt for a hypoallergenic oil like sweet almond oil or apricot kernel oil. These are both gentle enough for even the most delicate skin types.

How to use facial oils

Facial oils are an excellent way to hydrate and nourish the skin. They can be used alone or added to your favorite moisturizer or serum. When using facial oils, always start with a clean face. If you are using an oil-based cleanser, apply it to dry skin and massage for a minute or two before rinsing with warm water. If you prefer, you can also use a water-based cleanser followed by your facial oil of choice.

To apply the oil, dispense a few drops into the palm of your hand and rub your hands together. Then, using your fingertipsfaq fingers, smooth the oil over your face and neck in upward strokes. Allow the oil to soak in for a few minutes before applying makeup or sunscreen.

Why natural ingredients are important

Facial oils are often overlooked in favor of traditional cream moisturizers. But what many people don’t realize is that natural oils can be just as effective (if not more so) at keeping skin hydrated and healthy. In fact, natural ingredients like jojoba oil and argan oil are becoming increasingly popular in the beauty world because of their ability to nourish and protect the skin.

Here are a few reasons why natural ingredients are important for your skin:

They’re gentle and non-irritating: Many facial oils are made with ingredients that are gentle on the skin, making them ideal for those with sensitive skin. In fact, some facial oils can even help to reduce irritation and redness.

They’re packed with nutrients: Natural ingredients like jojoba oil and argan oil are rich in essential vitamins and minerals that can help to nourish and revitalize the skin.

They help lock in moisture: Facial oils can help to create a barrier on the skin that locks in moisture, keeping your skin hydrated all day long.

They have anti-aging properties: Some natural ingredients, like argan oil, have antioxidants that can help to protect the skin from damage caused by free radicals. This makes them beneficial for those looking to reduce the appearance of fine lines and wrinkles.

Conclusion

Facial oils can be incredibly beneficial for all skin types and are a great way to nourish the skin from within. Natural ingredients such as jojoba oil, argan oil, and vitamin E boost hydration and protection while providing essential nutrients that can help enhance your natural complexion. With just a few drops of facial oil, you can unlock the power of natural ingredients to get glowing, healthy-looking skin in no time!