Creating the “watercolor tears” look involves applying makeup in a way that mimics the appearance of softly blended watercolors. Here’s a step-by-step guide to achieving this look:

Step 1: Prepare Your Face
Start by cleansing your face and applying a lightweight moisturizer. This will create a smooth base for your makeup and help it adhere better. Allow the moisturizer to fully absorb into your skin before moving on to the next step.

Step 2: Apply Foundation
Choose a lightweight, medium-coverage foundation that matches your skin tone. Apply it evenly all over your face using a makeup sponge or brush. Blend it well to achieve a natural finish.

Step 3: Conceal and Correct
Use a creamy concealer to cover any blemishes, dark circles, or areas of redness. Dab a small amount of concealer onto these areas and gently blend it with your fingertips or a concealer brush. If you have any color correction needs (e.g., neutralizing redness or dark spots), use a color corrector before applying concealer.

Step 4: Add a Soft Wash of Color
Choose a pastel eyeshadow or blush shade in the color you want for your “watercolor tears.” Soft pinks, purples, and blues work well for this look. Using a fluffy eyeshadow brush, gently sweep the color across your eyelids and extend it slightly onto your lower lash line. Apply the same color to the apples of your cheeks for a coordinated look. The goal is to create a diffused and blended effect, so make sure to blend the edges of the color well.

Step 5: Apply Mascara and Define Brows
Curl your lashes and apply a coat or two of mascara to add definition to your eyes. If desired, you can also apply false lashes for a more dramatic effect. Fill in your eyebrows using a brow pencil or powder to frame your face and add structure.

Step 6: Emphasize the “Tears”
To create the illusion of “watercolor tears,” use a liquid or gel eyeliner in a dark shade, such as black or deep blue. Start from the outer corner of your eye and draw a thin line that extends slightly downwards towards the outer edge of your cheekbone. This line should resemble a tear track. Repeat the process on the other eye, ensuring the lines are symmetrical. Keep the lines soft and not too harsh.

Step 7: Blend and Soften the Liner
Using a small brush or a cotton swab, gently smudge and soften the eyeliner lines you created in the previous step. This will give them a watercolor-like appearance. Be careful not to completely erase the lines—instead, aim for a soft, diffused effect that resembles smudged watercolors.

Step 8: Finishing Touches
Apply a light coat of lip balm or a sheer lip gloss to keep your lips hydrated and add a touch of shine. Avoid heavy or opaque lip products that may overpower the delicate look you’ve created.

That’s it! You’ve now achieved the “watercolor tears” look. Remember, this style is all about softness and blending, so take your time and enjoy the creative process. Have fun experimenting with different colors and variations to make it your own.

To achieve the perfect beach look, follow these steps for sandy toes and sun-kissed nails:

1. Exfoliate and Moisturize your Feet:
– Start by exfoliating your feet to remove dead skin cells. You can use a foot scrub or make a DIY scrub using sugar and coconut oil.
– Rinse off the scrub and pat your feet dry.
– Apply a moisturizer or foot cream to hydrate your skin and keep it soft. Focus on areas prone to dryness like heels and cuticles.

2. Nail Care:
– Trim and shape your nails to your desired length. Use a nail file to smooth any rough edges.
– Soak your feet in warm water for a few minutes to soften the nails and cuticles.
– Gently push back the cuticles using a cuticle pusher or an orange stick. Be careful not to cut or damage the cuticles.

3. Beachy Nail Colors:
– Choose nail polish colors that reflect the beach aesthetic. Opt for shades like turquoise, coral, peach, pastel blue, or sandy nude tones.
– Apply a base coat to protect your nails and enhance the longevity of your polish.
– Apply two thin coats of your chosen beach-inspired nail polish color, allowing each coat to dry completely before applying the next.

4. Sun-Kissed Nail Art:
– If you want to add some nail art, consider these options:
– Create a gradient effect by sponging on a lighter or darker shade of the same color onto the tips or base of your nails.
– Apply a layer of gold or silver glitter polish over your base color to mimic the sparkling sun.
– Add small seashell or starfish nail stickers to accent one or two nails.
– Use a thin nail art brush to draw waves, palm trees, or a sunset scene on one or two accent nails.

5. Seal and Protect:
– Once your nail polish is completely dry, apply a top coat to seal and protect the color. This will also add a glossy finish to your nails.
– Allow the top coat to dry thoroughly to prevent smudging or smearing.

6. Sandy Toes:
– Head to the beach and enjoy the sand between your toes!
– Once you’re done, rinse off your feet to remove any sand and gently pat them dry.
– Reapply foot cream or moisturizer to keep your feet hydrated and soft.

Remember to relax and have fun while creating your beach look. Feel free to customize the colors and designs to match your personal style and preferences.

Have you ever wished for a magic wand that could instantly transform your tired and dull skin into glowing and radiant? Well, what if we told you that there’s a simple, affordable, and refreshing solution to achieve just that? Say hello to skin icing – an ancient beauty ritual that has been passed down through generations of women. From reducing puffiness under the eyes to improving blood circulation in the face, skin icing is a versatile technique with numerous benefits. So put on your favorite playlist, grab some ice cubes from the freezer, and get ready to give yourself an invigorating skincare treatment right at home!

What is skin icing?

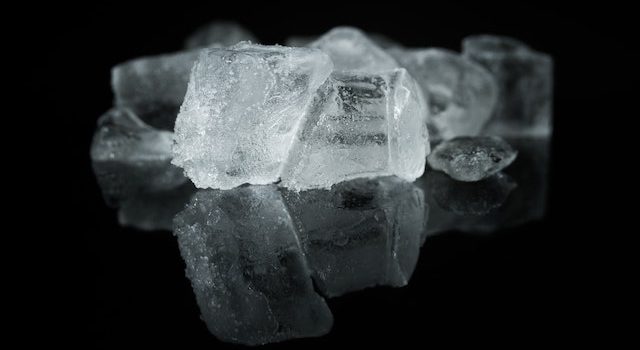
Skin icing is a simple and effective skincare treatment that involves rubbing ice cubes on the face and neck. The technique has been used for centuries by women in Asia to achieve bright, youthful-looking skin. It works by constricting blood vessels and reducing inflammation, which can help improve a variety of skin concerns.

One of the primary benefits of skin icing is its ability to reduce puffiness around the eyes. If you struggle with dark circles or bags under your eyes, try wrapping an ice cube in a soft cloth and gently massaging it around your eye area.

In addition to reducing puffiness, skin icing can also help soothe irritated or inflamed skin. If you have acne-prone or sensitive skin, applying ice directly to your trouble spots can help reduce redness and calm inflammation.

Another benefit of skin icing is improved circulation. As the cold temperature stimulates blood flow in the face, it can help promote healthy cell turnover and give your complexion a natural glow.

Incorporating regular sessions of skin icing into your skincare routine may provide numerous benefits for achieving healthier-looking skin at home!

How to ice your skin

Skin icing is a refreshing and rejuvenating technique that has become increasingly popular in recent years. It involves applying ice to your skin, which can help to reduce puffiness and inflammation, tighten pores, brighten complexion and even out skin tone.

So how do you go about icing your skin? First off, you’ll need some ice cubes or an ice pack. Wrap the ice in a thin towel or cloth before applying it directly to your face – this will prevent any damage from the cold temperature.

Start by gently rubbing the ice over your forehead, then move down to your cheeks and chin. Be sure not to spend too much time on one area as this may cause redness or irritation.

You can also incorporate facial massage techniques while icing for added benefits. Use circular motions around your eyes to decrease dark circles and fine lines. Apply pressure on specific points of tension such as jawline for increased lymphatic drainage.

It’s recommended that you only spend a few minutes at most doing this technique once per day instead of incorporating it into daily routine throughout the week- especially if you have sensitive skin!

Benefits of skin icing

Skin icing is a simple and effective way to rejuvenate your skin. The benefits of this technique are numerous, ranging from reducing inflammation and puffiness to improving blood circulation and tightening pores.

One of the biggest advantages of skin icing is its ability to reduce redness and inflammation. Applying ice on swollen or irritated areas can help soothe the skin, calm down any redness, and minimize the appearance of acne blemishes.

Icing also helps improve blood circulation by constricting blood vessels in our face. This results in increased oxygen flow to our skin cells which helps provide a natural glow while minimizing fine lines and wrinkles.

Moreover, using ice cubes on your face daily can tighten the pores by flushing out impurities from deep within them. Doing this will give you smoother looking fresh skin that’s less prone to breakouts.

Regular use of ice on your face may slow down aging signs as it boosts collagen production – leading to tighter, hydrated skin with fewer wrinkles over time!

There are many great reasons why people should try incorporating facial icing into their skincare routine!

Precautions to take when icing your skin

While skin icing can be a refreshing and rejuvenating experience for your skin, it’s important to take some precautions before you begin. Here are some tips to keep in mind:

Always start with clean skin. Your face should be free from makeup or any other products before you start the icing process.

Next, never ice your skin for too long. Applying ice directly on the skin for more than 15-20 minutes can damage the natural barrier of your skin and cause redness or even frostbite.

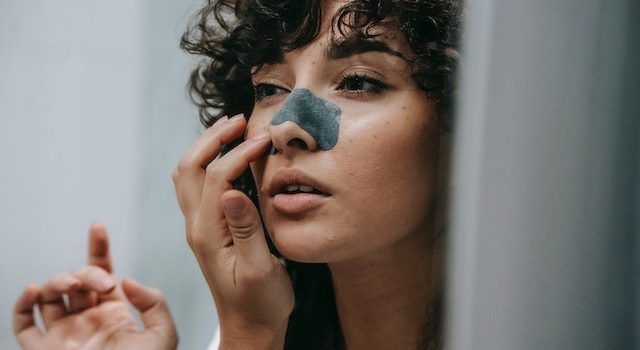
Another precaution is to avoid using ice cubes directly on your face. Instead, wrap them in a soft cloth or use an ice roller specifically designed for skincare purposes.

It’s also essential to pay attention to how your skin reacts during the icing process. If at any point it feels uncomfortable or painful, stop immediately and let your skin rest.

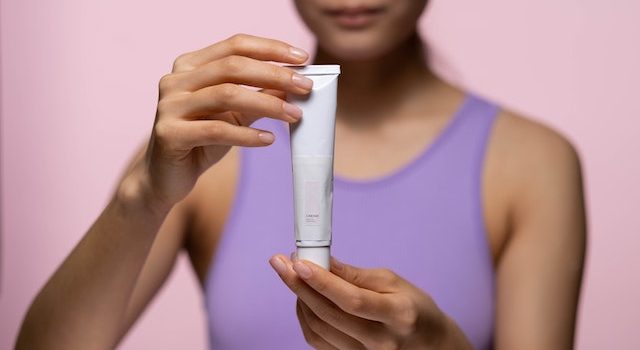
Make sure to moisturize after you’ve finished icing your face. This will help lock in hydration and prevent dryness caused by extreme cold temperatures.

By following these precautions when icing your skin, you’ll ensure that this cooling beauty technique remains safe and beneficial for your overall skincare routine!

Skin icing recipes

Skin icing is a refreshing and efficient way to rejuvenate your skin, but did you know that you can add some natural ingredients to enhance the benefits? Yes, ice alone works wonders on its own, but adding certain elements can provide additional nourishment and help target specific skin concerns. Here are three simple and effective skin-icing recipes you can try:

1) Green Tea Ice Cubes: Brew one cup of green tea and pour it into an ice cube tray. Once frozen, wrap the green tea cubes in a soft cloth or paper towel before applying them to your face. Green tea contains antioxidants that soothe inflammation and reduce redness.

2) Lemon Juice Ice Cubes: Squeeze fresh lemon juice into an ice cube tray and let it freeze overnight. Wrap the lemon cubes in a thin cloth before using them on your face. Lemon juice helps brighten dull skin by removing dead cells.

3) Aloe Vera Ice Cubes: Mix pure Aloe Vera gel with water (one part each), pour into an ice cube tray then freeze overnight. Use these cubes wrapped in soft cloth for soothing sunburns, reducing acne inflammation or tightening pores.

These recipes are easy to make at home with readily available items from your pantry or herb garden!

Conclusion

Skin icing is a refreshing and natural way to nourish and rejuvenate your skin. It offers numerous benefits such as reducing inflammation, improving circulation, tightening pores, and brightening complexion.

Remember that it’s important to take precautions when icing your skin such as not using ice directly on the skin for too long or avoiding areas with thin or sensitive skin.

Regularly incorporating skin icing into your skincare routine can lead to healthier and more radiant-looking skin. Whether you use just plain ice or try out different recipes with added ingredients like green tea or cucumber juice, giving yourself an at-home spa treatment has never been easier. So go ahead, give it a try and let us know how it works for you!

Olive oil, a kitchen staple known for its culinary uses, can also be a versatile addition to your skincare routine. Its moisturizing properties and abundance of antioxidants make it a surprising yet effective ingredient for achieving healthy and glowing skin. Here are five surprising ways to incorporate olive oil into your skincare routine:

1. Makeup Remover:

Olive oil can act as a gentle and effective makeup remover, even for stubborn waterproof products. Pour a small amount of olive oil onto a cotton pad and gently wipe away your makeup, focusing on the eyes and face. The oil helps dissolve makeup without stripping the skin of its natural oils, leaving it nourished and hydrated. Rinse with water afterward to remove any residue.

2. Cuticle Oil:

Treat your dry and brittle cuticles with a little olive oil. Massage a drop or two of olive oil onto your cuticles and nails before bedtime. The oil will hydrate and nourish the cuticles, promoting healthier nail growth and preventing breakage. Regular use can help you achieve stronger, neater nails.

3. Lip Scrub:

Create a simple and natural lip scrub using olive oil and sugar. Mix equal parts olive oil and sugar in a small bowl to create a paste. Gently massage the mixture onto your lips in circular motions for a minute or two, then rinse off with warm water. This homemade lip scrub exfoliates dead skin cells, leaving your lips smooth and soft. Follow up with a lip balm to lock in moisture.

4. Body Moisturizer:

Extend the benefits of olive oil to your body by using it as a moisturizer. After showering, while your skin is still damp, apply a small amount of olive oil to your body and massage it in. The oil will help seal in moisture, leaving your skin soft, supple, and hydrated. Focus on areas prone to dryness, such as elbows, knees, and feet.

5. Overnight Hair Treatment:

Olive oil can also be used as a nourishing overnight treatment for your hair. Warm a small amount of olive oil and apply it to your hair, focusing on the ends and dry areas. Gently massage the oil into your scalp to stimulate circulation. Cover your hair with a shower cap or towel and leave the oil on overnight. In the morning, wash your hair as usual. This treatment helps moisturize and restore shine to dry and damaged hair.

Remember to choose high-quality extra virgin olive oil for skincare purposes. Look for organic and cold-pressed options to ensure the oil retains its beneficial properties. Patch test olive oil on a small area of your skin before applying it more extensively, especially if you have oily or acne-prone skin.

With these surprising uses, olive oil can become a valuable addition to your skincare routine. Explore its versatility and enjoy the natural benefits it brings to your skin, nails, and hair.

Taking care of your skin doesn’t have to be a time-consuming or complicated process. If you’re a self-proclaimed “lazy girl” who prefers a low-maintenance skincare routine without sacrificing the health and appearance of your skin, this ultimate lazy girl’s skincare routine is for you. With just a few simple steps, you can achieve healthy, radiant skin effortlessly.

1. Cleanse with a gentle face wash:

Start your lazy girl’s skincare routine by cleansing your face with a gentle cleanser. Look for a cleanser that suits your skin type and effectively removes dirt, oil, and impurities without stripping the skin’s natural moisture. Opt for a cleanser that doesn’t require rinsing, such as micellar water or cleansing wipes, for a quick and easy cleansing step.

2. Moisturize with a multitasking product:

Invest in a multitasking moisturizer that combines hydration with other beneficial ingredients. Look for a moisturizer that offers SPF protection to save time on applying a separate sunscreen. Additionally, choose a moisturizer that contains antioxidants or other skincare ingredients to provide added benefits like brightening or anti-aging properties. This way, you can hydrate, protect, and treat your skin in one simple step.

3. Use a tinted moisturizer or BB cream:

If you want to even out your skin tone without the hassle of foundation, opt for a tinted moisturizer or BB cream. These products provide lightweight coverage while moisturizing the skin. They are easy to apply with your fingertips and give a natural, no-makeup look. Choose a shade that matches your skin tone for a seamless finish.

4. Apply an eye cream:

Don’t neglect the delicate skin around your eyes. Use a lightweight eye cream to hydrate and nourish the under-eye area. Look for eye creams with ingredients like hyaluronic acid or peptides to help minimize the appearance of fine lines and dark circles. Applying the eye cream with your ring finger, gently tap it around the orbital bone until it is absorbed.

5. Finish with a lip balm:

Keep your lips moisturized and protected by applying a hydrating lip balm. Look for a lip balm that offers SPF protection to shield your lips from the sun’s harmful rays. Reapply throughout the day as needed to maintain soft and supple lips.

Optional Step: Weekly Sheet Mask:

If you have a few extra minutes to spare, incorporate a weekly sheet mask into your lazy girl’s skincare routine. Sheet masks are convenient, mess-free, and packed with beneficial ingredients. Choose a sheet mask that addresses your specific skincare concerns, such as hydration, brightening, or firming. Leave the mask on for the recommended time, remove it, and gently pat any remaining essence into your skin.

Remember, consistency is key in any skincare routine. Even if you’re keeping it simple and low-maintenance, make sure to follow these steps daily to maintain healthy skin. Additionally, don’t forget to drink plenty of water, get enough sleep, and protect your skin from excessive sun exposure to further enhance your skin’s health and natural glow.

With this ultimate lazy girl’s skincare routine, you can achieve beautiful, healthy skin with minimal effort. Embrace simplicity, take care of your skin, and enjoy the benefits of a low-maintenance yet effective skincare routine.

Aklief (generic name trifarotene) is a topical retinoid that offers an alternative to tretinoin for achieving clearer skin. It is approved by the U.S. Food and Drug Administration (FDA) for the treatment of acne. Aklief is specifically formulated to target the underlying causes of acne, including excess oil production, clogged pores, and inflammation. Here is a comprehensive guide to understanding and using Aklief:

1. How Aklief works: Aklief belongs to a class of medications called retinoids, which are derived from vitamin A. It works by binding to specific receptors in the skin called retinoic acid receptors (RARs). This action helps regulate the skin cell turnover process, reducing the formation of clogged pores, promoting the shedding of dead skin cells, and preventing the formation of new acne lesions.

2. Benefits of Aklief:

– Acne treatment: Aklief is primarily used for the treatment of acne vulgaris. It can be effective in reducing both inflammatory and non-inflammatory acne lesions, including blackheads, whiteheads, papules, and pustules.

– Targeted action: Aklief specifically targets the RAR-γ receptor, which is predominantly found in the sebaceous glands of the skin. By selectively binding to this receptor, Aklief helps to normalize the skin’s oil production, leading to a reduction in acne breakouts.

– Potency and tolerability: Aklief is considered a potent retinoid but is designed to be well-tolerated by the skin. It is formulated with a unique molecule that allows for targeted delivery to the affected areas while minimizing irritation and dryness often associated with retinoids.

– Suitable for different skin types: Aklief can be used by individuals with various skin types, including those with oily, combination, or sensitive skin.

3. How to use Aklief:

– Start with clean, dry skin: Before applying Aklief, ensure that your skin is clean and dry. You may use a gentle cleanser suitable for your skin type.

– Apply a thin layer: Using clean fingertips, apply a thin layer of Aklief to the affected areas of your face once daily, preferably in the evening.

– Avoid sensitive areas: Take care to avoid applying Aklief near the eyes, lips, nostrils, or any other sensitive areas.

– Gradual introduction: When starting Aklief, it is recommended to begin with a once-daily application, and if tolerated well, you can increase the frequency to twice daily.

– Follow with moisturizer: After Aklief has absorbed into your skin, you may apply a moisturizer to help minimize dryness and irritation. Choose a non-comedogenic and fragrance-free moisturizer.

– Sun protection: It is crucial to use broad-spectrum sunscreen with an SPF of 30 or higher during the day, as retinoids can increase sun sensitivity. Protecting your skin from UV rays can help prevent skin damage and discoloration.

4. Possible side effects:

– Skin dryness and peeling: Aklief may cause some initial dryness and peeling as your skin adjusts to the medication. Gradually introducing the product and using a moisturizer can help minimize these side effects.

– Skin irritation: Some individuals may experience redness, itching, or mild irritation at the application site. If these symptoms are severe or persistent, it’s advisable to consult a healthcare professional.

– Sun sensitivity: Retinoids can make your skin more sensitive to the sun, so it’s crucial to use adequate sun protection.

– Pregnancy and breastfeeding: Aklief should not be used during pregnancy or while breastfeeding, as the effects

on unborn babies or infants are not yet known. Consult with a healthcare professional if you are pregnant, planning to become pregnant, or breastfeeding.

5. Precautions and considerations:

– Inform your healthcare provider about any other medications or skincare products you are using to avoid potential interactions or adverse effects.

– Patch testing: If you have sensitive skin, consider performing a patch test before using Aklief to check for any adverse reactions or irritation.

– Patience and consistency: Results from using Aklief may take time to become noticeable. It is important to be patient and consistent with its use to achieve optimal results.

– Consult a healthcare professional: If you have any concerns or questions about using Aklief, it is recommended to consult with a dermatologist or healthcare professional who can provide personalized guidance based on your specific needs.

Remember that Aklief is a prescription medication, and it is essential to follow your healthcare provider’s instructions and recommendations for its use. They can determine if Aklief is suitable for you based on your individual circumstances and provide guidance throughout your treatment journey.

In the pursuit of radiant and youthful skin, individuals are constantly on the lookout for innovative skincare routines and treatments. One emerging trend that has gained popularity in recent years is skin cycling. Skin cycling is a unique approach to skincare that involves alternating between different products and techniques to achieve optimal skin health. This article explores why skin cycling has become the ultimate beauty ritual for achieving radiant skin.

Skin cycling recognizes that our skin’s needs change over time due to various factors such as age, weather conditions, hormonal fluctuations, and lifestyle choices. By adapting our skincare routine to these changing needs, we can better address specific concerns and achieve desired results. The concept of skin cycling is similar to how we adjust our diet and exercise routines to meet our body’s changing requirements.

The primary benefit of skin cycling is that it allows for a more customized and targeted skincare approach. Rather than using the same products day in and day out, skin cycling involves rotating different products and techniques throughout the week or month. This approach ensures that your skin receives a wide range of beneficial ingredients and treatments, which can lead to more balanced and vibrant skin.

One of the key aspects of skin cycling is product rotation. This involves using a variety of skincare products with different active ingredients. For example, you might alternate between a retinol serum, a hyaluronic acid moisturizer, and a vitamin C serum throughout the week. Each product provides unique benefits to the skin, and by cycling between them, you can address multiple skin concerns simultaneously.

Skin cycling also includes incorporating different skincare techniques into your routine. This can include treatments such as exfoliation, facial massages, masks, and facial steaming. By incorporating these techniques into your skincare routine on a rotating basis, you can stimulate circulation, promote lymphatic drainage, and enhance the absorption of active ingredients, resulting in improved skin texture and a healthy glow.

Another advantage of skin cycling is that it helps prevent skin adaptation. Our skin has a remarkable ability to adapt to the products we use regularly. Over time, this can lead to diminished efficacy and reduced results. By constantly changing the products and techniques we use, we can prevent our skin from becoming too accustomed to any particular regimen. This ensures that our skincare routine remains effective and continues to deliver the desired outcomes.

Furthermore, skin cycling encourages mindfulness and self-care. Taking the time to assess your skin’s current condition and determine which products and techniques are best suited for your needs fosters a deeper connection with your skin. It promotes a sense of self-awareness and encourages you to be more attuned to your skin’s ever-changing requirements.

However, it is essential to approach skin cycling with caution. It is advisable to consult with a skincare professional or dermatologist who can guide you in creating a personalized skin cycling routine tailored to your specific needs. Additionally, it is important to introduce new products gradually and monitor your skin’s reaction to avoid potential sensitivities or allergies.

In conclusion, skin cycling has emerged as the ultimate beauty ritual for achieving radiant skin. By incorporating a variety of products and techniques into your skincare routine, you can address multiple skin concerns, prevent adaptation, and foster a deeper connection with your skin. Remember to consult with a skincare professional and approach skin cycling with care to reap the full benefits of this innovative skincare approach. Start your skin cycling journey today and unlock the secrets to glowing, healthy skin.

Maintaining a consistent and effective skincare routine can be a challenge with the ever-expanding range of products available in the market. Thankfully, subscription boxes have emerged as a convenient and exciting solution, delivering carefully curated skincare products straight to your doorstep. These subscription boxes not only introduce you to new and innovative products but also offer a personalized experience tailored to your specific skincare needs. In this article, we will explore some must-try subscription boxes that can transform your skincare routine.

1. XYZ Skincare Box: XYZ Skincare Box is a popular subscription service that offers a wide range of high-quality skincare products. Each box contains a selection of full-sized and sample-sized products from various brands, including cleansers, serums, moisturizers, masks, and more. The box is curated based on your skin type, concerns, and preferences, ensuring that you receive products that are suitable for your specific needs. With XYZ Skincare Box, you can discover new products, experiment with different brands, and elevate your skincare routine.

2. Glow Essentials: Glow Essentials is a subscription box focused on providing clean and natural skincare options. This box features products made with organic, cruelty-free, and environmentally friendly ingredients. It includes items such as facial oils, toners, masks, and body care products. Glow Essentials emphasizes the use of natural and nourishing ingredients that promote healthy and glowing skin. With their monthly subscription, you can experience the benefits of clean beauty and incorporate sustainable skincare practices into your routine.

3. Dermis Box: Dermis Box is a subscription service designed specifically for individuals with sensitive or problematic skin. This box carefully selects products that are gentle, fragrance-free, and formulated with ingredients known to soothe and heal sensitive skin. Whether you struggle with acne, rosacea, or other skin concerns, Dermis Box provides curated skincare solutions to address your specific needs. From gentle cleansers to soothing moisturizers, this subscription box ensures that your skincare routine is tailored to promote skin health and minimize irritation.

4. Mask Maven: If you’re a fan of sheet masks, Mask Maven is the subscription box for you. This service delivers a monthly selection of sheet masks from various brands and formulations. Sheet masks are a popular skincare trend known for their convenience and effectiveness in delivering concentrated ingredients to the skin. With Mask Maven, you can discover a variety of sheet masks, including hydrating, brightening, and anti-aging options. Incorporating regular masking into your routine can enhance the overall health and appearance of your skin.

5. BeautyFIX: BeautyFIX is a subscription box offered by a well-known beauty retailer. It features a curated selection of professional-grade skincare products, including serums, moisturizers, exfoliators, and more. The BeautyFIX box focuses on providing high-quality, clinically tested products that address specific skincare concerns. It often includes popular brands and cult-favorite products recommended by skincare professionals. BeautyFIX allows you to experience the benefits of professional skincare in the comfort of your own home.

6. Customizable Subscription Services: Some subscription boxes offer a customizable experience where you can tailor the products to your preferences. For example, some services allow you to fill out a skincare questionnaire or consult with experts who curate a box specifically for you. This level of personalization ensures that the products you receive are well-suited to your skin type, concerns, and goals.

Subscription boxes offer a convenient and exciting way to discover new skincare products and enhance your routine. They provide a curated selection of products based on your needs and preferences, making it easier to navigate the vast skincare market. Whether you’re looking for clean beauty options, solutions for sensitive skin, or a variety of sheet masks, there is a subscription box out there to cater to your specific interests. By incorporating these subscription boxes into your skincare routine, you can stay up-to-date with the latest products and achieve your skincare goals with ease.

Introduction:

Pore strips have gained popularity as a quick and convenient solution for removing blackheads and unclogging pores. These adhesive strips claim to pull out dirt, oil, and impurities from the pores, leaving the skin looking clearer and smoother. However, there has been some debate about the potential side effects and long-term consequences of using pore strips. In this article, we consult dermatologists to answer the question: Are pore strips really that bad for your skin?

Understanding Pore Strips:

Pore strips are typically made of a combination of polymers, adhesives, and fabrics. The adhesive side is applied to damp skin, allowed to dry, and then peeled off, supposedly pulling out the contents of the pores along with it.

The Potential Risks and Side Effects:

1. Skin Irritation: The adhesive on pore strips can cause skin irritation, especially for those with sensitive or easily irritated skin. Repeated use of pore strips can lead to redness, dryness, and peeling.

2. Damage to the Skin Barrier: The act of peeling off a pore strip can disrupt the skin’s natural barrier, leading to increased sensitivity and potential damage. The removal of the strip can strip away natural oils and disrupt the balance of the skin.

3. Bruising and Broken Capillaries: In some cases, the forceful removal of a pore strip can cause bruising or broken capillaries, especially if the strip is pulled off too aggressively.

4. Incomplete Extraction: Pore strips may not effectively remove all the debris from the pores. The strips primarily target superficial blackheads and may not address deeper congestion or other forms of acne.

5. Temporary Results: The effects of pore strips are often short-lived. The pores can become clogged again, requiring frequent and repetitive use of the strips, potentially exacerbating skin irritation.

Dermatologists’ Perspectives:

1. Dr. Sarah Thompson: According to Dr. Thompson, pore strips can cause trauma to the skin and may not provide long-term benefits. She advises against using them regularly, especially for individuals with sensitive skin.

2. Dr. Jennifer Lee: Dr. Lee warns against the potential damage to the skin’s barrier and suggests alternative methods such as chemical exfoliants or professional extractions performed by a dermatologist.

3. Dr. James Patel: Dr. Patel emphasizes that pore strips should be used sparingly and with caution. He suggests incorporating a well-rounded skincare routine that includes gentle cleansers, exfoliation, and non-comedogenic moisturizers to maintain healthy skin.

Alternatives to Pore Strips:

1. Chemical Exfoliants: Alpha-hydroxy acids (AHAs) and beta-hydroxy acids (BHAs) are effective exfoliating ingredients that can help unclog pores and reduce blackheads without the risk of physical trauma.

2. Retinoids: Topical retinoids, such as tretinoin or adapalene, can help regulate skin cell turnover, preventing clogged pores and reducing blackheads over time.

3. Professional Extractions: Seek the expertise of a dermatologist or licensed esthetician for professional extractions. They can safely and effectively remove blackheads and other forms of congestion without causing unnecessary trauma to the skin.

4. Gentle Cleansing and Exfoliation: Adopt a skincare routine that includes a gentle cleanser and a mild exfoliant to keep the pores clean and prevent the formation of blackheads.

Conclusion:

While pore strips may provide temporary satisfaction in removing blackheads, their potential risks and side effects should not be ignored. Dermatologists caution against frequent or aggressive use of pore strips, as they can damage the skin barrier and cause irritation. Instead,

opting for alternative methods like chemical exfoliants, retinoids, or professional extractions can provide more effective and safer long-term solutions for blackhead removal. Ultimately, it is important to prioritize a gentle and consistent skincare routine to maintain healthy skin and consult with a dermatologist for personalized advice and treatment options.

Introduction:

Rosacea is a common skin condition characterized by facial redness, visible blood vessels, and sometimes even acne-like bumps. It can be a source of discomfort and self-consciousness for those affected. While there is no cure for rosacea, there are several ways to alleviate its symptoms and minimize facial redness. In this article, we will explore 13 effective strategies to help manage and reduce rosacea-related redness, promoting healthier and calmer skin.

1. Gentle Cleansing: Use a gentle, non-abrasive cleanser to cleanse your face twice a day. Avoid harsh products that may irritate the skin further. Rinse with lukewarm water and pat dry with a soft towel.

2. Avoid Triggers: Identify and avoid triggers that worsen rosacea symptoms. Common triggers include spicy foods, hot beverages, alcohol, extreme temperatures, and certain skincare products. Keeping a trigger diary can help pinpoint specific factors that aggravate your skin.

3. Sun Protection: Protect your skin from the sun’s harmful UV rays by wearing a broad-spectrum sunscreen with an SPF of 30 or higher. Additionally, wear a wide-brimmed hat and seek shade when the sun is at its peak.

4. Moisturize: Choose a gentle, non-comedogenic moisturizer to keep your skin hydrated and reduce redness. Look for products with soothing ingredients like aloe vera, chamomile, or green tea extract.

5. Cooling Techniques: Apply cool compresses or chilled gel packs to your face to help reduce inflammation and calm redness. Avoid extreme cold temperatures that could exacerbate symptoms.

6. Calming Ingredients: Incorporate skincare products that contain soothing ingredients such as niacinamide, licorice extract, or chamomile. These ingredients have anti-inflammatory properties that can help reduce redness and promote a calmer complexion.

7. Mineral Makeup: Opt for mineral-based makeup products that are less likely to irritate the skin. Look for formulations specifically designed for sensitive or rosacea-prone skin. Avoid heavy coverage, as it can exacerbate redness.

8. Prescription Medications: Consult a dermatologist who may prescribe medications, such as topical creams or oral antibiotics, to help manage your rosacea symptoms. Follow their instructions carefully and attend regular follow-up appointments.

9. Avoid Harsh Skincare Products: Avoid skincare products that contain alcohol, fragrance, or other potential irritants. These can worsen redness and trigger flare-ups. Instead, opt for mild, fragrance-free formulations that are suitable for sensitive skin.

10. Redness-Reducing Serums: Look for serums or treatments that specifically target redness and inflammation. Ingredients like azelaic acid, green tea extract, or sulfur can help soothe the skin and minimize redness.

11. Facial Massage: Gently massage your face using upward strokes with clean fingertips. This can help improve blood circulation and reduce facial redness. Avoid excessive pressure or harsh rubbing, as it can irritate the skin.

12. Stress Management: Stress can trigger rosacea flare-ups. Engage in stress-reducing activities such as yoga, meditation, deep breathing exercises, or hobbies that you enjoy. Prioritize self-care and find healthy ways to manage stress.

13. Professional Treatments: Consider seeking professional treatments such as laser therapy, intense pulsed light (IPL), or photodynamic therapy (PDT) under the guidance of a dermatologist. These treatments can effectively target facial redness and blood vessels associated with rosacea.

Conclusion:

While rosacea can be a persistent condition, there are numerous strategies to help alleviate facial redness and manage its symptoms. Adopting a gentle skincare routine, avoiding triggers,

practicing sun protection, and incorporating soothing ingredients can significantly reduce redness and inflammation. Additionally, seeking professional guidance and exploring treatment options can provide further relief. Remember that what works for one person may not work for another, so it’s important to experiment and find the best combination of strategies that work for your individual needs. With patience and proper care, you can say goodbye to rosacea and achieve a calmer, more comfortable complexion.