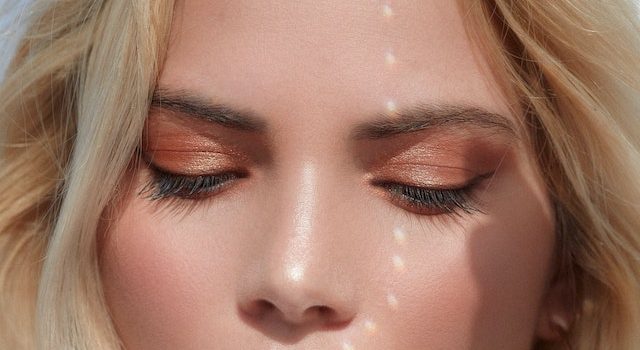
Are you in your 20s and struggling with skin issues that seem to come out of nowhere? You’re not alone! Hormonal changes during this decade can wreak havoc on your skin, leading to acne, dryness, sensitivity, inflammation, and more. But don’t despair – there are ways to combat these pesky problems and maintain a glowing complexion. In this blog post, we’ll explore the connection between hormonal changes and skin issues in your 20s. Plus, we’ll provide tips for preventing or treating these concerns so you can feel confident in your own skin again!
Hormonal changes in your 20s
Your 20s are a time of significant hormonal changes as your body shifts from adolescence to adulthood. For women, this decade typically marks the beginning of their reproductive years, and with it comes fluctuations in estrogen and progesterone levels that can impact skin health.
Estrogen is responsible for maintaining collagen production, which helps keep skin firm and elastic. As estrogen levels decrease during the menstrual cycle or due to birth control use or other factors, skin may become drier and less supple.
Progesterone also plays a role in regulating oil production in the skin’s sebaceous glands. When progesterone levels rise before menstruation, for example, oil production increases too – leading to clogged pores and acne breakouts.
In addition to these sex hormones, stress hormones like cortisol can also impact skin health. High cortisol levels due to chronic stress can trigger inflammation throughout the body – including on the surface of your skin!
These hormonal changes are perfectly normal but they do require special attention when it comes to skincare routines!
How these changes can affect your skin
Hormonal changes are a natural part of life, but they can wreak havoc on your skin. During your 20s, you’re likely to experience fluctuations in hormones that can cause a variety of issues.
For starters, hormonal changes can increase the production of sebum in your skin. Sebum is an oily substance produced by glands in the skin and too much of it can lead to clogged pores and acne breakouts.
In addition to acne, hormonal changes may also lead to dryness and sensitivity. When hormone levels shift, it impacts the overall balance of oil and moisture in your skin. This means that some areas may become overly dry while others remain oily.
Another way hormonal changes affect the skin is through inflammation. Hormones like cortisol trigger inflammatory responses throughout the body, including within the skin. Inflammation leads to redness, irritation and even premature aging.
While these effects may seem daunting, there are measures you can take to combat them. Proper skincare routine using products designed for your specific concerns will help maintain healthy looking complexion despite any shifts happening inside your body due to age or other factors such as puberty or pregnancy-induced hormonal fluctuations.
What you can do to prevent or treat skin issues caused by hormones
When it comes to hormonal changes and their effects on the skin, prevention is key. One of the best things you can do is maintain a consistent skincare routine that includes gentle cleansing, moisturizing, and the use of non-comedogenic products.
For those experiencing acne breakouts, incorporating salicylic acid or benzoyl peroxide into your routine can help unclog pores and reduce inflammation. It’s also important to avoid picking at or squeezing pimples as this can lead to scarring and further breakouts.
If dryness is an issue, using a hydrating serum or incorporating more healthy fats into your diet can help improve skin moisture levels. Avoiding hot showers and opting for lukewarm water when washing your face can also help prevent further dehydration.
Sensitivity caused by hormonal changes may require switching to fragrance-free products that are formulated for sensitive skin. Additionally, avoiding harsh physical exfoliants and opting for chemical exfoliation with AHAs or BHAs can be beneficial in reducing sensitivity while still promoting healthy cell turnover.
Maintaining a balanced diet rich in fruits, vegetables, whole grains, lean protein and healthy fats may also contribute positively towards hormone regulation which will ultimately reflect on one’s skin health.
Acne
Acne is a common skin issue that affects many people, especially in their 20s. It can be caused by hormonal changes, genetics, or even diet and lifestyle habits. One of the main hormones responsible for acne is testosterone, which increases during puberty and can result in excess oil production.
When pores become clogged with oil and dead skin cells, bacteria can grow and cause inflammation. This leads to the formation of pimples, blackheads, whiteheads, and sometimes even cysts.
Treating acne involves finding the root cause and taking steps to prevent future breakouts. This may include using topical treatments like benzoyl peroxide or salicylic acid to reduce inflammation and kill bacteria.
It’s also important to maintain a healthy skincare routine that includes cleansing twice daily, exfoliating regularly (but not too often!), and moisturizing with non-comedogenic products.
Diet can also play a role in preventing acne. Avoiding processed foods high in sugar or refined carbohydrates may help balance hormone levels and reduce inflammation.
Managing acne requires patience and consistency in both skincare habits and lifestyle choices.
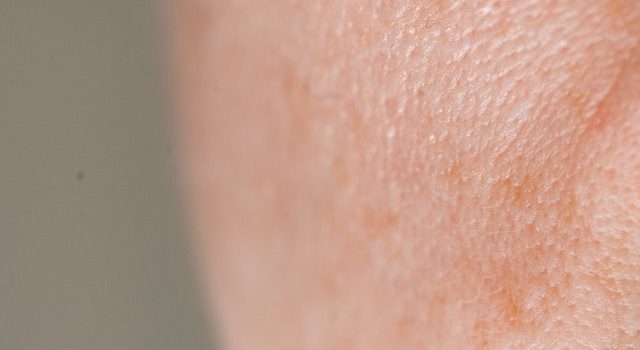
Dryness
Dryness is a common skin issue that many people face in their 20s. Hormonal changes can affect the natural balance of oils on your skin, leading to dry patches and flakiness. This can be especially frustrating if you have naturally oily or combination skin.
To combat dryness, it’s important to use gentle cleansers that don’t strip your skin of its natural oils. Look for products with hydrating ingredients like hyaluronic acid and glycerin. Avoid using hot water when washing your face as this can also contribute to dryness.
In addition to a good skincare routine, make sure you’re drinking enough water throughout the day to keep your body hydrated from the inside out. You may also want to consider incorporating healthy fats into your diet, such as avocado and nuts, which can help improve skin hydration levels.
When choosing moisturizers, look for ones that are specifically formulated for dry or dehydrated skin types. These will typically contain richer textures and more nourishing ingredients than those designed for oily or normal skin types.
Remember that consistency is key when treating dryness – stick to a regular skincare routine and give any new products time to work before switching them out. With patience and proper care, you’ll be able regain moisture balance in no time!
Sensitivity
As we age, our bodies go through many hormonal changes that can affect our skin in different ways. One of the most common issues that women face in their 20s due to hormonal fluctuations is sensitivity.
Sensitive skin may be caused by a variety of factors including genetics, environmental exposure, and underlying health conditions. However, it’s important to note that hormones play a crucial role.
During your menstrual cycle or pregnancy, hormone levels fluctuate drastically which can lead to redness, itchiness and dryness on your skin. This often leads to an uncomfortable sensation overall.
But fear not! There are several things you can do to help alleviate sensitive skin symptoms caused by hormonal imbalances such as using gentle skincare products specifically formulated for sensitive skin types and avoiding harsh chemicals or fragrances within those products.
Additionally, incorporating anti-inflammatory foods into your diet such as leafy greens and healthy fats like avocados may also help reduce inflammation throughout the body – including the skin!
While sensitivity can be frustrating at times; taking charge with simple lifestyle adjustments such as being more mindful about what we use on our bodies will definitely make all the difference when trying to keep our complexions glowing!
Inflammation
Inflammation is a common skin issue that can be caused by hormonal changes in your 20s. When hormones like testosterone, estrogen, and progesterone fluctuate during this stage of life, it can trigger inflammation in the skin.
Inflammation can manifest as redness, swelling, or irritation. It may also lead to acne breakouts or exacerbate existing ones. In some cases, inflammation can even cause premature aging and damage to the skin’s barrier function.
To combat inflammation caused by hormonal changes, it’s important to incorporate anti-inflammatory ingredients into your skincare routine. Look for products with antioxidants like vitamin C or green tea extract. You may also want to use gentle exfoliants like alpha-hydroxy acids (AHAs) or beta-hydroxy acids (BHAs) to remove dead skin cells without causing further irritation.
Maintaining a healthy diet and lifestyle habits can also help reduce inflammation in the body and therefore on your skin. Eating plenty of fruits and vegetables rich in vitamins A and C as well as omega-3 fatty acids found in fish are essential nutrients for reducing inflammation.
Addressing any underlying health issues such as PCOS will help balance hormone levels which will reduce any flare-ups of inflammatory symptoms on the face so you have clear glowing youthful-looking skin!
Diet and lifestyle
Your diet and lifestyle choices can have a significant impact on your skin’s health. Consuming a lot of processed foods, sugary drinks, and alcohol can increase inflammation in your body, leading to breakouts and other skin issues. On the other hand, eating a balanced diet that includes plenty of fruits, vegetables, whole grains, lean proteins, and healthy fats can help improve your complexion.
In addition to following a healthy diet plan, it’s also essential to maintain an active lifestyle. Exercise increases blood flow throughout the body which helps deliver nutrients to the skin cells effectively. It also helps reduce stress levels which are known contributors to acne breakouts.
Moreover smoking is one habit you should avoid at all costs if you want healthy-looking skin. Smoking deprives the body of oxygen while causing premature aging signs like wrinkles or fine lines around your mouth area.
Finally setting up proper sleep habits is key for maintaining glowing skin as well. Getting enough restful sleep allows your body time for cell regeneration which contributes significantly to keeping good overall health including beautiful looking skin!
Skincare routine
Maintaining a good skincare routine is crucial for preventing and treating skin issues caused by hormonal changes. Your routine should include cleansing, toning, moisturizing, and protection from the sun. It’s also important to use products that are specifically formulated for your skin type.
Aside from your daily skincare regimen, it’s recommended to incorporate weekly exfoliation and face masks in order to help combat any excess oil or dryness on the skin. Remember that consistency is key when it comes to seeing results with your skincare routine.
In addition, make sure you’re taking care of yourself through diet and lifestyle changes. Eating a balanced diet rich in fruits, vegetables, whole grains, and lean proteins can provide essential nutrients for healthy skin. Staying hydrated by drinking plenty of water also aids in keeping the skin looking fresh and youthful.
While hormonal changes can certainly contribute to various skin issues during our 20s (and even beyond), there are steps we can take to prevent or treat these concerns. By staying informed about how hormones affect our bodies and using effective skincare techniques tailored toward our specific needs, we can achieve clear and radiant-looking skin at any age!