Introduction:
In the quest for longer and fuller lashes, many people turn to natural remedies like castor oil. However, what does science and dermatology have to say about the effectiveness of castor oil for lash growth? In this article, we delve into the truth behind castor oil and its potential benefits for lashes, providing insights from a dermatologist’s perspective.

1. Understanding the Claims:
Before exploring the effectiveness of castor oil for lash growth, it’s important to understand the claims associated with it. Castor oil is believed to nourish, hydrate, and stimulate lash growth due to its nutrient-rich composition and moisturizing properties.

2. Lack of Scientific Evidence:
Despite numerous anecdotal reports and personal testimonials, the scientific evidence supporting castor oil’s effectiveness for lash growth is limited. There is a lack of well-designed clinical studies specifically focused on castor oil’s impact on lash growth. More research is needed to draw definitive conclusions.

3. Potential Benefits:
While scientific data is limited, dermatologists acknowledge some potential benefits of castor oil for lashes. The oil’s nutrient content, including fatty acids, vitamin E, and proteins, may contribute to lash nourishment and conditioning, reducing breakage and improving lash health.

4. Moisturizing and Conditioning Properties:
Castor oil’s moisturizing and conditioning properties can help hydrate lashes, preventing brittleness and improving their overall appearance. By keeping the lashes well-hydrated, castor oil may promote lash health and potentially support lash growth.

5. The Role of Ricinoleic Acid:
One component of castor oil, ricinoleic acid, is believed to have potential hair follicle-stimulating properties. It is suggested that ricinoleic acid could potentially encourage lash growth by promoting blood circulation and stimulating hair follicles. However, further research is required to substantiate these claims.

6. Proper Application Technique:
To maximize potential benefits, dermatologists advise applying castor oil to the lash line using a clean mascara wand or a cotton swab. Care should be taken to avoid getting the oil into the eyes, as this can cause irritation.

7. Individual Variations and Patience:
It’s important to note that individual experiences with castor oil may vary. Lash growth is a slow process, and results may not be immediately noticeable. Consistency and patience are key when using castor oil for lash growth.

8. Potential Risks and Precautions:
While castor oil is generally considered safe for topical use, some individuals may experience skin irritation or allergic reactions. Conduct a patch test before applying castor oil to the lash line, and if any adverse reactions occur, discontinue use immediately and consult a dermatologist.

Conclusion:
Castor oil’s effectiveness for lash growth is a topic that lacks strong scientific evidence. While it may offer potential benefits due to its nutrient content and moisturizing properties, individual results may vary. As with any skincare product, it’s essential to consult a dermatologist for personalized advice and recommendations. They can offer alternatives or suggest other options that may be more effective for achieving longer, fuller lashes.

Are you tired of constantly rummaging through your cluttered beauty collection, desperately searching for that one lipstick shade or hair product? Well, it’s time to say goodbye to cluttered countertops and hello to a more organized beauty routine. Organizing your beauty products not only saves you time and energy but also helps extend the life of your beloved items. In this blog post, we’ll share 15 life-changing ways to organize your beauty collection – from decluttering tips to storage solutions for every type of product. Let’s dive in!

Declutter Your Beauty Collection

Decluttering your beauty collection is the first step towards a more organized and stress-free routine. Start by gathering all of your products in one place – yes, even those forgotten items hiding in the back of your drawer. This will help you see what you own and what needs to go.

Next, it’s time to get ruthless. Take a good look at each item and ask yourself when was the last time you used it? Has it expired or gone bad? If so, it’s time to toss it out. And if there are duplicates or similar shades/products that can be consolidated, consider doing so.

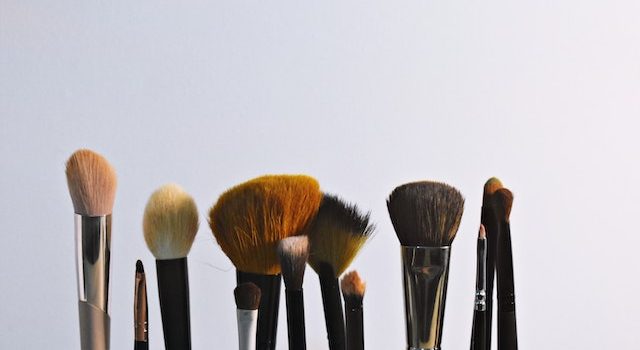
Don’t forget to also declutter any unused brushes, applicators, or tools that may be taking up unnecessary space. Once you’ve narrowed down your collection to only the essentials, organizing them becomes much easier.

Remember: less is more when it comes to beauty products! By decluttering regularly, not only do you save valuable counter space but also ensure that everything in your collection has a purpose and serves you well.

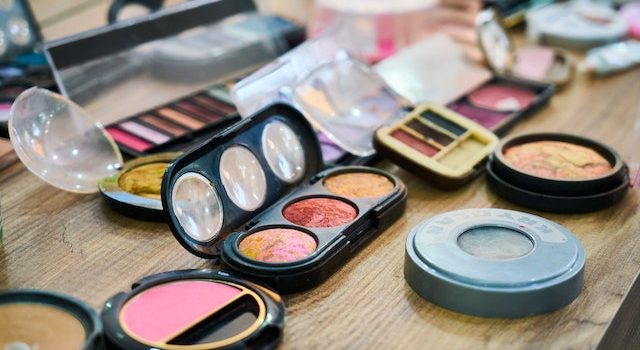
The best way to organize your makeup

When it comes to organizing your makeup collection, there are a few key tips and tricks that can help make the process much easier.

Consider investing in clear acrylic storage containers. These not only look sleek and stylish but allow you to see all of your products at once, making it easier to find what you need quickly.

Another great tip is to organize your makeup based on categories such as lipsticks, eyeliners or blushes. This ensures that everything has its designated place and makes finding specific items much simpler.

Consider also utilizing drawer dividers or organizers within drawers to keep everything neat and tidy. This is particularly useful for smaller items like eyeshadow palettes or brushes which can easily get jumbled up without proper organization.

Don’t be afraid to declutter regularly – if you haven’t used a product in over six months then chances are you won’t miss it when it’s gone!

By implementing these simple yet effective tips into your routine, organizing your makeup collection will become an easy task!

How to store your beauty products

One of the most important things to consider when organizing your beauty collection is how to store your products. Here are some tips and tricks for keeping everything in its place:

First, consider the type of product you’re storing. Some items, like foundation or perfume, should be kept away from direct sunlight or extreme temperatures. Look for storage solutions that keep these products protected.

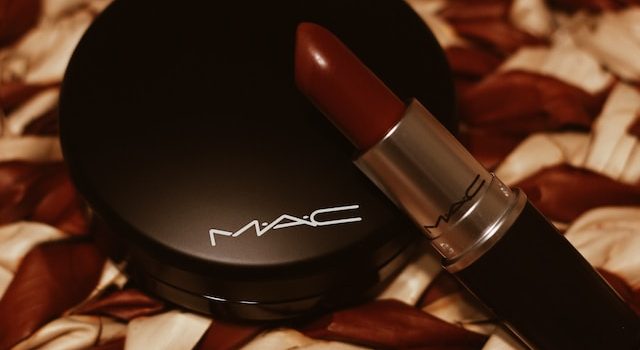
For items that you use frequently, like lipsticks or eyeliners, try using a clear acrylic organizer with multiple compartments. This will not only keep everything easily accessible but also looks visually appealing.

If you have limited counter space, consider utilizing wall-mounted storage options such as shelves or magnetic strips for metal tools like tweezers and scissors.

When it comes to brushes and sponges, always make sure they are stored upright in a clean container to avoid bacteria buildup.

Don’t forget about expiration dates! Rotate out any expired products regularly to prevent clutter and potential skin irritation.

The best way to organize your hair products

When it comes to organizing your hair products, there are many options available depending on your preference and space. One great way to organize is by using a shower caddy or over-the-door organizer. This keeps everything in one place and easily accessible while taking up minimal counter space.

Another idea is to use drawer dividers or baskets specifically for hair products. This approach allows you to separate items by category, such as styling tools, brushes, and products. It also makes it easy to grab what you need without digging through a cluttered drawer.

If you have limited storage space, consider utilizing wall-mounted shelves or hooks for your hair care essentials. Not only does this free up counter space but it can also add some decorative flair to your bathroom.

For those with larger collections of hair products, investing in a rolling cart may be the answer. This allows you to store everything in one mobile unit that can easily be moved around as needed.

No matter which option suits you best, keeping your hair products organized will save time and reduce stress when getting ready each day!

The best way to organize your skincare products

When it comes to skincare, we all have an extensive collection of products that we use regularly. From cleansers to toners and serums to moisturizers, there’s no doubt that our beauty cabinets are filled with a lot of goodies. However, keeping them organized can be challenging at times.

The first step in organizing your skincare products is decluttering. Get rid of any expired or unused items by checking the expiration date and condition of each product. It’s essential not only for tidiness but also for your skin health.

Next up is categorizing your products into groups such as cleansers, toners, serums, moisturizers or masks depending on how you use them in your routine. This way you’ll know exactly where everything belongs.

Investing in storage solutions like drawer organizers or acrylic containers will help keep everything in its place and easily accessible when needed. Also try to avoid using glass jars as they’re more prone to breaking if dropped.

Another great tip is labeling your products so that you can quickly identify what’s inside without having to open every bottle or jar individually; this saves time while getting ready each morning and night.

Make sure you’re storing everything out of direct sunlight and away from humidity which may alter the ingredients’ efficacy over time. A cool dry place like a linen closet would be ideal!

By following these tips for organizing your skincare collection, not only will it make things easier when preparing daily routines but also helps prolong their lifespan too!

Conclusion

Organizing your beauty collection may seem like a daunting task, but with these 15 life-changing tips, you can say goodbye to cluttered countertops and hello to an organized oasis. Remember to declutter your collection regularly and only keep what you use on a daily basis. Find the best storage solutions for your beauty products based on their type and size. And lastly, make sure to maintain your organization system once it’s in place.

By following these simple steps, not only will you have a more visually appealing space, but also save time getting ready each day as everything will be easily accessible. So go ahead and transform your beauty routine with some much-needed organization!

Makeup allergies can occur when your immune system reacts negatively to certain ingredients present in cosmetic products. These allergic reactions can range from mild to severe, and it’s important to be aware of the signs and symptoms so that you can identify and manage them appropriately. Here are some common signs and symptoms of a makeup allergy:

1. Skin Irritation: One of the most common signs of a makeup allergy is skin irritation. You may experience redness, itching, or a rash on the area of skin where the makeup was applied. This can occur immediately after application or develop gradually over time.

2. Swelling: Allergic reactions to makeup can cause swelling in the affected area. Your eyelids, lips, or other parts of the face may become swollen and puffy.

3. Hives: Raised, itchy welts on the skin known as hives can develop as a result of an allergic reaction. These can appear in the area where the makeup was applied or may spread to other parts of the body.

4. Dryness and Flaking: Allergic reactions to certain cosmetic products can lead to dry, flaky skin. This can make your skin feel tight and uncomfortable.

5. Burning or Stinging Sensation: Some individuals may experience a burning or stinging sensation when they apply makeup that they are allergic to. This discomfort can be a sign of an allergic reaction.

6. Watery Eyes: If you’re allergic to eye makeup or any other cosmetic product that comes into contact with your eyes, you may experience watery or teary eyes as a result of the allergic reaction.

7. Blistering or Crusting: In severe cases, an allergic reaction to makeup can cause blisters or crusts to form on the skin. This typically occurs when the allergic reaction is particularly intense or if the individual has highly sensitive skin.

It’s important to note that these symptoms can vary from person to person, and not everyone will experience the same reactions. Additionally, some symptoms may appear immediately, while others may develop over time with repeated exposure to the allergen.

If you suspect that you have a makeup allergy, it is recommended to take the following steps:

1. Stop Using the Product: If you experience any signs of an allergic reaction after applying makeup, discontinue use of the product immediately. Remove the makeup gently using a mild cleanser and water.

2. Consult a Dermatologist: If your symptoms persist or worsen, it’s advisable to consult a dermatologist or an allergist. They can evaluate your condition, determine the specific allergen causing the reaction, and provide appropriate medical advice or treatment.

3. Patch Testing: In cases of severe or persistent allergies, a dermatologist may conduct patch testing to identify the specific ingredients you are allergic to. This involves applying small amounts of various substances to your skin under controlled conditions to identify the allergen.

4. Read Labels and Avoid Allergens: To prevent future allergic reactions, carefully read the labels of cosmetic products and avoid those containing ingredients you are allergic to. Common allergens in makeup include fragrances, preservatives, dyes, and certain metals like nickel.

5. Test New Products: Before using a new makeup product on your face, perform a patch test on a small area of skin to check for any potential allergic reactions. Apply a small amount of the product and observe the area for at least 24 hours for any signs of irritation or allergic response.

Remember, it’s always best to seek professional medical advice if you suspect you have a makeup allergy or experience persistent or severe symptoms.

Introduction:
The summer solstice is a highly anticipated event that marks the longest day of the year in the Northern Hemisphere. It is a time when the sun reaches its highest point in the sky, bringing warmth and light to our lives. While the solstice itself is a remarkable celestial occurrence, this year, skywatchers have an additional reason to be excited. A rare and spectacular planetary alignment is set to coincide with the summer solstice, creating a breathtaking celestial display that shouldn’t be missed.

The Planetary Alignment:
On the day of the summer solstice, several planets in our solar system will align in a visually stunning formation. This alignment occurs when multiple planets appear close to each other in the sky, creating a captivating celestial spectacle. While planetary alignments are not uncommon, having one coincide with the summer solstice adds an extra layer of significance and beauty to the event.

Which Planets Will Align?
The specific planets involved in this summer solstice’s planetary alignment will vary depending on the year. However, some of the most commonly observed planets during such alignments include Jupiter, Saturn, Mars, Venus, and Mercury. These planets, with their distinct colors and brightness, create a mesmerizing visual display against the backdrop of the summer sky.

How to Observe the Planetary Alignment:
To witness this spectacular planetary alignment during the summer solstice, all you need is a clear view of the night sky. Find a location away from city lights, preferably in a dark and open area, to enhance your viewing experience. It is recommended to check the local weather forecast and choose a night with clear skies for optimal visibility.

Using a star chart or a smartphone app that provides real-time sky maps can help you identify the planets and their positions in the sky. Look towards the western or eastern horizon, depending on the time of night, as the planets will typically be visible in these directions during the summer solstice.

Capture the Moment:
If you have a camera with manual settings or a smartphone with a night mode feature, consider capturing the planetary alignment during the summer solstice. Experiment with different exposure settings and long exposure techniques to capture the beauty of the celestial event. Share your photographs with friends and fellow sky enthusiasts to spread the joy of witnessing this rare occurrence.

Conclusion:
The summer solstice is already a remarkable event that heralds the arrival of summer and brings us closer to nature. The addition of a planetary alignment during this time makes it even more special. Don’t miss out on the opportunity to witness this spectacular celestial display. Take the time to step outside, gaze at the night sky, and marvel at the beauty of our solar system. The summer solstice’s planetary alignment is a reminder of the vastness and wonder of the universe, and it’s an experience that will leave you in awe of the cosmos.

When it comes to makeup, water can be a major challenge. Whether you’re heading to the beach, attending a pool party, or simply want your makeup to withstand the elements, waterproof makeup is a game-changer. To help you make a splash with your makeup, we’ve gathered tips from the pros on how to achieve a flawless and waterproof look. Here are their expert suggestions:

1. Start with a Clean Canvas: Before applying any makeup, cleanse and moisturize your skin to create a smooth base. This helps your makeup adhere better and last longer.

2. Use a Waterproof Primer: Apply a waterproof primer to your face before foundation. This creates a barrier between your skin and makeup, ensuring it stays in place even when exposed to water.

3. Opt for Long-Wearing Foundation: Choose a long-wearing, waterproof foundation that is specifically designed to withstand water, humidity, and sweat. Look for formulas labeled as “water-resistant” or “long-lasting.”

4. Set with a Waterproof Powder: After applying foundation, set your makeup with a waterproof setting powder. This helps absorb excess oil and provides an extra layer of protection against smudging and fading.

5. Invest in Waterproof Eye Products: For your eyes, use waterproof eyeliner, mascara, and eyeshadows. These products are specially formulated to resist water and stay put, even when faced with splashes or tears.

6. Fill in Your Brows with Waterproof Products: If you want defined brows that won’t budge, opt for waterproof eyebrow pencils or gels. These products help fill in sparse areas and keep your brows looking flawless all day.

7. Seal Your Look with a Waterproof Setting Spray: Finish your makeup with a spritz of waterproof setting spray. This not only helps lock your makeup in place but also adds an extra layer of protection against water and humidity.

8. Avoid Touching Your Face: Once your makeup is applied, try to avoid touching your face as much as possible. This reduces the chances of smudging or transferring your makeup.

9. Carry Essentials for Touch-Ups: Despite your best efforts, some touch-ups may still be necessary. Carry blotting papers, a compact mirror, and a small makeup bag with your essentials for quick fixes on the go.

10. Remove Waterproof Makeup Properly: When it’s time to remove your waterproof makeup, use a gentle yet effective makeup remover specifically designed for waterproof formulas. Avoid tugging or rubbing too harshly, as this can irritate your skin.

By following these tips from the pros, you can confidently wear waterproof makeup and make a splash without worrying about smudging, fading, or losing your flawless look. Whether you’re hitting the pool, enjoying outdoor activities, or simply want long-lasting makeup, these expert suggestions will help you achieve a waterproof makeup look that lasts all day.

The sun is our nearest star and a vital source of light, heat, and energy for life on Earth. However, did you know that the sun’s activity can also have significant effects on our planet’s thermosphere? Recently, scientists have observed a dramatic rise in the temperature of Earth’s thermosphere due to increased solar activity. In this blog post, we’ll explore how solar flares affect the earth’s atmosphere and what consequences a rise in thermosphere temperature may bring. So grab your sunscreen and let’s dive into this exciting topic!

The sun’s activity and the earth’s thermosphere

The sun constantly releases charged particles and electromagnetic radiation into space, known as solar wind. These particles interact with the earth’s magnetic field, causing a variety of phenomena like auroras and geomagnetic storms. But that’s not all – these charged particles also heat up the upper atmosphere or thermosphere.

The thermosphere is a layer of the earth’s atmosphere located above the mesosphere. It spans from about 80 kilometers to more than 600 kilometers above sea level and contains extremely low-density gas molecules. The temperature in this layer can reach thousands of degrees Celsius due to high-energy ultraviolet radiation and X-rays from the sun.

Solar activity affects our planet’s thermosphere in various ways, including changes in its density, pressure, and composition. Solar flares are one such phenomenon that can have a significant impact on the thermosphere temperature by increasing its ionization levels.

Understanding how solar activity impacts Earth’s atmosphere is crucial for predicting space weather events that may affect our technology-based society.

How solar flares affect the thermosphere

The sun is a powerful force that can have significant effects on Earth’s atmosphere. One of the most notable impacts of solar activity is the fluctuation in thermosphere temperature. This layer, which sits approximately 80 to 600 kilometers above the earth’s surface, plays an important role in our planet’s climate and weather patterns.

Solar flares are one of the primary drivers behind changes in thermosphere temperature. These intense bursts of radiation release a tremendous amount of energy that can ionize gases in this atmospheric layer and cause it to heat up rapidly. The hotter temperatures lead to an expansion of the air molecules, which can create drag on satellites and other objects orbiting in space.

When thermosphere temperatures rise due to increased solar activity, there can be several consequences for our planet. For example, higher levels of atmospheric drag caused by expanded air molecules may affect satellite operations or disrupt radio communication systems.

Understanding how solar flares impact our planet’s atmosphere is critical for predicting potential disruptions and developing strategies to mitigate their effects.

The consequences of a rise in thermosphere temperature

The thermosphere is a delicate layer of the Earth’s atmosphere that plays an essential role in our planet’s climate and weather. A rise in its temperature can lead to several consequences, some of which might be disastrous.

One major consequence is the disruption of communication systems and satellite operations. The thermosphere houses many satellites that we use for communication, navigation, and observation purposes. With an increase in temperature, these satellites suffer from drag force due to increased atmospheric density leading to their degradation or even failure.

Another severe consequence could be the depletion of our ozone layer. The ozone layer absorbs harmful ultraviolet radiation emitted by the sun but when exposed to high temperatures it can break down causing serious environmental problems such as skin cancer or other health issues.

Furthermore, a rise in thermosphere temperature can also cause dramatic changes in wind patterns across different latitudes leading to droughts or floods depending on where you live.

Any rise in thermosphere temperature is a concerning matter with significant implications for life on earth including telecommunication disruptions, environmental damage and potential natural disasters. It highlights how connected everything is within our ecosystem and how necessary it is for us humans to protect every element within nature carefully.

How to protect yourself from the sun’s activity

The sun is a powerful force that can cause harm if not approached with caution. Protecting yourself from its activity is essential to maintain good health and well-being.

One of the simplest ways to protect yourself from the sun’s activity is by wearing protective clothing. This includes long-sleeved shirts, pants, hats, and sunglasses.

Another way to shield yourself from the sun’s rays is by applying sunscreen regularly. Choose a broad-spectrum sunscreen with an SPF of at least 30 and reapply it every two hours or after swimming or sweating.

If you plan on spending time outdoors during peak sunlight hours, try to seek shade whenever possible. Bring an umbrella or find shelter under a tree or canopy.

Staying hydrated is also crucial when combating the effects of the sun. Drink plenty of water throughout the day, especially if you’re engaging in physical activities outside.

Be aware of your own limits and listen to your body. If you start feeling dizzy, nauseous or experience any other symptoms related to heat stroke or dehydration then take immediate action such as finding shade and drinking water immediately.

Taking these simple measures can ensure that you are protected against harmful solar radiation while enjoying outdoor activities safely!

Conclusion

The sun’s activity can have a significant impact on our planet, from affecting GPS and communication systems to altering the temperature of our thermosphere. While it may seem daunting, there are steps we can take to protect ourselves from these effects. By staying informed about solar flares and their potential consequences, as well as taking measures such as using sunscreen and protective clothing when spending time outdoors during high levels of sun activity, we can ensure that we stay safe and healthy while still enjoying all that our world has to offer. So let us enjoy the beauty of nature while also being mindful of its power.


We’ve all experienced the frustration of discovering a broken or damaged lipstick. But before you toss it in the trash, hold on! There are simple and effective ways to fix your broken lipstick at home, saving you from the disappointment of losing a beloved shade. We’ve gathered expert advice from makeup artists on how to revive your damaged lipstick and bring it back to its former glory.

1. Assess the Damage: Take a close look at your broken lipstick and determine the extent of the damage. Is it merely a clean break, or has it melted or deformed? Understanding the condition will help you choose the appropriate method for fixing it.

2. Clean and Sanitize: Before you start the repair process, make sure your hands and any tools you’ll be using are clean and sanitized. This will help maintain hygiene and prevent any unwanted contamination.

3. Warm and Reattach: For a clean break, gently warm the broken ends of the lipstick with a hairdryer or a flame (carefully!). Once slightly softened, reattach the broken piece to the base of the lipstick. Hold it in place for a few seconds to ensure a secure bond.

4. Melt and Mold: If your lipstick has melted or deformed, the best approach is to melt it down completely. Use a spoon or a small heat-safe container to melt the lipstick over a low flame or in short bursts in the microwave. Once melted, carefully pour it into a clean empty lipstick container or a small jar. Let it cool and solidify before using.

5. Blend and Smooth: If you have multiple lipsticks with different shades, you can get creative by blending them together to create custom colors. Melt the desired lipsticks and mix them thoroughly to achieve the desired shade. Pour the mixture into a clean container and let it set.

6. Depot and Combine: Another option is to depot the broken lipstick and combine it with similar shades or lip balm to create a tinted lip balm or lip tint. Melt the broken lipstick and mix it with the desired lip balm or lip product. Pour the mixture into a clean container and let it solidify.

7. Clean and Trim: If your lipstick is damaged beyond repair or you prefer a different application method, you can salvage the product by cleaning and transferring it to a small makeup palette or container. Scrape off the remaining lipstick from the tube and transfer it to the desired container. Use a lip brush or your fingertip to apply the product.

Remember, while these methods can effectively fix your broken lipstick, the texture or finish might slightly differ from the original. However, with a little creativity and experimentation, you can enjoy your favorite shades again without having to repurchase them.

So, before you bid farewell to your broken lipstick, give these expert tips a try. You’ll not only save money but also get the satisfaction of reviving a beloved product. Show your damaged lipstick some love, and let it shine on your lips once more!

Summer is here, and it’s time to hit the beach and soak up the sun. But how do you keep your makeup looking fresh and fabulous under the scorching heat? Don’t worry; we’ve got you covered with these nine beach-friendly makeup picks that will withstand the heat and humidity, so you can look like a beach goddess all day long.

1. Lightweight Tinted Moisturizer: Swap your heavy foundation for a lightweight tinted moisturizer with SPF. It provides a natural, dewy finish while protecting your skin from the sun’s harmful rays.

2. Waterproof Mascara: Don’t let sweat or water ruin your mascara. Opt for a waterproof formula that will keep your lashes volumized and defined, even after a dip in the ocean.

3. Long-Wearing Eyeshadow Sticks: Say goodbye to creased eyeshadow and hello to long-lasting color with eyeshadow sticks. These creamy formulas are easy to apply and won’t smudge or fade, even in the heat.

4. Waterproof Eyeliner Pencil: Define your eyes with a waterproof eyeliner pencil. It glides on smoothly and stays put, giving you a smudge-free look throughout your beach adventures.

5. Lip Balm with SPF: Protect your lips from the sun while adding a hint of color with a lip balm that contains SPF. Keep them moisturized and shielded from harmful UV rays.

6. Setting Spray: Lock your makeup in place with a setting spray that is designed to withstand heat and humidity. It will help your makeup stay put, so you can enjoy the beach without worrying about touch-ups.

7. Cream Blush: Achieve a natural, flushed look with a cream blush. It blends seamlessly into the skin and gives you a healthy, sun-kissed glow that lasts all day.

8. Waterproof Brow Gel: Keep your brows perfectly groomed with a waterproof brow gel. It will hold them in place and add definition, even when you’re swimming or sweating.

9. Tinted Lip Balm: Add a touch of color to your lips while keeping them hydrated with a tinted lip balm. It’s a low-maintenance option that provides a fresh and effortless look.

With these nine beach-friendly makeup picks, you can confidently enjoy your time at the beach without worrying about your makeup melting or smudging. Embrace the summer vibes, feel the sand between your toes, and look stunning with a fresh and long-lasting makeup look that will make heads turn.

Some general tips for creating silver makeup looks that add sparkle to any occasion:

1. Start with a primer: Apply a primer to create a smooth canvas for your makeup and help your silver eyeshadow or glitter adhere better.

2. Choose the right silver shade: There are various shades of silver, ranging from cool to warm tones. Consider your skin tone and the occasion to select the most flattering silver shade for your makeup look.

3. Apply silver eyeshadow: Use a silver eyeshadow to create a shimmery base on your eyelids. You can apply it all over the lid or focus on the inner corners for a pop of brightness.

4. Add dimension: To create depth, blend a darker shade into the crease of your eyelids. This will add dimension and make your silver eyeshadow stand out even more.

5. Experiment with different textures: Play with different textures, such as metallic or glittery silver eyeshadows, to achieve the desired level of sparkle.

6. Highlight the inner corners: Apply a lighter silver shade or a silver glitter to the inner corners of your eyes to make them appear brighter and more awake.

7. Line your eyes: Use a silver eyeliner to line your upper lash line or create a winged eyeliner look. This will enhance the silver theme and make your eyes pop.

8. Don’t forget the lashes: Apply mascara or false lashes to complete your silver makeup look. Black mascara or lashes will provide a nice contrast against the silver eyeshadow.

9. Balance the rest of your makeup: Since silver is a bold and attention-grabbing color, keep the rest of your makeup relatively neutral. Opt for a nude or soft pink lip color and a subtle blush.

10. Set your makeup: To ensure your silver makeup lasts all day or night, use a setting spray to lock it in place.

Remember, these are general tips, and you can always adapt them to suit your personal style and preferences.


Introduction:
Makeup brushes are essential tools for achieving a flawless and professional makeup application. However, over time, brushes can accumulate dirt, oils, and bacteria, compromising their performance and potentially causing skin issues. Regularly replacing your makeup brushes is crucial for maintaining optimal results and the health of your skin. In this article, we’ll provide expert advice on when to replace your makeup brushes, ensuring you achieve the best possible makeup application and keep your skin in its best condition.

Signs it’s time to replace your makeup brushes:
1. Shedding bristles: If you notice bristles constantly falling out or shedding during makeup application, it’s a clear indication that your brush needs replacement. Shedding bristles can lead to streaky makeup application and an overall unsatisfactory finish.

2. Loss of shape and structure: Over time, brushes can lose their original shape and become misshapen. This can affect their ability to blend products evenly and precisely. If your brushes no longer hold their intended shape, it’s time to consider replacing them.

3. Damaged or frayed bristles: When bristles become damaged, frayed, or splayed, they lose their effectiveness. Damaged bristles can cause patchy application and difficulty in achieving a smooth, seamless look.

4. Product buildup: Even with regular cleaning, makeup residue and product buildup can accumulate deep within the bristles. If your brushes become stiff or have a stubborn buildup that doesn’t come off even after thorough cleaning, it’s a sign that it’s time to replace them.

Determining the replacement timeline:
The replacement timeline for makeup brushes can vary depending on several factors. While it’s generally recommended to replace brushes every 6 to 12 months, certain considerations may warrant more frequent replacements. For individuals with sensitive or acne-prone skin, it’s advisable to replace brushes every 3 to 6 months to minimize the risk of bacterial buildup and potential skin issues.

Additionally, the frequency of use and the type of products you use with your brushes can impact their lifespan. Brushes used with liquid or cream products tend to accumulate more residue and require more frequent replacement compared to those used with powder formulas.

Tips for prolonging the lifespan of your brushes:
1. Clean your brushes regularly: Regular cleaning is essential for maintaining the cleanliness and performance of your brushes. Clean them at least once a month using a gentle brush cleanser or mild shampoo. Ensure thorough rinsing and proper reshaping of the bristles before allowing them to air dry.

2. Handle your brushes with care: Rough handling and excessive force during makeup application can lead to bristle damage and a shortened lifespan. Use gentle, sweeping motions when applying makeup, and avoid pressing too hard on the skin.

3. Store brushes properly: Proper storage can prevent unnecessary damage to your brushes. Store them upright in a clean, dry, and well-ventilated area to maintain their shape and prevent the growth of bacteria. Avoid storing brushes in a damp environment or exposing them to excessive heat.

4. Invest in quality brushes: High-quality brushes are more durable and tend to last longer compared to low-quality alternatives. Investing in well-made brushes made from quality materials will ensure they withstand regular use and cleaning without deteriorating quickly.

Conclusion:
Knowing when to replace your makeup brushes is crucial for achieving optimal results and maintaining the health of your skin. By keeping an eye out for signs of deterioration, cleaning your brushes regularly, and following proper storage techniques, you can prolong the lifespan of your brushes and ensure they perform at their best. Remember, brushes that are well-maintained and replaced when necessary will help you achieve flawless makeup application and keep your skin looking its best. So, be mindful of the condition of your brushes and give them the attention they deserve to enhance your beauty routine.