Introduction:
Beyond the Stars: Unraveling the Universe through the Milky Way” takes us on a thrilling cosmic expedition, exploring the pivotal role of the Milky Way in our quest to understand the universe. This article delves into the astronomical significance of this grand galaxy, serving as a cosmic window through which we glimpse distant celestial realms. Through centuries of observation and exploration, the Milky Way has become an invaluable tool in unraveling the mysteries of the cosmos.
The Galactic Tapestry
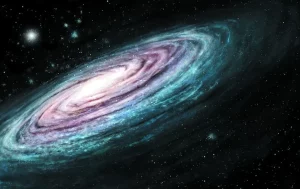
Embark on a cosmic journey through the Milky Way, an awe-inspiring tapestry of stars, gas, and dust.
A Beacon of Light
Discover how the Milky Way serves as a guiding light in the night sky, inspiring generations of stargazers and astronomers.
Revealing the Structure of Our Galaxy
Uncover how astronomers mapped the Milky Way’s structure, revealing its spiral arms and central bulge.
Stars: From Birth to Death
Explore how the Milky Way provides insight into the life cycle of stars, from their formation to their final stages.
Unveiling the Dark Side
Delve into the mysteries of dark matter and dark energy, both elusive components influencing the fate of the universe.
Galactic Encounters
Investigate the collisions and interactions between the Milky Way and other galaxies, shaping the cosmic landscape.
The Milky Way as a Time Machine
Discover how studying distant stars in the Milky Way allows us to peer into the universe’s past.
A Cosmic Census
Learn how the Milky Way’s stellar population provides crucial data for understanding the universe’s composition.
Extraterrestrial Life: The Search Within Our Galaxy
Explore the possibility of finding extraterrestrial life within the Milky Way and nearby star systems.
Conclusion: Our Cosmic Journey Continues
“Beyond the Stars: Unraveling the Universe through the Milky Way” celebrates the boundless spirit of human exploration and our insatiable curiosity about the cosmos. Through the vast expanse of the Milky Way, we gain unparalleled insights into the universe’s past, present, and future. As we continue to gaze beyond the stars, the mysteries of the cosmos remain an enduring enigma, drawing us further into the fascinating realms of the unknown. The Milky Way, as a cosmic window, will forever guide our journey of understanding and appreciation for the magnificent universe that surrounds us.