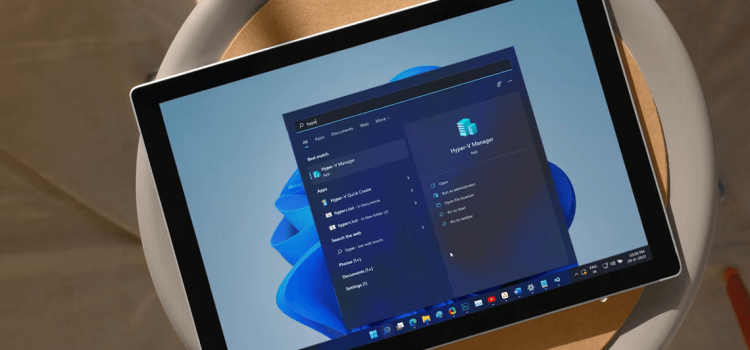
A Guide to Installing Hyper V on Windows 11 Home
Hyper V, a powerful virtualization tool, comes built-in with most Windows 11 editions, but there’s a notable exception – Windows 11 Home. If you’re a Windows 11 Home user, don’t worry; we’ve got you covered. In this guide, we’ll show you how to enable Hyper-V on Windows 11 Home, allowing you to harness the potential of virtualization and create virtual machines with ease.
Hardware Virtualization: The First Step
Before we dive into enabling Hyper-V, it’s crucial to ensure that your hardware supports virtualization. Hyper-V relies on Hardware Virtualization, which must be enabled in your computer’s BIOS. Here’s how to do it:
1. Power Down and Access BIOS
- Shut down your PC if it is powered on.
- Turn on your computer and start pressing the BIOS access key (F10, F2, F12, F1, or DEL) to enter BIOS.
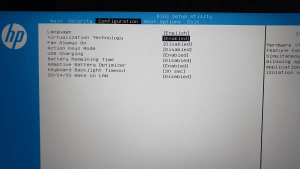
2. Enable Virtualization
- In the BIOS Setup utility, navigate to the Configuration tab.
- Locate “Virtualization Technology” using the arrow keys.
- Hit Enter and select “Enabled,” then press Enter again to confirm.
- Save changes by pressing F10 and exit BIOS.
Your PC will now restart with Hardware Virtualization enabled, setting the stage for the installation of Hyper-V on Windows 11 Home.
Installing Hyper-V: The Batch Script Hack
With Hardware Virtualization enabled, you’re ready to proceed with the installation of Hyper-V on Windows 11 Home. However, before you start, it’s advisable to create a restore point to safeguard your system. Here’s how to enable Hyper-V:
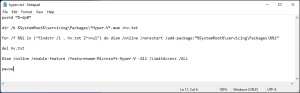
1. Create a Batch Script
- Open a new Notepad file by pressing Win + R, typing “notepad,” and clicking OK.
- Copy and paste the provided batch script into the Notepad file.
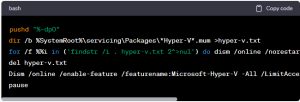
Image by https://pressmaverick.com// - Save the file as “hyperv.bat” (the “.bat” extension is crucial).
In the file name field, type hyperv.bat. The .bat extension at the end of the file name is important to execute the script.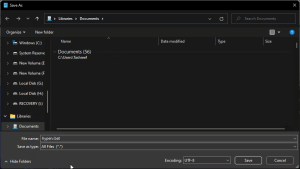
Image by https://www.makeuseof.com/ 5. Next, click the drop-down for Save as type and select All Files.
6. Click the Save button to save the file.
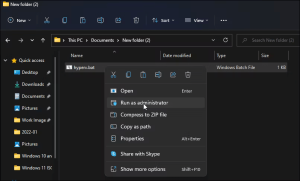
Image by https://www.makeuseof.com/ 7. Next, right-click on the hyperv.bat file and select Run as administrator. Click Yes if prompted by User Account Control.
8. The scrip will start executing in the Command Prompt to install Hyper-V. It may take a while, so wait till the process is complete.
9.Once completed, you will see the Operation completed successfully message.
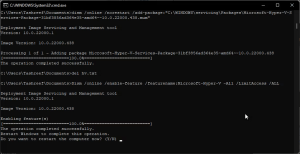
Image by https://www.makeuseof.com/ 10. Type Y to confirm and restart your PC. If not, enter N to exit the Command Prompt.
After the restart, Hyper-V will be successfully installed on your Windows 11 Home system. You can now create and manage virtual machines with ease.
Here’s how you can quickly add Hyper-V to Windows 11 using Command Prompt:
- Press the Win key and type cmd. Then right-click on Command Prompt and select Run as administrator.

Image by https://www.makeuseof.com/ - In the Command Prompt window, type the following command and press Enter:
<code>DISM /Online /Enable-Feature /All /FeatureName:Microsoft-Hyper-V - The above command uses the Deployment Imaging Service and Management (DISM) tool to enable Microsoft Hyper-V and the necessary dependencies on your Windows computer. The operation completed successfully message means you have successfully enabled Hyper-V.
Alternative Method: Enabling Hyper-V Using Command Prompt
If the batch script method isn’t your preference, you can enable Hyper-V through Command Prompt:
- Press the Win key, type “cmd,” right-click on Command Prompt, and select “Run as administrator.”
- In the Command Prompt, type the following command and press Enter:
This command utilizes the Deployment Imaging Service and Management (DISM) tool to enable Hyper-V. If you see the “Operation completed successfully” message, you’ve successfully enabled Hyper-V.
How to Disable Hyper-V on Windows 11 Home
Should you ever need to disable Hyper-V on your Windows 11 Home system, here’s how you can do it:
- Press Win + R to open the Run dialog.
- Type “optionalfeatures.exe” and click OK.
- In the Windows Features dialog, locate “Hyper-V.”
- Uncheck the “Hyper-V” option and click OK. Wait for the uninstallation process to finish.
- Click “Restart Now” to apply the changes.
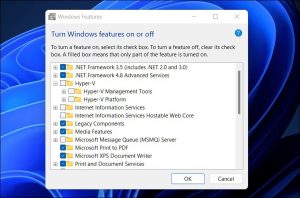
Image by https://www.makeuseof.com/
Exploring Alternatives: Windows Sandbox
While Hyper-V isn’t available on Windows 11 Home by default, you can explore another virtualization solution, Windows Sandbox, which offers lightweight isolation for running applications. However, this feature is exclusive to the Pro and Enterprise editions of Windows 11.
If you’re on Windows 11 Home and need a virtualization solution, consider exploring third-party alternatives for running and testing applications in isolation.
In conclusion, while Microsoft officially restricts Hyper-V to certain Windows 11 editions, a few tweaks and the right batch script can empower Windows 11 Home users to enjoy the benefits of virtualization. With Hyper-V installed, you can create and manage virtual machines seamlessly, enhancing your computing experience.
Remember to use these methods responsibly and always back up your data before making significant system changes. Enjoy your enhanced Windows 11 Home experience with Hyper-V!
Knowledge Source:
Tashreef Shareef, a tech enthusiast with years of experience in Windows and virtualization technologies.